Environments
An environment defines the runtime context for your application. It encapsulates the app's configuration, including secrets for dataset connections, catalog-level schemas and tables, and the specific immutable code version running there.
In Tower, you will always have at least one environment called default. As your data platform scales, you can introduce additional isolated environments as needed, such as staging, integration-testing, or production.
The default environment
The default environment serves as the base configuration layer.
-
Inheritance: Secrets and catalogs defined in
defaultare automatically inherited by all other environments. -
Overrides: To customize a configuration for a specific environment, simply create a secret or catalog in that environment with the same name to override the inherited default.
Deleting an environment
Deleting an environment removes the resources defined specifically for that environment:
- workflow schedules defined in the environment
- secrets defined in the environment
- catalog definitions created in the environment
- each application's deployment assignment to a version in the environment
- the environment itself
Secrets and catalogs inherited from default are not deleted.
Before Tower deletes a Tower-managed catalog, the catalog must be empty, with no namespaces remaining. If any managed catalog is not empty, environment deletion is rejected so you can remove its contents and retry. On a successful deletion, Tower removes that catalog and its catalog-specific Polaris service principals, catalog roles, and principal roles. The account-shared AWS IAM role remains available to other catalogs and environments.
Versions, environments, and promotion
Every environment manages its own deployed application version. When an app is executed (via tower run, a workflow schedule, or the API), Tower looks up the version mapped to the target environment and executes that exact code.
Environments remain locked to their respective versions independently until you explicitly change them. This isolation provides the foundation for a secure promotion workflow:
[ Local Dev ] ──( tower deploy )──> [ default environment ]
                                              │
                                      ( Verify changes )
                                              │
                                      ( UI/API Promotion )
                                              ▼
                                    [ production environment ]
This is the foundation for promoting code from one environment to another: you deploy to default (or any environment you use for development), verify it, and then promote the same version to production when you're ready.
Deploying a new version
Every execution of tower deploy packages your code into a new, immutable version (v1, v2, v3). You control where this version lands using CLI flags:
| Command | Target Environment | Behavior |
|---|---|---|
tower deploy | default only | Builds a new version and pins it strictly to default. Other environments are untouched. |
tower deploy --environment=your_env | your_env only | Builds a new version and pins it strictly to the specified environment. |
tower deploy --all | All environments | Builds a new version and pins it everywhere simultaneously. Ideal for initial setups or critical hotfixes. |
Example Workflow
A typical workflow looks like this:
# Iterate on default until you're happy with the code.
tower deploy

# Promote that working version to production by re-deploying with --environment.
# This creates a new version and pins it to production only.
tower deploy --environment=production
A bare tower deploy only alters the default environment. If production is running v3 and you run tower deploy, production remains safely on v3 until explicitly updated.
Promoting an existing version
To promote an existing version (e.g., moving v5 from default to production) without rebuilding the package, use the App Changelog in the Tower UI:
- Locate the desired version in the changelog.
- Click the Promote action.
- Select your target environment.
This maps the existing version to the new environment without generating a new version number. You can also automate this workflow programmatically using the Update App Environment API.
Rolling back
Because every version is preserved and addressable, rolling back is the same operation as promoting: You just pick an older version. From the App Changelog for the app in the Tower UI:
- Find the version you want to rollback to
- Click the Deploy dropdown
- Select the environment you want that version to be deployed to
The environment is redeployed to that earlier version on the next scheduled or on-demand run.
Runtime Version Resolution
When a run is triggered, Tower resolves the execution target using a deterministic three-step process:
- Identify the Target: Look up the environment specified for the run (fallback is
default). - Resolve the Pin: Read the application version currently deployed to that specific environment.
- Execute: Run that exact immutable version.
Because this resolution happens at the precise moment the run initializes, workflows are completely deterministic. Any deployments executed mid-run will not impact the active execution.
Secrets
Database passwords, S3 bucket locations, and encryption keys are all examples of secrets that you might want to inject into your apps running either locally or in the Tower cloud at runtime.
Tower provides a secure secrets management system that ensures that your secrets are not only available where you need them, but they're available in a secure way, too. You can learn more about our standard security practices in the architecture section.
Secrets can be thought of as name-value pairs.
Secrets in the default environment
When you create a secret with the tower secrets create command and don't specify an environment, the secret will be created in the default environment. The secret and its value will be available in all your environments, unless you override it.
tower secrets create --name=snowflake_url \
    --value=https://abc123.snowflake.com
✔ Creating secret... Done!
Success! Secret "snowflake_url" was created
Use the tower secrets list command to determine which secrets you have configured. If you don't specify the environment, it will show you only the secrets in the default environment.
tower secrets list
 Secret         Environment  Preview
----------------------------------------
 s3_bucket      default      XXXXXXcket
 snowflake_url  default      XXXXXX.com
Secrets in other environments
Sometimes you will want to use different secret values for different environments that you run you apps in. For example, imagine you have an app that reads data from S3 and writes it to a Snowflake database. It's likely that you use a different Snowflake database in development, staging, and production environments. Therefore, you would want to have the same secret name (e.g. snowflake_url) in all your environments, but use different secret values depending on the environment.
To create a secret in an environment different from default, use the --environment parameter.
tower secrets create --name=snowflake_url \
    --value=https://abc123-prod.snowflake.com \
    --environment=production
✔ Creating secret... Done!
Success! Secret "snowflake_url" was created
When you run both of these commands, you will have a secret with key snowflake_url in both the default and the production environments, but with different values.
Use the --environment parameter with the tower secrets list command to show what secrets will be used in a given environment.
tower secrets list --environment=production
 Secret         Environment  Preview
----------------------------------------
 s3_bucket      default      XXXXXXcket
 snowflake_url  production   XXXXXX.com
Use the -a parameter to list all secrets in all environments.
tower secrets list -a
 Secret         Environment  Preview
----------------------------------------
 s3_bucket      default      XXXXXXcket
 snowflake_url  default      XXXXXX.com
 snowflake_url  production   XXXXXX.com
Managing secrets in the Tower UI
You can use the Tower UI to create, list and delete secrets.
Navigate to (> Secrets ) and click on "Create New Secret". You can add a secret to the default environment or select "+New Environment" in the drop-down and type in e.g. production.
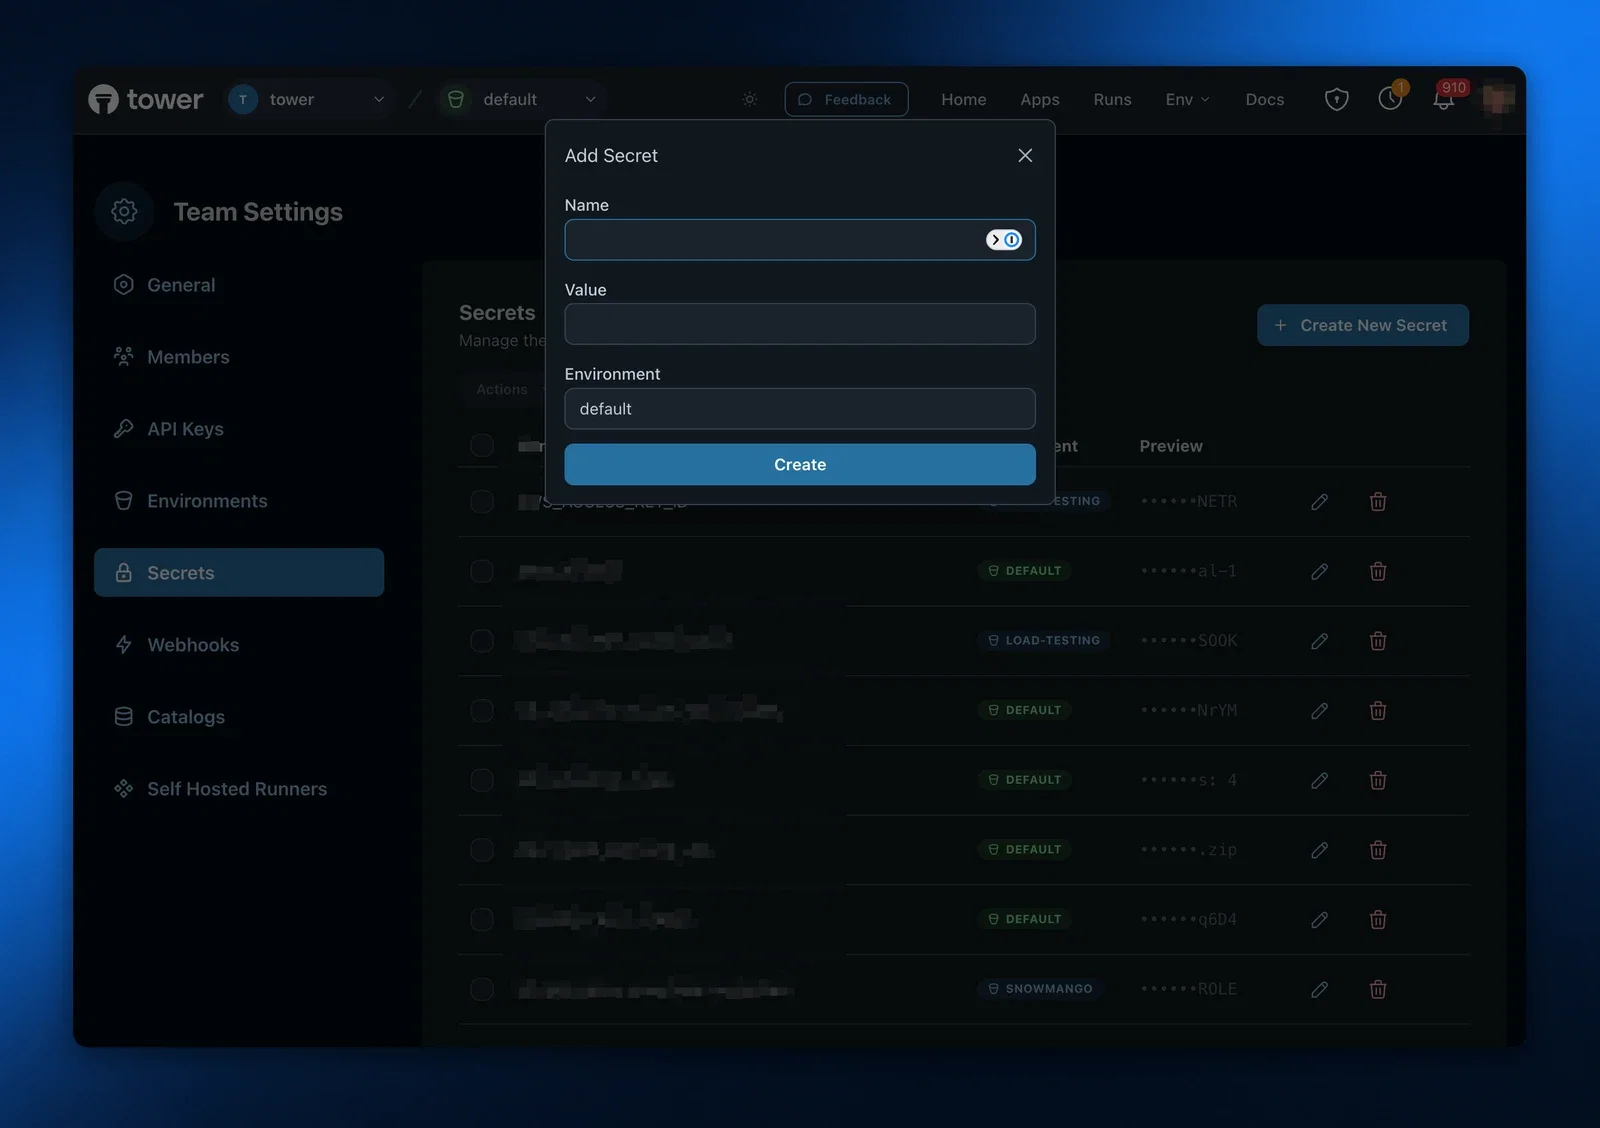
You can later delete secrets from the secrets list.
Catalogs
Apache Iceberg catalogs simplify the use of Iceberg tables inside Tower apps.
Catalogs are defined per each Tower environment. As with secrets, catalogs defined in the default environment are inherited by all other environments.
Creating catalogs
To create a catalog, use the Tower UI.
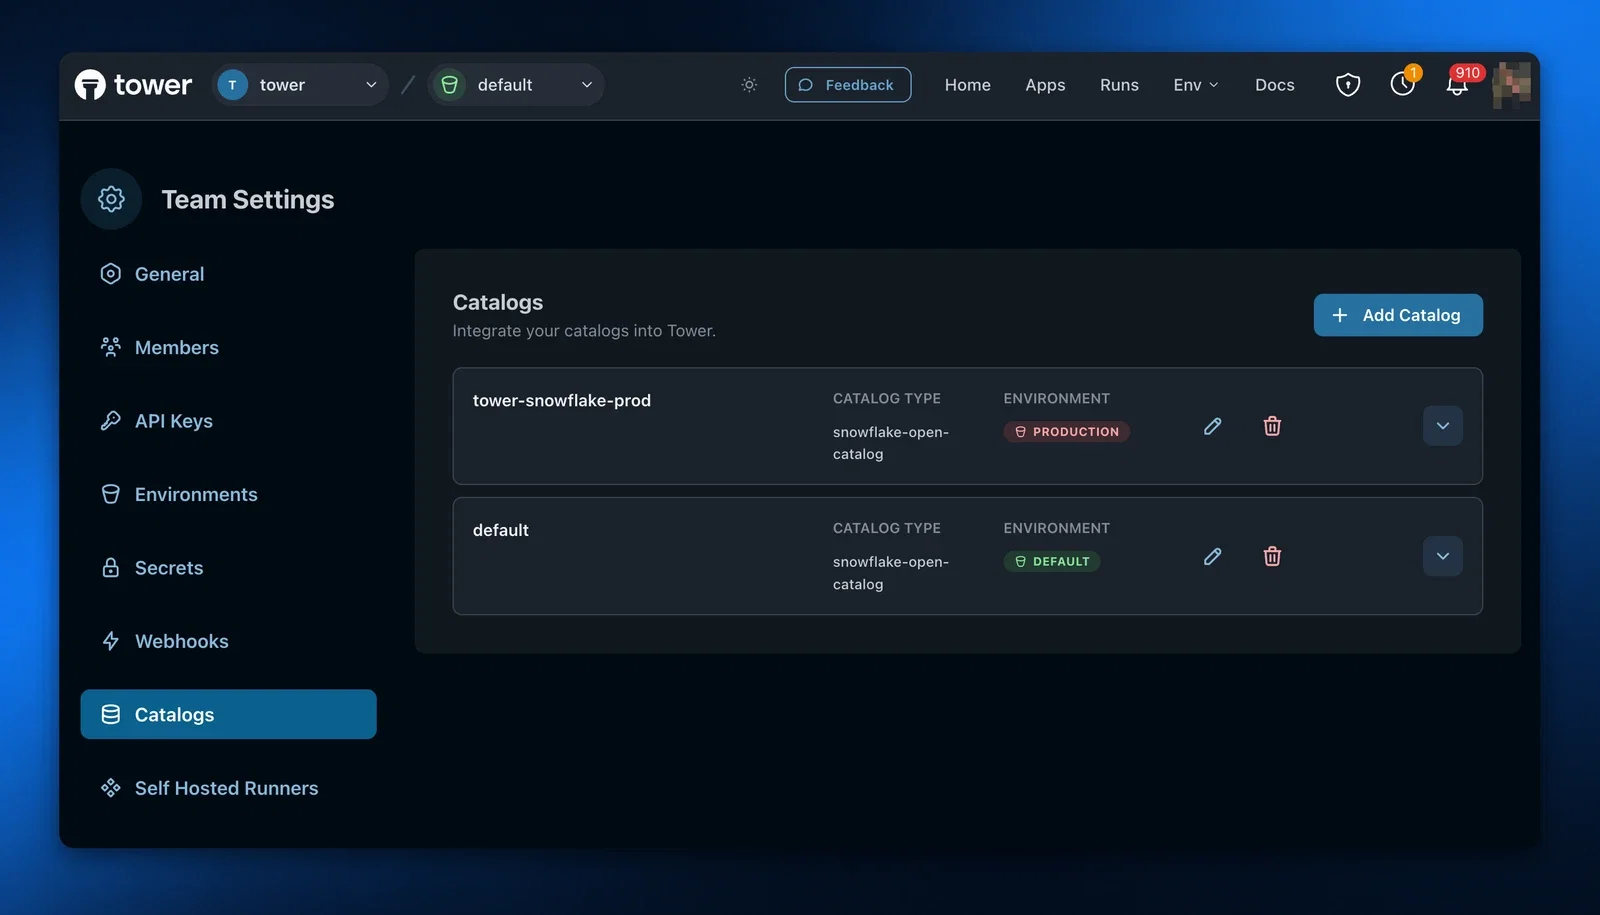
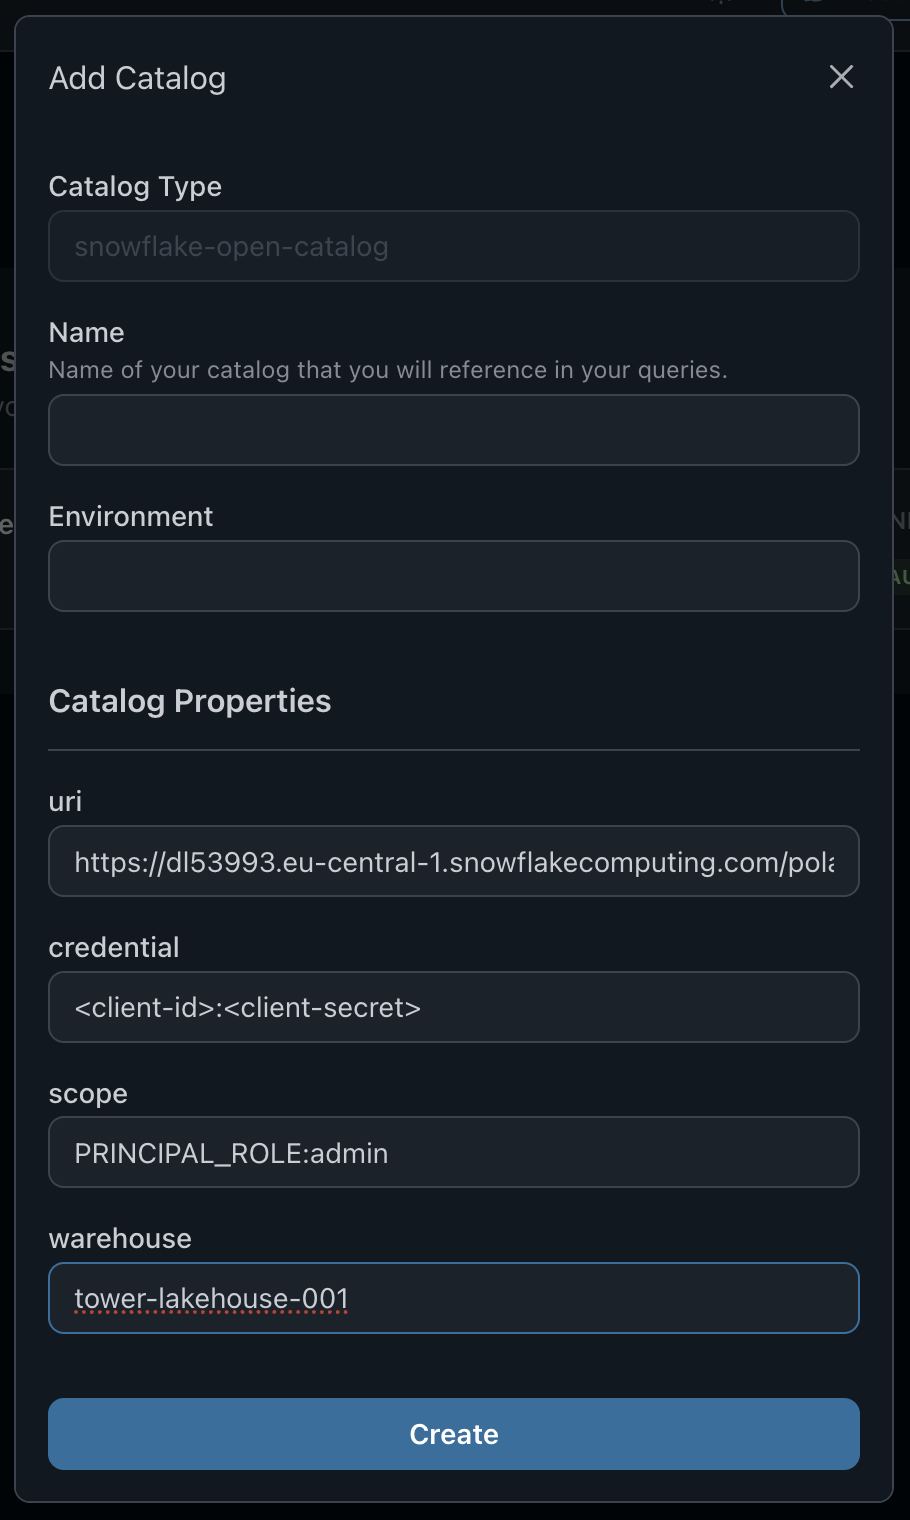
When creating a catalog in Tower, specify its slug, and the 4 properties that Tower (and the pyiceberg library that Tower uses internally) need to know to connect to the catalog service: URI, Credential, Scope, and Warehouse. You can get these values during the set-up of the catalog service.
Set the catalog slug to the catalog identifier that you are planning to use inside your Tower app, e.g. 'mycatalog'. Pyiceberg calls this identifier the catalog name.
If you set the slug to the string default, you won't need to explicitely specify the catalog identifier in your code.
Using catalogs
To work with Iceberg tables inside your Tower apps you should use the Tower tables SDK. Tower tables use the pyiceberg library internally. You can use pyiceberg to access Iceberg tables directly, but the tables SDK will typically be simpler to use, as it automatically loads all catalogs defined in the environment the app is running in.
import pyarrow as pa
import tower
SCHEMA = pa.schema([...])
mytable = tower.tables('mytable', catalog='mycatalog').create_if_not_exists(SCHEMA)
In the above example, when checking for the existance of the table, Tower will look in its metadata for the catalog that has the slug 'mycatalog'.
When you set the slug of your catalog to 'default', the catalog identifier can be dropped and the above example can be simplified to:
import pyarrow as pa
import tower
SCHEMA = pa.schema([...])
mytable = tower.tables('mytable').create_if_not_exists(SCHEMA)
When using pyiceberg to access Iceberg tables, do something like this.
import pyarrow as pa
from pyiceberg.catalog import load_catalog
SCHEMA = pa.schema([...])
mycatalog = load_catalog('mycatalog')
mytable = mycatalog.create_table_if_not_exists('mytable', SCHEMA)
Supported catalog types
Tower supports the following Iceberg catalog types:
-
Apache Polaris — requires URI, Credential, Scope, and Warehouse
-
Snowflake Open Catalog — requires URI, Credential, Scope, and Warehouse
Snowflake Open Catalog Example Config
-
Lakekeeper — requires URI, Credential, Scope, and Warehouse
-
Cloudflare R2 Catalog — requires URI, Warehouse, and Token
-
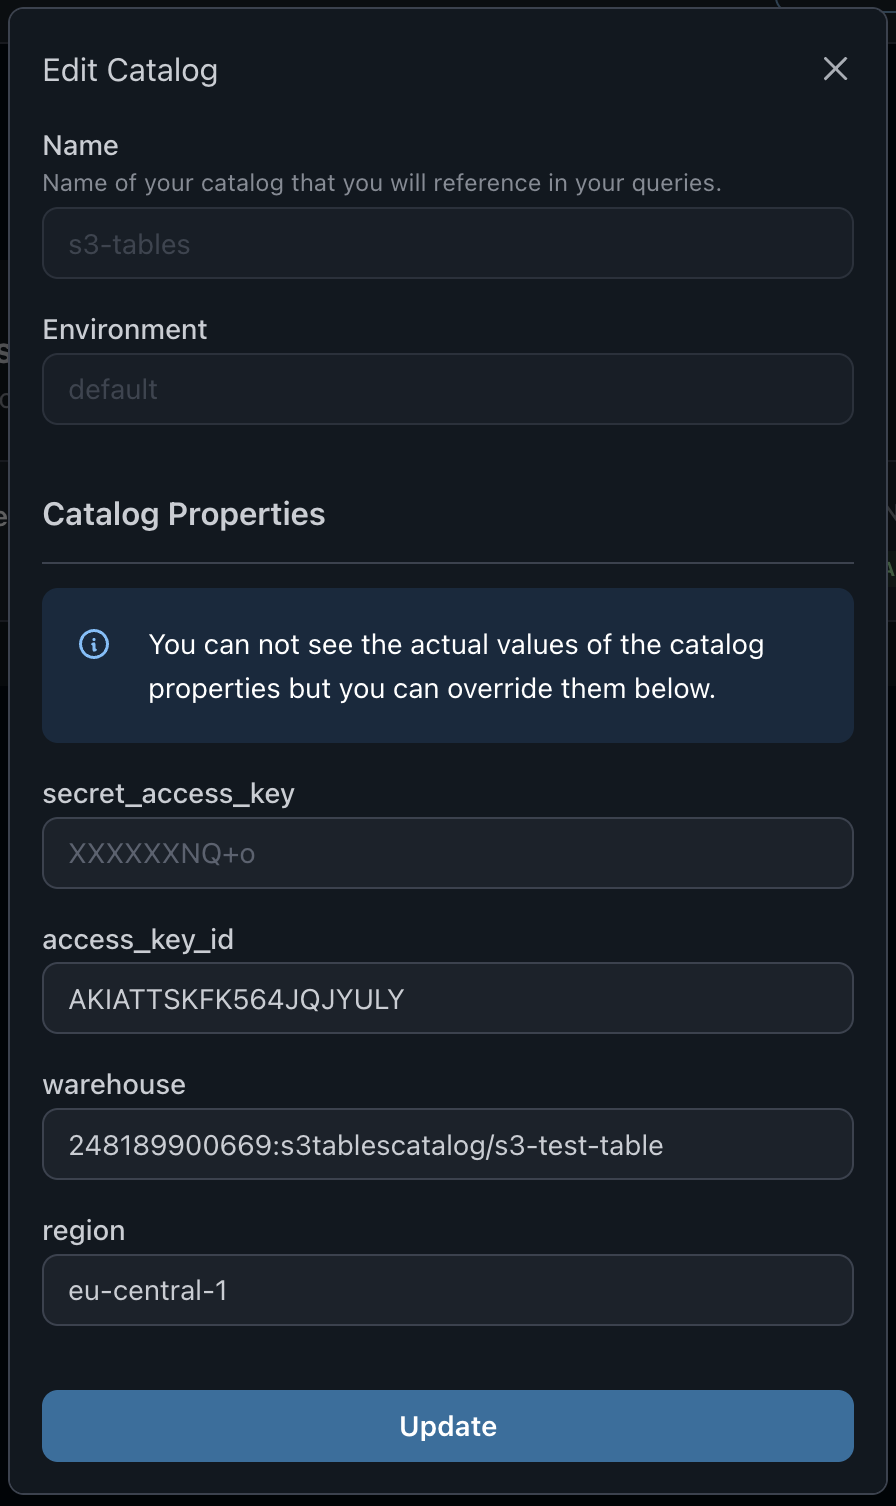
S3 Tables — requires Access Key ID, Secret Access Key, Warehouse, and Region. Tower automatically configures the REST catalog endpoint, SigV4 signing, and AWS Glue integration based on the provided region.
S3 Tables Example Config
Advanced use cases
Programmatically determining the environment
Sometimes users need to programmatically determine which environment the app is running in, e.g. to use different data source types (DuckDB vs Snowflake) depending on the environment. Tower provides the tower.info.environment() SDK function and the TOWER_ENVIRONMENT environment variable for this purpose. Review this section for details.