# Tower Documentation
> Documentation for how Tower works
This file contains all documentation content in a single document following the llmstxt.org standard.
## Data Plane
Tower's uses a modern distributed system architectural pattern that separates the control plane from the data plane. This design gives your data apps improved scalability, enhanced security, and greater flexibility while ensuring they remain resilient in a serverless environment.
The data plane is responsible for processing customer data, while the control plane manages metadata about applications that allows Tower to provide its services.
## Overview
### Control Plane
The control plane is the centralized management layer of Tower that:
- Handles user authentication and authorization
- Manages encrypted application packages and secrets
- Orchestrates workload scheduling
- Provides the user interface, API endpoints and CLI interactions
- Monitors overall system health and metrics
- Stores encrypted packages and environment data (e.g. secrets, catalogs, etc.)
The control plane **does not process customer data** in any way.
### Data Plane (Tower Runner)
The data plane is powered by the Tower Runner - a specialized program that:
- Securely communicates with the control plane to receive jobs
- Downloads and decrypts application packages
- Executes Python code in a sandboxed environment
- Handles data processing and workload execution
- Cleans up after application execution
- Maintains security boundaries for workload isolation
## Deployment Options
Tower offers two primary deployment options for the data plane:
### 1. Data Plane in Tower Cloud
- Fully managed by Tower
- Automatic scaling and maintenance
- Zero infrastructure management required
- Built-in high availability
- Pre-configured sandboxed Python environment
- Ideal for teams that want a hands-off approach
### 2. Self-Hosted Data Plane
- Deploy in your own cloud or on-premises infrastructure
- Complete control over the runtime environment
- Enhanced data privacy and security
- Ability to access private networks and resources
- Custom resource allocation
- Same secure packaging and execution model as cloud runners
- Windows service support and Linux systemd service for unattended operation
## Setting Up the Data Plane
### Option 1: Using Tower Cloud Data Plane
The Tower Cloud Data Plane is the default option for Tower. Unless you configure a Self-Hosted runner, Tower will dispatch all of your runs automatically to the Tower Cloud data plane and automatically scale up and down on demand.
### Option 2: Using a Self-Hosted Data Plane
:::note
If you want to use Tower's Self-Hosted runners, you need to be on a plan that supports this feature! Upgrade your plan or [contact Tower support](mailto:hello@tower.dev) for more information.
:::
#### Prerequisites
To operate a Self-Hosted Data Plane, you need to install Self-Hosted Tower runners on one or multiple devices.
Before installing a Tower Runner on a device, ensure that you have:
- A Tower account and API key
- System requirements:
- x86_64 or ARM architecture
- Internet connectivity to `*.tower.dev`
- Root or sudo access for system package installation
Self-Hosted Data Plane mode ensures that all runs for your account execute exclusively on your own Self-Hosted runners.
It can be enabled in the UI by navigating to Settings → Self-Hosted Runners.
#### Behavior
Tower's control plane will only dispatch runs to Self-Hosted runners that belong to your account. If no such runners are connected,
runs will remain queued until a runner comes online (they will not fall back to Tower Cloud).
Use cases:
- Data privacy and sovereignty requirements
- Access to private/on-prem resources
- Custom hardware (e.g., high-memory, GPU)
#### Install and configure Self-Hosted runners
For installation and configuration steps for Linux, macOS, and Windows, as well as where to download the runner, see our guide on how to [install and run Self-Hosted runners](/docs/using-tower/self-hosted-runner-installation.md).
##### Environment Variables
The Tower Runner supports configuration through environment variables:
- `TOWER_ENVIRONMENT`: Specifies the environment for the runner (e.g., `production`, `staging`, `development`). Then runs created in that environment will only run on a runner with a matching environment.
## Security and Configuration
### Encryption
Tower implements multiple layers of encryption to ensure the security of your applications and data:
- **Application Package Encryption**: Before storage, all application packages are encrypted using AES-256-GCM encryption with unique keys per account. This ensures that your source code and application assets remain confidential, even when stored in Tower's infrastructure managed by Tower.
- **Secret Management**: All secrets are protected using envelope encryption:
- Each secret is encrypted with a unique data encryption key (DEK)
- The DEK is then encrypted with your account's key encryption key (KEK)
- Secrets are only decrypted within the runner environment at runtime
- See our [Security documentation](/docs/architecture/security.md) for more details on envelope encryption
- **Runtime Security**:
- Decryption of packages and secrets occurs only within the secure runner environment
- Encryption keys are never stored on disk and are kept in memory only for the duration of the run
- After each run, all decrypted data is securely wiped from the runner environment
### Network Security
Tower implements strict network security measures to protect all communications:
- **Control Plane Communication**:
- All runner-to-control-plane communication uses TLS 1.3
- Mutual TLS (mTLS) authentication ensures only authorized runners can connect
- All API endpoints require authentication using runner-specific credentials
- **Network Requirements**:
- Outbound connections to `*.tower.dev` on ports 443 (HTTPS) via TCP for gRPC communication
- No inbound connections are required
- Proxy support available for enterprise environments
- Optional VPC/VNET peering for cloud deployments
- **Network Isolation**:
- Each runner operates in its own network namespace
- Network access can be restricted using standard firewall rules
- Support for custom DNS configuration
### Runner Security
The Tower Runner implements multiple security measures to ensure safe execution of code:
- **Sandboxed Environment**:
- Resource limits enforced for CPU, memory, and disk usage
- File system access is restricted to the application's working directory
- **Runtime Isolation**:
- Separate user contexts for each application
- Private Python virtual environments per run
- No shared state between different applications
- Network isolation between concurrent runs
- **Cleanup Procedures**:
- Automatic removal of all application data after execution
- Secure wiping of sensitive data from memory and disk
- Regular rotation of runner credentials
- Automatic termination of long-running processes
- **Package Integrity**:
- Cryptographic verification of downloaded packages
- Package signature validation before execution
- Version pinning for reproducible runs
- Automatic security scanning of dependencies
## Monitoring and Management
_Coming soon_
## Best Practices
_Coming soon_
## Troubleshooting
### Getting Help
- Contact Tower support for assistance
- Check the documentation for updates
## Conclusion
The separation of control and data planes in Tower provides a flexible, secure, and scalable architecture for your workflow needs. With end-to-end encryption, secure runners, and flexible deployment options, Tower ensures your applications run reliably while maintaining the highest security standards.
---
## How Tower works
This is a high-level, technical description of how Tower works. It brings
together lots of concepts that are important for writing and maintainting Tower
apps, as well as helps you understand how Tower behaves in production.
## Defining an app
An app is composed of your Python code, a `requirements.txt` file that
describes the dependencies you use in your Python code, any data you might want
to package with it, and a `Towerfile` that tells Tower how to use all of it.
Tower can run _any_ Python. There's no integration: Just hand us Python, and
we'll run it.
### Knowing what to run
Tower uses the Towerfile in your app's root directory to figure out how and
what, exactly, to run for your app. The Towerfile contains all the information
about what source code to run, what dependencies to download, and what file is
your entrypoint.
See the [Towerfile reference](/docs/reference/towerfile) for more information.
#### Example Towerfile
```toml
[app]
name = "my-app"
script = "./pipeline.py"
source = [
"./**/*.py",
"./*.py",
"./requirements.txt"
]
```
Using your Towerfile, Tower creates a package that it encrypts and saves for
execution later.
## Deploying apps
Applications are deployed to Tower using the CLI. When you run `tower
deploy`, Tower uses your Towerfile to build a package that's shipped to Tower
and encrypted for storage.
:::info
Because your Tower packages are encrypted, Tower doesn't know what's inside the
package. Tower **can not** read or get access to your code.
:::
## Configuring apps
There are a number of features available in Tower to parameterize or configure
apps at runtime, not to mention the fact that you can ship configuration data
with the app in your Towerfile as described above!
### Secrets
The primary way to share things like database credentials, cloud provider keys, or any other configuration with a Tower app is with secrets. Secrets are keys and values, available via the `tower secrets` commands in the CLI, that are shared with the app as environment variables at runtime.
:::info
Secrets in Tower are encrypted end-to-end using AES-256 with unique encryption
keys for each account. The only environment in which they're decrypted is at
runtime in the Tower runner. Tower **can not** see or read your secret data.
:::
## The Tower runtime environment
Tower uses a runner model to run your app. The runner knows how to talk to
Tower to get the latest version of the code and any configuration, it knows how
to decrypt your data, and it uses a special sandboxed version of Python to
securely run the application.
### The Tower runner
The backbone of the Tower runtime environment is the Tower runner. The runner
is a small program that comes online and talks to Tower, looking for app jobs
to run. When there's an app to run, it downloads the latest version of the app,
executes it, and cleans up after the app when it's done.
---
## Networking
The documentation on the Tower [data plane](/docs/architecture/data-plane) describes how Tower separates its control plane from its data plane architecturally. You can use the Tower-hosted data plane or run your own data plane using `tower-runner`.
This document describes the network configuration for Tower's hosted data plane.
## Deployment regions
Tower uses Amazon Web Services as its cloud hosting provider. The control plane runs in `eu-central-1` (Frankfurt). The data plane is available in multiple regions:
| Region | Location | Status |
|--------|----------|--------|
| `eu-central-1` | Frankfurt, Germany | Available |
| `us-east-1` | N. Virginia, USA | Available |
| `us-west-2` | Oregon, USA | Available |
| `eu-west-1` | Ireland | Available |
You can select the execution region for your team under **Settings > General > Execution Region**. This determines which data plane your runs are dispatched to.
## Virtual private cloud
Tower's control plane and the hosted data planes run in separate virtual private clouds. Each data plane VPC has a network configuration that prevents ingress from external services. Users cannot write applications that talk directly to Tower-hosted compute hardware.
# IP addresses
In your network policies, to use the Tower-hosted data plane, allowlist the following IP addresses to allow Tower-hosted traffic.
## AWS eu-central-1
* `3.124.118.210`
* `63.177.162.15`
## AWS us-east-1
* `54.145.91.19`
* `32.195.40.107`
## AWS us-west-2
* `54.214.239.87`
* `54.148.103.191`
## AWS eu-west-1
* `54.77.125.86`
* `18.200.12.243`
---
## Security
This document covers the most important security topics to understand when using Tower.
## Data at Rest: Envelope Encryption
Tower uses envelope encryption for securing all data at rest. This means your data is encrypted using industry-standard AES-256 encryption, and the encryption keys themselves are also encrypted and managed by a secure key management system.
The following assets are encrypted using our envelope encryption practice:
- Apps (packages)
- Secrets
- Catalogs
### What is Envelope Encryption?
Envelope encryption is a method of securing data by encrypting it twice, using a combination of data encryption keys (DEKs) and key encryption keys (KEKs). First, the data is encrypted using a DEK, which is unique to each dataset. Then, the DEK itself is encrypted with a KEK, typically managed by a secure key management system (KMS). This approach enhances security by limiting access to the DEK and simplifying key management, as only the smaller KEKs need to be securely stored and rotated.
### Key Management
Tower uses AWS KMS for key management which prevents Tower employees from getting access to the private keys. This means that Tower employees can never decrypt your sensitive data.
## Data in Transit: Hybrid Encryption
Tower uses a hybrid encryption approach that combines RSA and AES-GCM for secure data transmission. This provides both the security of asymmetric encryption and the performance benefits of symmetric encryption.
### How Hybrid Encryption Works
Our hybrid encryption process works in two stages:
1. **Symmetric Encryption (AES-256-GCM)**:
- A random 32-byte AES key is generated for each message
- A random 12-byte initialization vector (IV) is generated
- The message is encrypted using AES-256-GCM with the generated key and IV
- This provides efficient encryption of the actual data
2. **Asymmetric Encryption (RSA-2048)**:
- The AES key is encrypted using an RSA public key provided by the user with OAEP padding
- SHA-256 is used as the hash function for OAEP
- This ensures secure key exchange
The final encrypted message consists of:
- RSA-encrypted AES key
- 12-byte IV
- AES-GCM encrypted message
All components are base64 encoded for transmission
## Public Key Cryptography
Tower uses RSA with OAEP padding for secure key exchange. This ensures that sensitive data can be securely transmitted between clients and the Tower service.
The following assets require encryption using our public key:
- Secrets
- Catalogs
### How Secret Encryption Works
1. When submitting a secret to Tower:
- Clients fetch a published RSA public key from the Tower API
- The secret is encrypted using our hybrid encryption approach
- The result is sent to the Tower service
2. When Tower receives an encrypted secret:
- The data is base64 decoded
- The RSA-encrypted AES key is decrypted using Tower's private key
- The AES key is used to decrypt the actual secret
- The secret is then re-encrypted using envelope encryption for storage
### How Catalog Encryption Works
1. When submitting a catalog to Tower:
- Clients fetch a published RSA public key from the Tower API
- Each catalog properties is encrypted using our hybrid encryption approach
- The result is sent to the Tower service
2. When Tower receives an encrypted secret:
- The data is base64 decoded
- For each catalog property, the RSA-encrypted AES key is decrypted using Tower's private key and the AES key is used to decrypt the each secret
- Each catalog property is then re-encrypted using envelope encryption for storage
## Transport Layer Security
Tower services use transport layer security (TLS 1.3) for all communications. This provides an additional layer of security for data in transit.
### What is Transport Layer Security?
TLS is a cryptographic protocol that ensures secure communication over a network. It provides:
- Encryption of data in transit
- Authentication of communicating parties
- Integrity verification of transmitted data
TLS 1.3 is the latest version of the protocol and provides enhanced security features compared to previous versions.
---
## Apps
Apps are packages of Python code, shell scripts, requirements.txt and other config files that you deploy to and manage with Tower. You describe how to package and invoke your app to Tower using a [Towerfile](/docs/reference/towerfile.md).
Apps can implement ETL or ELT pipelines, batch inference jobs, web scraping tasks and other common data application types. Tower executes your apps in the Tower cloud and can also run these apps locally on your development machine.
## Example app
A very simple app could be structured as follows.
```bash
my-app
├── Towerfile
└── task.py
```
The code that the app will actually execute is in the `task.py` file.
```bash
cat task.py
```
```bash
import os
import time
count = 0
while count < 5:
count += 1
print("Hello, world!")
time.sleep(1)
```
The Towerfile describes how to package and invoke this app. You can learn a bit more about what goes into a Towerfile in the [Towerfile reference](/docs/reference/towerfile).
```bash
cat Towerfile
```
```bash
[app]
name = "hello-world"
script = "./task.py"
source = [
"./task.py",
]
```
## Versions
When you deploy an app to the Tower cloud, it generates a new **immutable version** (e.g., `v1`, `v2`, `v3`). Because every version is permanently preserved and addressable, making rollbacks and promotions safe.
### Environment Binding
A version is created by being deployed to an environment. Each environment runs exactly one version at any given time, and different environments can run different versions of the same app simultaneously — for example, `default` is running `v10` while `production` remains on `v8`.
### Deploying via the CLI
Use the `tower deploy` command to spin up a new version. Its destination depends on the flags you include:
#### 1. Deploy to Default
Creates a new version and targets the `default` environment only.
```bash
tower deploy
```
The resulting output of a successful deploy to your default environment looks like this:
```bash
✔ Building package... Done!
Deploying to Tower... [00:00:00] [████████████████████████████████████████] 611 B/611 B (0s)
Success! Version `v10` has been deployed to Tower!
```
#### 2. Deploy to a Specific Environment
Creates a new version and targets only the specified environment.
```bash
tower deploy --environment=production
```
#### 3. Deploy Everywhere
Creates a new version and immediately deploys it to every environment configured for the app.
```bash
tower deploy --all
```
:::info
**Next Steps:** For a deep dive into full deployment, promotion, and rollback workflows, check out the [Versions, environments, and promotion](/docs/concepts/environments#versions-environments-and-promotion) guide.
:::
## Parameters
To parameterize the way that applications behave at runtime, you can configure parameters in your Towerfile. When you run the app, you can pass in `--parameter` flags to set parameter values. When you're defining the parameter in the Towerfile, you specify a default value so you can always assume that a value will be present.
Parameters are passed in to your application's runtime environment as environment variables. You can access them using the Tower SDK — for example, if your parameter name is `my_parameter`, access it with `tower.parameter('my_parameter')`.
:::warning
**Note:** In the future, parameters will be scoped under `TOWER__PARAMETER__*` in the environment. For example, a parameter named `MY_PARAMETER` will be stored as `TOWER__PARAMETER__MY_PARAMETER`. Using `tower.parameter('MY_PARAMETER')` will continue to work — the SDK handles the resolution automatically.
:::
### Updating parameter definitions
Parameter definitions are updated every time your application is deployed.
### Example app with parameters
Here's an example of the syntax for an app with two parameters defined.
```bash
cat Towerfile
```
```bash
[app]
name = "hello-world"
script = "./task.py"
source = [
"./task.py",
]
[[parameters]]
name = "friend"
description = "Someone that is close to you."
default = "Steve"
[[parameters]]
name = "foe"
description = "Something that you'd prefer to avoid."
default = "Carl"
```
And here's the example app Python for using the parameter.
```python
import time
import tower
# This task does nothing at all, really.
count = 0
friend = tower.parameter("friend")
foe = tower.parameter("foe")
while count < 5:
count += 1
print("Hello, {friend}! Boo to {foe}".format(friend=friend, foe=foe))
time.sleep(1)
```
### Hidden parameters
Sometimes you have sensitive data that you don't want to expose in the Tower UI
or the REST API. For example, you might have an API key that your app needs to
access a third-party service. You can mark parameters as "hidden" in your
Towerfile to prevent them from being exposed in the UI and API.
```bash
[app]
name = "hello-world"
script = "./task.py"
source = [
"./task.py",
]
[[parameters]]
name = "friend"
description = "A secret friend that you have."
hidden = true
[[parameters]]
name = "foe"
description = "Something that you'd prefer to avoid."
default = "Carl"
```
Note that hidden parameters may only have empty default values, so if your app needs a non-empty value for a hidden parameter, you must pass it in when you run the app. You can pass in hidden parameters using the `--parameter` flag when you run the app.
When you run the app above, the value that you pass in for the `friend`
parameter will not be visible in the Tower UI or the REST API. However, your
app will still be able to access the value of the `friend` parameter using
`tower.parameter("friend")`.
## Running apps
You can use the `tower run` command in the terminal, the "Run App" feature in the [Tower UI](https://app.tower.dev), or the REST API to execute (initiate a run) an app. Learn more about it in the [Runs](/docs/concepts/runs) section.
## More examples
You can find more examples in the [tower-examples](https://github.com/tower/tower-examples) repository on GitHub.
---
## Data Agents
A Data Agent is a Tower app that runs a reasoning loop powered by a language model. Based on a user prompt and the results of previous tool calls, the agent decides which tools to invoke next. The "Data" in Data Agent refers to the agent's use of business data - stored in databases like Iceberg - to inform its decisions.
## Overview
Unlike simple LLM calls that generate text, Data Agents can take actions. They iterate in a reasoning loop:
1. Receive a user prompt
2. Call an LLM to reason about what to do next
3. Execute a tool based on the LLM's decision
4. Feed the tool's output back to the LLM
5. Repeat until the agent determines it has the final answer
This architecture allows agents to dynamically orchestrate multiple Tower apps, query databases, and make decisions based on real business data.
## Data Agents vs Simple LLM Calls
| Aspect | Simple LLM Call | Data Agent |
|--------|-----------------|------------|
| **Output** | Text generation | Actions + text |
| **Data access** | None or static context | Dynamic database queries |
| **Tool use** | None | Multiple tools per request |
| **Iteration** | Single call | Reasoning loop |
## How It Works
A Data Agent uses a language model specialized in **tool calling** (such as xLAM-2 or GPT-5). The LLM reasons about each step and decides which tool to invoke. Common tool types include:
- **Data retrieval** — Query databases or APIs for information
- **Data transformation** — Process, filter, or aggregate results
- **External actions** — Trigger Tower apps or other services
By grounding decisions in real business data, Data Agents can provide accurate, context-aware responses rather than relying solely on the LLM's training data.
## Learning More
For a hands-on example of building a Data Agent with Tower, see the [Deploying Agentic Flows](/docs/examples/agents) example, which demonstrates an agent that answers stock price questions using cached Iceberg data.
---
## Environments
An environment defines the runtime context for your application. It encapsulates the app's configuration, including secrets for dataset connections, catalog-level schemas and tables, and the specific immutable code version running there.
In Tower, you will always have at least one environment called `default`. As your data platform scales, you can introduce additional isolated environments as needed, such as `staging`, `integration-testing`, or `production`.
## The `default` environment
The `default` environment serves as the base configuration layer.
- **Inheritance:** Secrets and catalogs defined in `default` are automatically inherited by all other environments.
- **Overrides:** To customize a configuration for a specific environment, simply create a secret or catalog in that environment with the same name to override the inherited default.
## Versions, environments, and promotion
Every environment manages its own deployed application version. When an app is executed (via `tower run`, a workflow schedule, or the API), Tower looks up the version mapped to the target environment and executes that exact code.
Environments remain locked to their respective versions independently until you explicitly change them. This isolation provides the foundation for a secure promotion workflow:
```
[ Local Dev ] ──( tower deploy )──> [ default environment ]
│
( Verify changes )
│
( UI/API Promotion )
▼
[ production environment ]
```
This is the foundation for promoting code from one environment to another: you deploy to `default` (or any environment you use for development), verify it, and then promote the same version to `production` when you're ready.
### Deploying a new version
Every execution of `tower deploy` packages your code into a new, immutable version (`v1`, `v2`, `v3`). You control where this version lands using CLI flags:
| Command | Target Environment | Behavior |
| --- | --- | --- |
| `tower deploy` | `default` only | Builds a new version and pins it strictly to `default`. Other environments are untouched. |
| `tower deploy --environment=your_env` | `your_env` only | Builds a new version and pins it strictly to the specified environment. |
| `tower deploy --all` | All environments | Builds a new version and pins it everywhere simultaneously. Ideal for initial setups or critical hotfixes. |
#### Example Workflow
A typical workflow looks like this:
```bash
# Iterate on default until you're happy with the code.
tower deploy
# Promote that working version to production by re-deploying with --environment.
# This creates a new version and pins it to production only.
tower deploy --environment=production
```
:::info
A bare `tower deploy` only alters the `default` environment. If `production` is running `v3` and you run `tower deploy`, `production` remains safely on `v3` until explicitly updated.
:::
### Promoting an existing version
To promote an existing version (e.g., moving `v5` from `default` to `production`) without rebuilding the package, use the **App Changelog** in the [Tower UI](https://app.tower.dev):
1. Locate the desired version in the changelog.
2. Click the **Promote** action.
3. Select your target environment.
This maps the existing version to the new environment without generating a new version number. You can also automate this workflow programmatically using the [Update App Environment API](/docs/reference/api/update-app-environment).
### Rolling back
Because every version is preserved and addressable, rolling back is the same operation as promoting: You just pick an older version. From the **App Changelog** for the app in the [Tower UI](https://app.tower.dev):
1. Find the version you want to rollback to
2. Click the **Deploy** dropdown
3. Select the environment you want that version to be deployed to
The environment is redeployed to that earlier version on the next scheduled or on-demand run.
### Runtime Version Resolution
When a run is triggered, Tower resolves the execution target using a deterministic three-step process:
1. **Identify the Target:** Look up the environment specified for the run (fallback is `default`).
2. **Resolve the Pin:** Read the application version currently deployed to that specific environment.
3. **Execute:** Run that exact immutable version.
Because this resolution happens at the precise moment the run initializes, workflows are completely deterministic. Any deployments executed mid-run will not impact the active execution.
## Secrets
Database passwords, S3 bucket locations, and encryption keys are all examples of secrets that you might want to inject into your apps running either locally or in the Tower cloud at runtime.
Tower provides a secure secrets management system that ensures that your secrets are not only available where you need them, but they're available in a secure way, too. You can learn more about our standard security practices in the [architecture](/docs/architecture/security.md) section.
Secrets can be thought of as name-value pairs.
### Secrets in the `default` environment
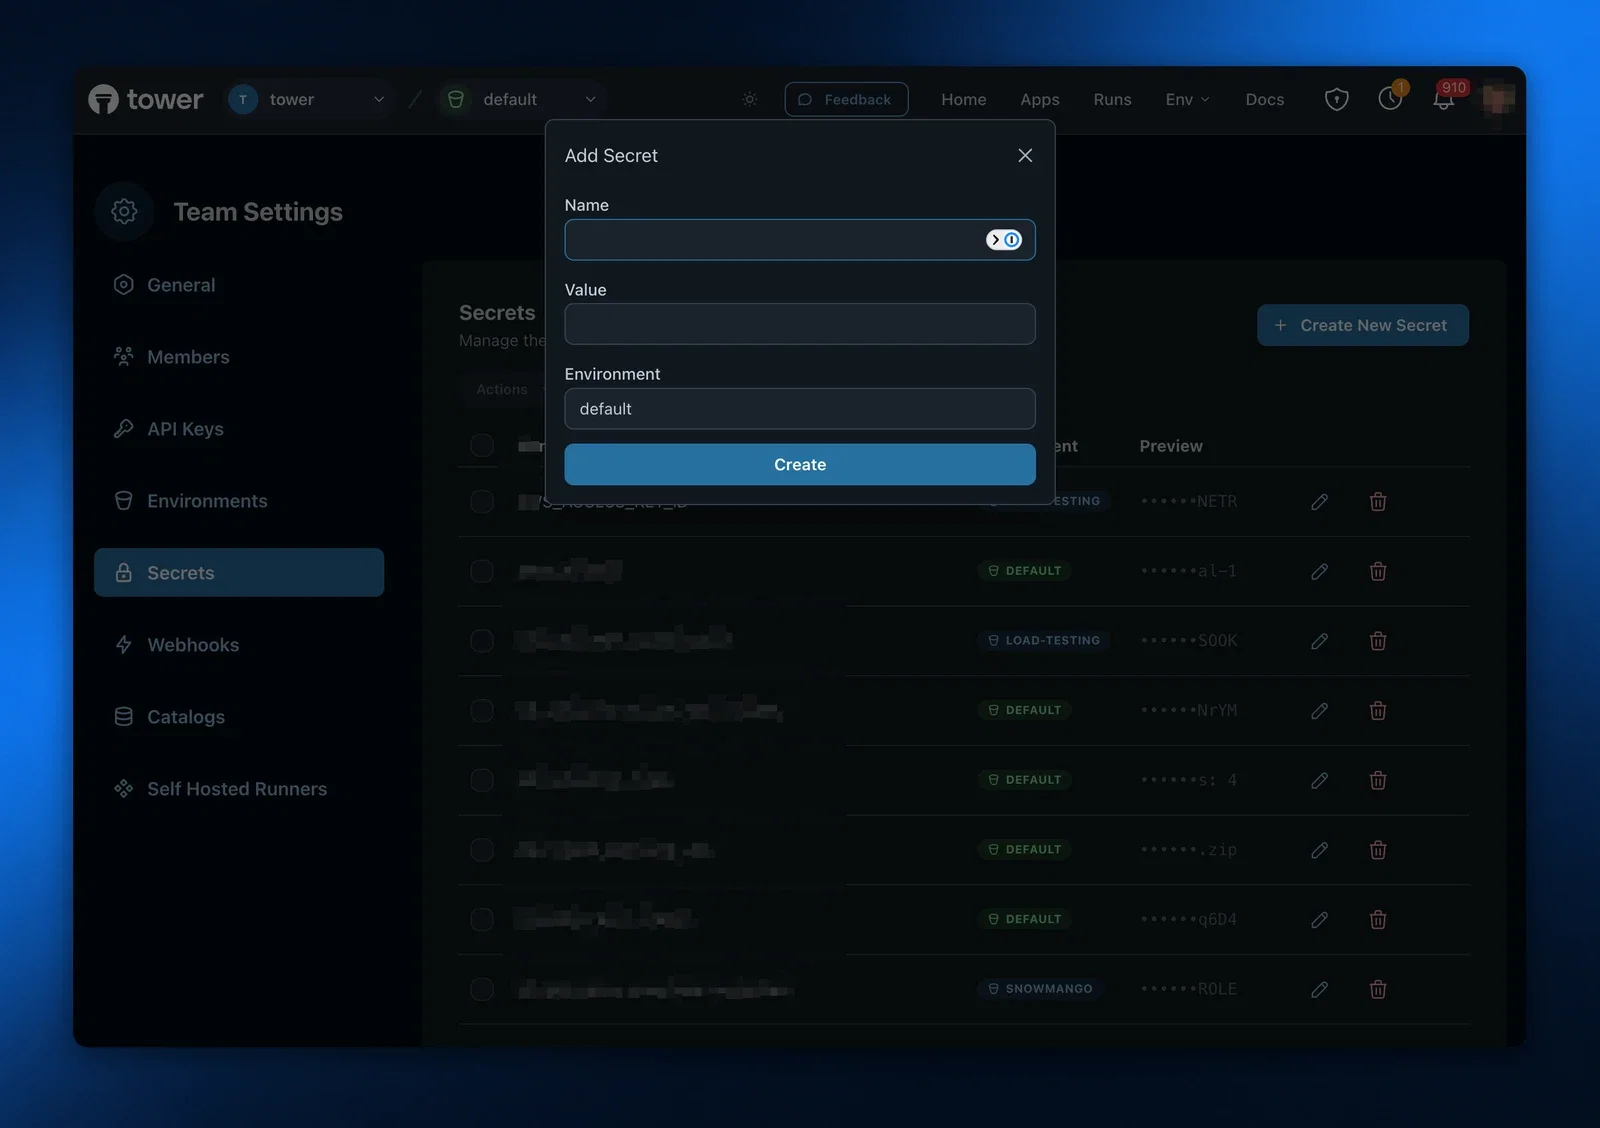
When you create a secret with the `tower secrets create` command and don't specify an environment, the secret will be created in the `default` environment. The secret and its value will be available in all your environments, unless you override it.
```bash
tower secrets create --name=snowflake_url \
--value=https://abc123.snowflake.com
```
```bash
✔ Creating secret... Done!
Success! Secret "snowflake_url" was created
```
Use the `tower secrets list` command to determine which secrets you have configured. If you don't specify the environment, it will show you only the secrets in the `default` environment.
```bash
tower secrets list
```
```bash
Secret Environment Preview
----------------------------------------
s3_bucket default XXXXXXcket
snowflake_url default XXXXXX.com
```
### Secrets in other environments
Sometimes you will want to use different secret values for different environments that you run you apps in. For example, imagine you have an app that reads data from S3 and writes it to a Snowflake database. It's likely that you use a different Snowflake database in development, staging, and production environments. Therefore, you would want to have the same secret name (e.g. `snowflake_url`) in all your environments, but use different secret values depending on the environment.
To create a secret in an environment different from `default`, use the `--environment` parameter.
```bash
tower secrets create --name=snowflake_url \
--value=https://abc123-prod.snowflake.com \
--environment=production
```
```bash
✔ Creating secret... Done!
Success! Secret "snowflake_url" was created
```
When you run both of these commands, you will have a secret with key `snowflake_url` in both the `default` and the `production` environments, but with different values.
Use the `--environment` parameter with the `tower secrets list` command to show what secrets will be used in a given environment.
```bash
tower secrets list --environment=production
```
```bash
Secret Environment Preview
----------------------------------------
s3_bucket default XXXXXXcket
snowflake_url production XXXXXX.com
```
Use the `-a` parameter to list all secrets in all environments.
```bash
tower secrets list -a
```
```bash
Secret Environment Preview
----------------------------------------
s3_bucket default XXXXXXcket
snowflake_url default XXXXXX.com
snowflake_url production XXXXXX.com
```
### Managing secrets in the Tower UI
You can use the [Tower UI](https://app.tower.dev) to create, list and delete secrets.
Navigate to (> **Secrets** ) and click on "Create New Secret". You can add a secret to the `default` environment or select "+New Environment" in the drop-down and type in e.g. `production`.
You can later delete secrets from the secrets list.
## Catalogs
Apache Iceberg catalogs simplify the use of Iceberg tables inside Tower apps.
Catalogs are defined per each Tower environment. As with secrets, catalogs defined in the `default` environment are inherited by all other environments.
### Creating catalogs
To create a catalog, use the [Tower UI](https://app.tower.dev).
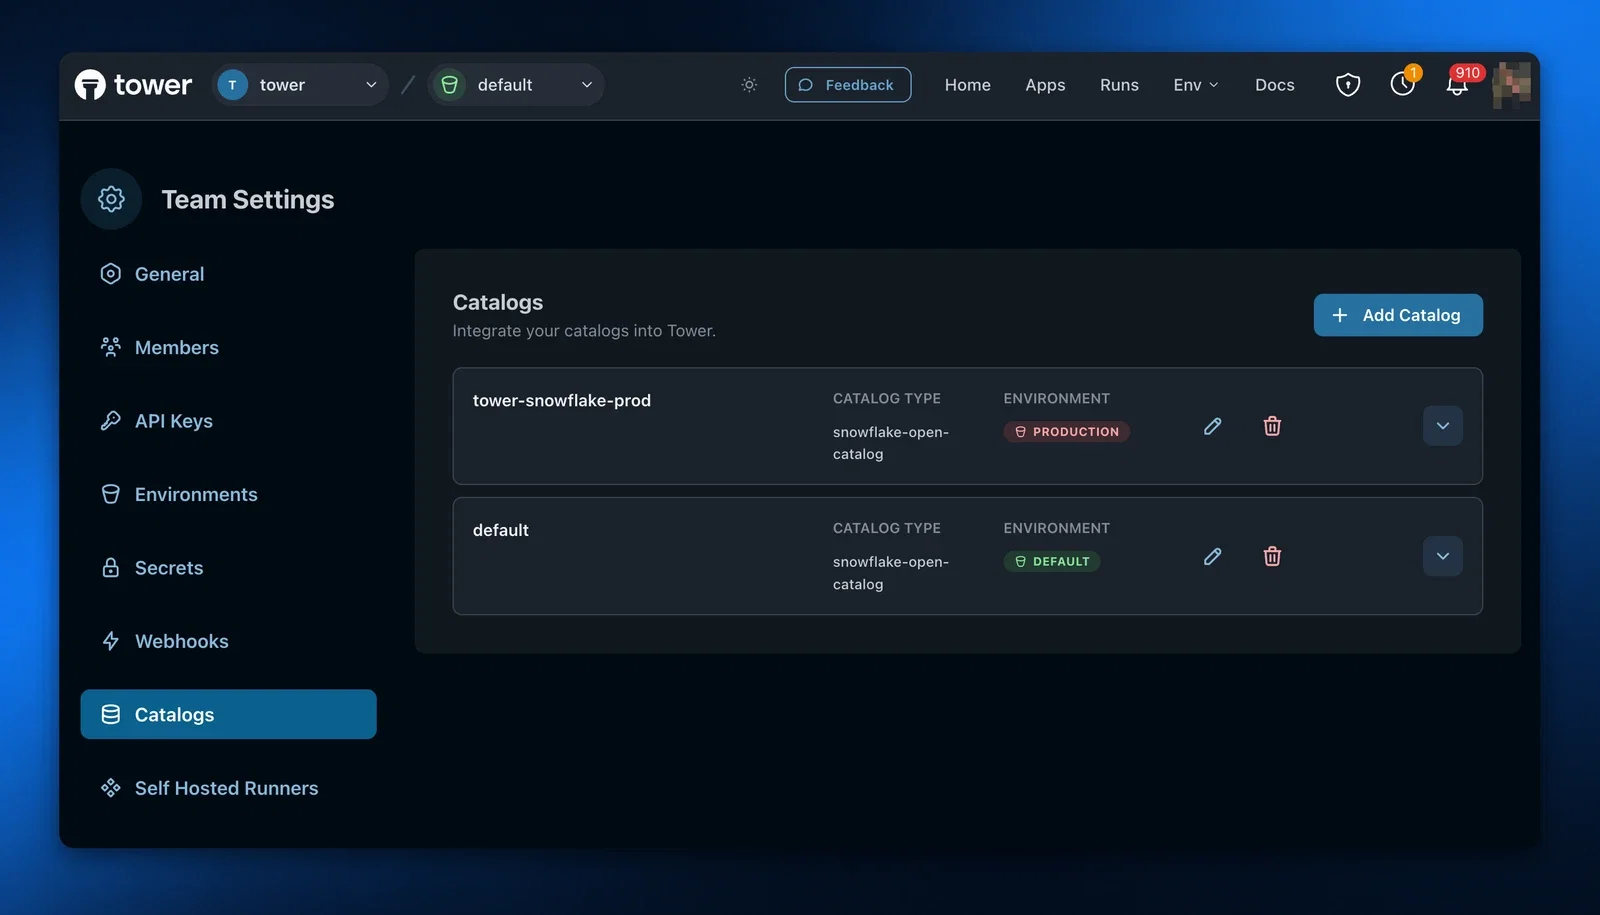
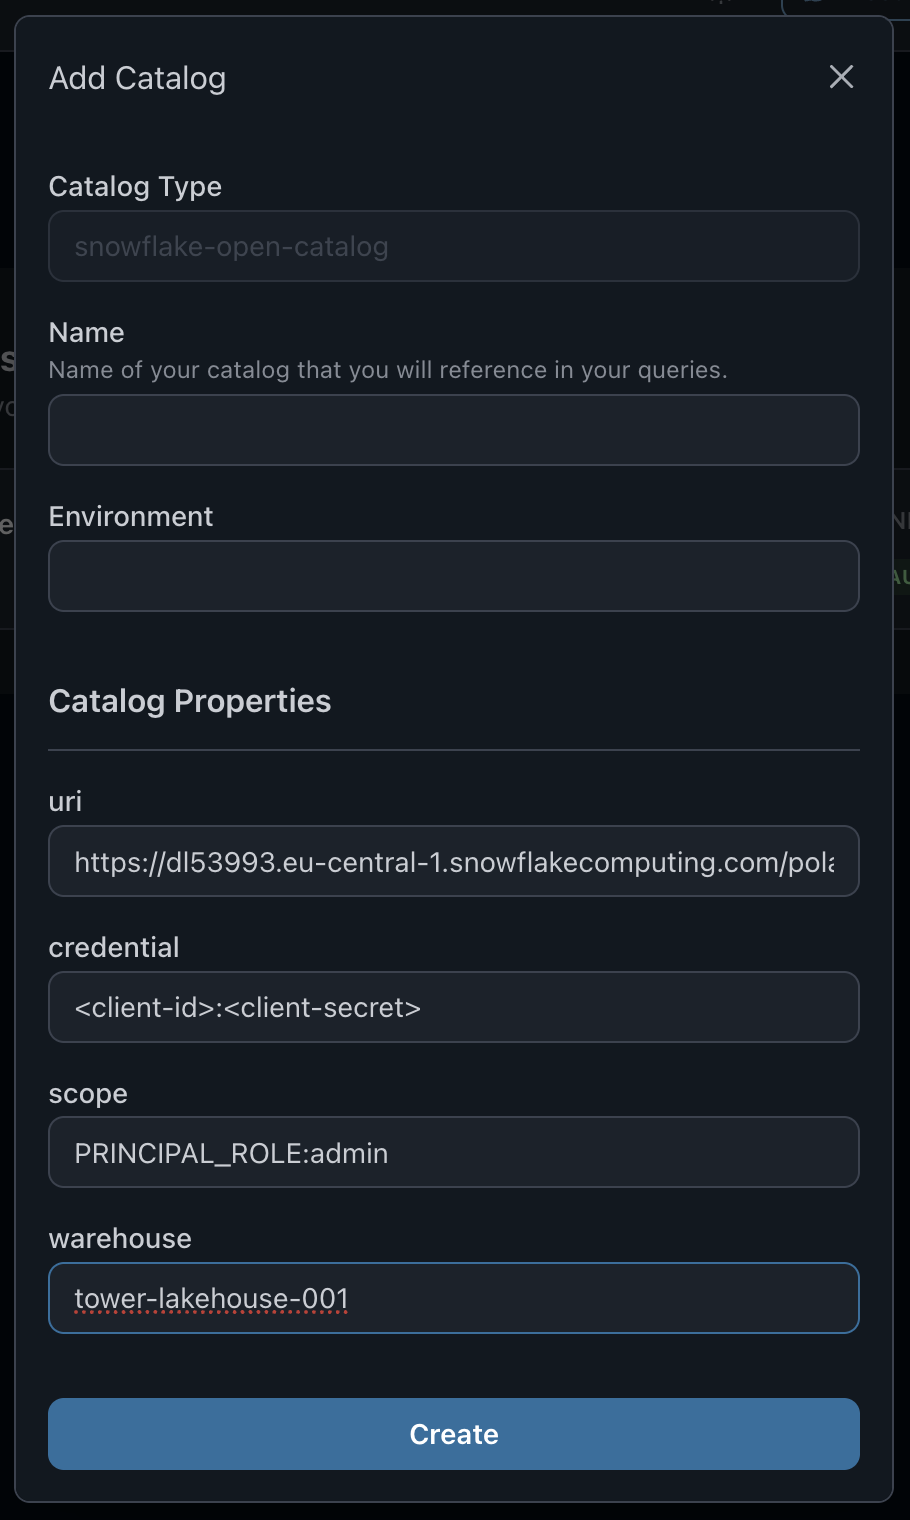
When creating a catalog in Tower, specify its `slug`, and the 4 properties that Tower (and the [`pyiceberg`](https://py.iceberg.apache.org/) library that Tower uses internally) need to know to connect to the catalog service: URI, Credential, Scope, and Warehouse. You can get these values during the set-up of the catalog service.
Set the catalog `slug` to the catalog identifier that you are planning to use inside your Tower app, e.g. 'mycatalog'. `Pyiceberg` calls this identifier the catalog `name`.
If you set the `slug` to the string `default`, you won't need to explicitely specify the catalog identifier in your code.
### Using catalogs
To work with Iceberg tables inside your Tower apps you should use the Tower `tables` SDK. Tower `tables` use the `pyiceberg` library internally. You can use `pyiceberg` to access Iceberg tables directly, but the `tables` SDK will typically be simpler to use, as it automatically loads all catalogs defined in the environment the app is running in.
```python
import pyarrow as pa
import tower
SCHEMA = pa.schema([...])
mytable = tower.tables('mytable', catalog='mycatalog').create_if_not_exists(SCHEMA)
```
In the above example, when checking for the existance of the table, Tower will look in its metadata for the catalog that has the slug 'mycatalog'.
When you set the slug of your catalog to 'default', the catalog identifier can be dropped and the above example can be simplified to:
```python
import pyarrow as pa
import tower
SCHEMA = pa.schema([...])
mytable = tower.tables('mytable').create_if_not_exists(SCHEMA)
```
When using `pyiceberg` to access Iceberg tables, do something like this.
```python
import pyarrow as pa
from pyiceberg.catalog import load_catalog
SCHEMA = pa.schema([...])
mycatalog = load_catalog('mycatalog')
mytable = mycatalog.create_table_if_not_exists('mytable', SCHEMA)
```
### Supported catalog types
Tower supports the following Iceberg catalog types:
- **Apache Polaris** — requires URI, Credential, Scope, and Warehouse
- **Snowflake Open Catalog** — requires URI, Credential, Scope, and Warehouse
Snowflake Open Catalog Example Config
- **Lakekeeper** — requires URI, Credential, Scope, and Warehouse
- **Cloudflare R2 Catalog** — requires URI, Warehouse, and Token
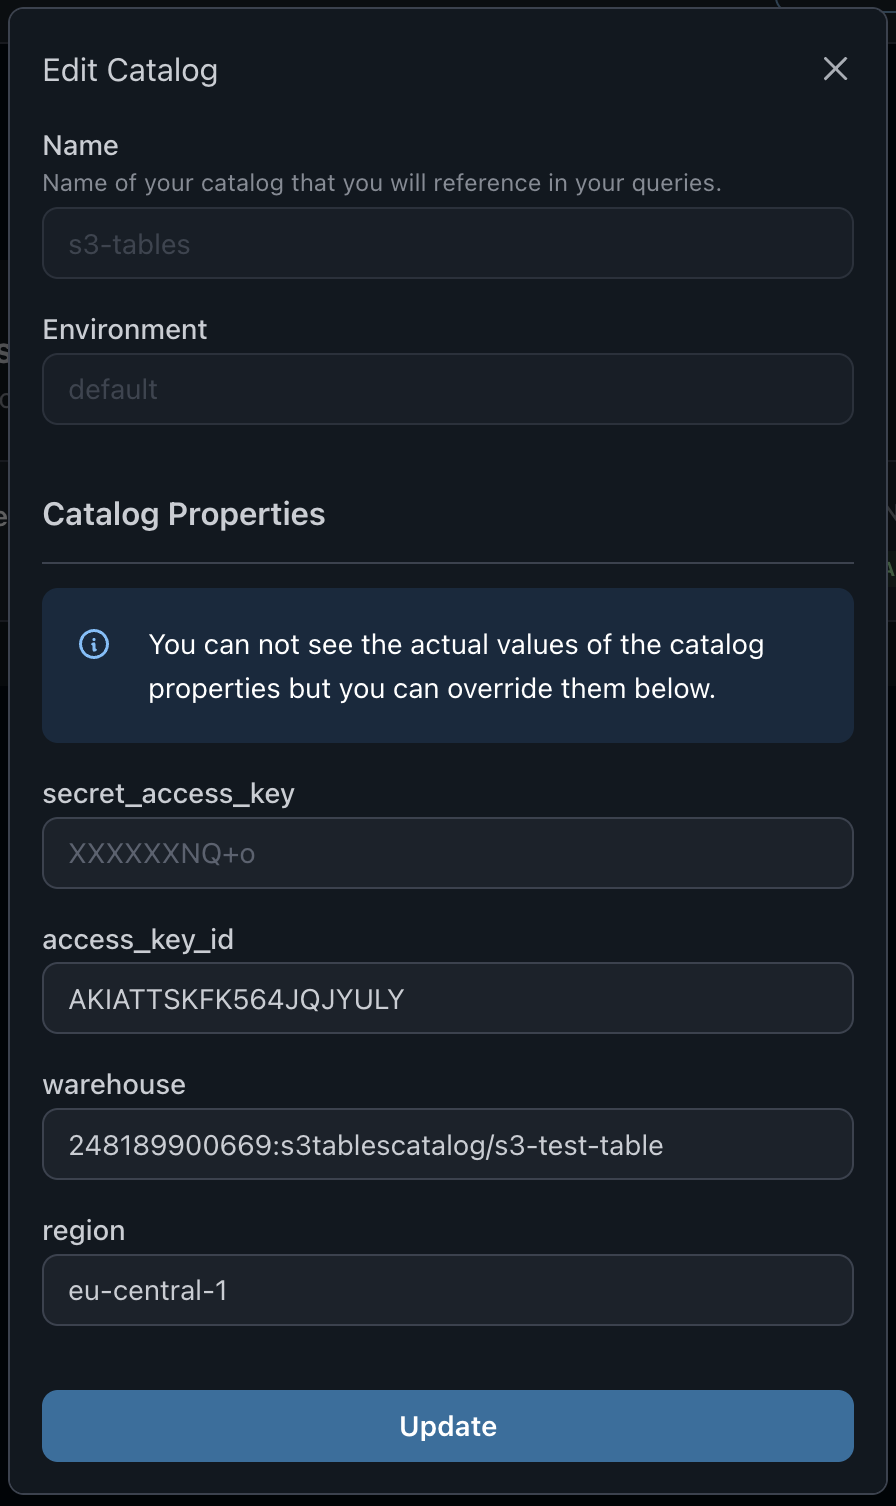
- **S3 Tables** — requires Access Key ID, Secret Access Key, Warehouse, and Region. Tower automatically configures the REST catalog endpoint, SigV4 signing, and AWS Glue integration based on the provided region.
S3 Tables Example Config
## Advanced use cases
### Programmatically determining the environment
Sometimes users need to programmatically determine which environment the app is running in, e.g. to use different data source types (DuckDB vs Snowflake) depending on the environment. Tower provides the `tower.info.environment()` SDK function and the `TOWER_ENVIRONMENT` environment variable for this purpose. Review this [section](/docs/using-tower/advanced.md) for details.
---
## Models
Tower Models provide easy access to Large Language Models (LLMs) through a unified interface. They abstract away the complexity of different inference providers and model APIs, allowing you to work with local and remote models seamlessly.
## Overview
Tower offers two main components for working with language models:
- The `Llm` class: A wrapper around language models that provides methods for text generation and chat completions
- The `llms` helper function: A convenient way to create and configure `Llm` instances
## Instantiating Models
To create a `Llm` instance, you need to:
1. Specify the model name (can be a model family name or specific model identifier)
2. Optionally set the maximum tokens for responses
3. Use the `llms()` helper function
Here's a basic example:
```python
import tower
# Create a language model instance
llm = tower.llms("llama3.2", max_tokens=1000)
```
The returned `llm` object is of the Tower `Llm` class, which provides a unified interface for working with different language model providers. Currently, Tower supports Ollama for local inference and Hugging Face Hub for remote inference.
### Model Name Resolution
Tower automatically resolves model names based on available inference providers. You can specify either:
- Model family names (e.g., "llama3.2", "gemma3.2", "deepseek-r1")
- Specific model identifiers (e.g., "deepseek-r1:14b", "deepseek-ai/DeepSeek-R1-0528")
The system will automatically select the appropriate inference provider and resolve the exact model name.
For a list of supported model family names, see the [Tower LLM module](https://github.com/tower/tower-cli/blob/main/src/tower/_llms.py).
## Model Operations
### Model Instantiation
The `llms` helper function creates an `Llm` instance with these parameters:
#### Configuration
- `model_name` (str): The name of the language model to use
- `max_tokens` (int): Maximum number of tokens to generate in responses (defaults to 1000)
### Llm Methods
Once you have a language model instance, you can perform these operations:
#### Chat Completions
- [complete_chat()](/docs/reference/tower-sdk#llmcomplete_chat) - Sends a list of messages and returns the generated response (OpenAI Chat Completions API format)
#### Simple Prompts
- [prompt()](/docs/reference/tower-sdk#llmprompt) - Sends a single prompt string and returns the generated response (legacy OpenAI Completions API format)
## Usage Examples
### Chat-based Interactions
```python
import tower
# Create a language model
llm = tower.llms("llama3.2", max_tokens=500)
# Use for chat completions
messages = [
{"role": "system", "content": "You are a helpful assistant."},
{"role": "user", "content": "Hello, how are you?"}
]
response = llm.complete_chat(messages)
print(response)
```
### Simple Prompt Interactions
```python
import tower
# Create a language model
llm = tower.llms("deepseek-r1", max_tokens=1000)
# Use for simple prompts
response = llm.prompt("What is the capital of France?")
print(response)
```
## Learning More
For a more in-depth review of working with models in Tower, see the [Working with Models](/docs/using-tower/working-with-models) guide.
---
## Runs
Runs are executions of a particular app version inside a chosen environment.
## Run statuses
A run moves through a series of statuses during its lifetime:
| Status | Description |
|---|---|
| `scheduled` | The run has been accepted and is waiting to be dispatched to a runner. |
| `pending` | The run is in the queue waiting for an available runner. |
| `starting` | A runner has accepted the run and is provisioning: scheduling compute, pulling the image, and downloading your code bundle. Time spent in `starting` is cold-start overhead — it is not your code executing. |
| `running` | Your code is actively executing. |
| `exited` | The app finished with exit code `0` (success). |
| `crashed` | The app exited with a non-zero exit code. |
| `errored` | An infrastructure error prevented the run from completing normally. |
| `cancelled` | The run was cancelled before it could finish. |
| `retrying` | The run failed but has remaining retry attempts; it is waiting before the next attempt is dispatched. |
Runs with status `scheduled`, `pending`, `starting`, `running`, or `retrying` are considered **active** and count toward active run limits.
The run's reported duration (from `started_at` to `ended_at`) includes time spent in `starting` — if you want to measure pure execution time, subtract the time the run was in `starting` from total duration.
## Running apps
You can use the [Tower CLI](/docs/getting-started/download-the-cli.md) (see the [Tower CLI reference](/docs/reference/tower-cli.md) as well) to run an app from the command line. Additionally, apps can be run via the "Run App" feature in the [Tower UI](https://app.tower.dev), or via the [run REST API](/docs/reference/api/run-app).
When running an app, you run its latest version.
### Running an app locally
When developing and debugging an app, running it locally helps with observing resource consumption and getting access to logs without delay. However, it is important to create the same execution environment locally as your application will have when it runs in the Tower cloud. For this purpose, when you run an app in Tower locally, Tower will install the same dependencies, and set the same environment variables that it would do in regular, Tower-cloud mode.
```bash
tower run --local
```
```bash
✔ Getting secrets... Done!
✔ Building package... Done!
Success! App `hello-world` has been launched
2024-11-20 08:44:45 | Hello, world!
2024-11-20 08:44:46 | Hello, world!
2024-11-20 08:44:47 | Hello, world!
2024-11-20 08:44:48 | Hello, world!
2024-11-20 08:44:49 | Hello, world!
Success! Your app exited cleanly.
```
### Running an app in the Tower cloud
Once you tested the app and are ready to execute it in the Tower cloud for production purposes, run the command without the --local parameter.
```bash
tower run
```
```bash
✔ Scheduling run... Done!
Success! Run #12 for app `hello-world` has been scheduled
```
By running an app in the Tower cloud, you are creating a record of the run that you can then analyze, retrieve logs and metrics for, get alerted on etc.
Use `tower apps show ` to get the run status, or observe the run in the [Tower UI](https://app.tower.dev) (> **Apps** > hello-world).
```bash
tower apps show hello-world
```
```bash
Name: hello-world
Description:
A simple 'Hello, world!' app for demonstrating Tower.
Recent runs:
# Status Start Time Elapsed Time
------------------------------------------------
12 exited 2024-11-20 08:46:11 8s
11 exited 2024-11-19 20:14:46 9s
10 exited 2024-11-19 20:14:20 5s
9 exited 2024-11-19 20:13:36 3s
8 exited 2024-11-19 19:46:01 7s
7 exited 2024-11-16 15:31:23 7s
6 exited 2024-11-15 15:40:23 7s
5 exited 2024-11-15 11:07:51 5s
4 exited 2024-11-15 08:44:23 10s
3 exited 2024-11-14 16:02:31 8s
```
## Running an app with parameters
When you run the application with no parameters specified, parameter values will be set to defaults specified in the Towerfile.
```bash
tower run --local
```
```bash
✔ Getting secrets... Done!
✔ Building package... Done!
Success! App `hello-world` has been launched
2024-11-20 16:39:47 | Hello, Steve! Boo to Carl
2024-11-20 16:39:48 | Hello, Steve! Boo to Carl
2024-11-20 16:39:49 | Hello, Steve! Boo to Carl
2024-11-20 16:39:50 | Hello, Steve! Boo to Carl
2024-11-20 16:39:51 | Hello, Steve! Boo to Carl
Success! Your app exited cleanly.
```
You can change the parameter values when you invoke the application using the `--parameter` CLI options.
```bash
tower run --local \
--parameter=friend=Nick \
--parameter=foe=nobody
```
```bash
✔ Getting secrets... Done!
✔ Building package... Done!
Success! App `hello-world` has been launched
2024-11-20 16:39:47 | Hello, Nick! Boo to nobody
2024-11-20 16:39:48 | Hello, Nick! Boo to nobody
2024-11-20 16:39:49 | Hello, Nick! Boo to nobody
2024-11-20 16:39:50 | Hello, Nick! Boo to nobody
2024-11-20 16:39:51 | Hello, Nick! Boo to nobody
Success! Your app exited cleanly.
```
The same syntax works for running remotely (e.g. without the `--local` flag).
## Retries
When a run ends with `crashed` or `errored` status, Tower can automatically retry it based on the app's retry policy. Each retry is a new attempt within the same run record; the run's status transitions to `retrying` while waiting for the next attempt to be dispatched.
The `num_attempts` field on a run tells you how many attempts have been made. The full per-attempt history (status, timing, exit code) is available in the `attempts` array on the run detail response.
See [Retrying failed runs](/docs/using-tower/retries) for configuration details.
---
## Tables
Tower Tables make it easy for users to onboard to Apache Iceberg. They provide methods for accessing and processing tabular and semi-structured data (e.g. tables with nested fields, via the VARIANT data type).
## Overview
Tower offers two main components for working with tables:
- The `Table` class: A wrapper around Iceberg tables that provides methods for reading and writing data
- The `tables` helper function: A convenient way to create and access tables
## Creating Tables
To create a table, you need to:
1. Define its schema in [Arrow Schema](https://arrow.apache.org/docs/python/generated/pyarrow.Schema.html#pyarrow.Schema) format
2. Use either `create_if_not_exists()` or `create()` methods
Here's a basic example:
```python
import pyarrow as pa
import tower
SCHEMA = pa.schema([
("col1", pa.string()),
("col2", pa.float64()),
...
])
mytable = tower.tables('mytable').create_if_not_exists(SCHEMA)
```
The returned `mytable` object is of the Tower `Table` class, which provides a unified interface for working with different types of tables. Currently, Tower supports Apache Iceberg tables.
### Catalogs and Namespaces
Tower Tables are aware of the [catalogs](/docs/concepts/environments#catalogs) defined in Tower. Using the `tables` helper saves you from writing boilerplate code to set environment variables.
The example above assumes you're creating tables in the 'default' namespace of the 'default' catalog. For more examples of table creation with different catalogs and namespaces, see our [Working with Tables](/docs/using-tower/working-with-tables.md) guide.
## Table Operations
### TableReference Methods
The `tables` helper returns a `TableReference` object with these methods:
#### Table Creation
- [create_if_not_exists()](/docs/reference/tower-sdk#tablereferencecreate_if_not_exists) - Creates a table with specified schema if it doesn't exist
- [create()](/docs/reference/tower-sdk#tablereferencecreate) - Creates a table with specified schema (fails if table exists)
#### Table Access
- [load()](/docs/reference/tower-sdk#tablereferenceload) - Gets a reference to an existing table and loads its metadata
### Table Methods
Once you have a table reference, you can perform these operations:
#### Schema Operations
- [schema()](/docs/reference/tower-sdk#tableschema) - Gets the table's schema
#### Reading Data
- [to_polars()](/docs/reference/tower-sdk#tableto_polars) - Returns a Polars LazyFrame for efficient data processing
- [read()](/docs/reference/tower-sdk#tableread) - Reads the entire table into memory as a Polars DataFrame
#### Writing Data
- [insert()](/docs/reference/tower-sdk#tableinsert) - Inserts new data into the table
- [upsert()](/docs/reference/tower-sdk#tableupsert) - Updates existing rows or inserts new ones
#### Data Management
- [delete()](/docs/reference/tower-sdk#tabledelete) - Removes data from the table based on specified conditions
## Learning More
For a more in-depth review of working with tables in Tower, see the [Working with Tables](/docs/using-tower/working-with-tables) guide.
---
## Teams
Teams are shared workspaces that enable groups of users to collaboratively develop and run apps in Tower. By creating a team, you establish a common context where multiple people can access the same Apps, Secrets, and resources.
## Overview
When using Tower individually, you work in the context of your personal account. All apps, secrets, and catalogs belong to you. Teams extend this model to support collaboration—when you're part of a team, you can switch between your personal context and any team context you belong to.
Teams provide three key benefits:
- **Shared access** to apps and their configurations
- **Collaborative development** with multiple contributors
- **Centralized secrets management** for secure credential sharing
## Teams vs Personal Workspaces
The key differences between team and personal workspaces are:
| Aspect | Personal Workspace | Team Workspace |
|--------|-------------------|----------------|
| **Access** | Only you | All team members |
| **Secrets** | Your personal secrets | Team secrets |
| **Deployment** | Deploy to your account | Deploy to team account |
| **Collaboration** | Individual | Multiple contributors |
> **Note**: Runs of apps in team accounts use the **secrets of the team**, not of the user who deployed or ran the app.
## Learning More
For step-by-step instructions on creating teams, inviting members, and deploying team apps, see the [Working in Teams](/docs/using-tower/working-in-teams) guide.
---
## Deploying Agentic Flows
Agents are a special form of orchestration flows. They iterate in a reasoning loop, decide which tools to call, process the tool results, and iterate until they are satisfied with the final answer.
## Data Agent with Iceberg Cache
This [example](https://github.com/tower/tower-examples/tree/main/13-ticker-update-agent) demonstrates how to deploy and operate a **data agent** that uses business data for decision making. The agent answers stock price questions by:
1. Checking if data exists in an Iceberg table cache
2. Fetching missing data from Yahoo Finance via a Tower app
3. Using an LLM (local or cloud) to reason about which tools to call
The agent uses a **reasoning loop** powered by a language model specialized in tool calling (such as xLAM or GPT-4). The LLM dynamically decides the best path for each ticker, minimizing external API calls by leveraging cached data when available.
**Inference options:**
- **Local inference**: Use llama.cpp or ollama with models like xLAM-2
- **Cloud inference**: Use OpenAI, DeepSeek, or other providers
**Highlights**: LangChain, Iceberg, tool calling, llama.cpp/ollama, OpenAI/DeepSeek
---
## Running dbt Core
Tower can run dbt Core projects with remote seed hydration and integrated secrets management.
## E-commerce Analytics with dbt
This [example](https://github.com/tower/tower-examples/tree/main/14-dbt-core-ecommerce-analytics) packages a dbt Core project (Olist e-commerce dataset) and runs it on Tower. The app demonstrates:
1. **Remote seed hydration** — Seeds are downloaded from an S3 archive before `dbt seed`
2. **Runtime profiles** — `profiles.yml` is written from a Tower secret at runtime
3. **dbt commands** — Executed via `dbtRunner` with results streamed to Tower logs
You can customize the dbt commands, target, and select expressions via app parameters.
**Highlights**: dbt Core, dbtRunner, S3 seed archives, Snowflake/DuckDB
---
## End-to-End Data Platform Demo
The [tower-demo](https://github.com/tower/tower-demo) repository showcases a complete data platform for **Orbita Supply Co.**, a fictional retail company. This comprehensive example demonstrates how Tower orchestrates a modern data lakehouse architecture with ingestion, transformation, analytics, and AI automation.
## Overview
The demo includes 20+ Tower apps organized into five categories:
| Category | Apps | Description |
|----------|------|-------------|
| **Ingestion** | 5 | Extract data from Shopify, IoT sensors, and operational systems |
| **Transformation** | 4 | Build analytics-ready tables with dbt and Tower |
| **Analytics** | 4 | Interactive Marimo notebook dashboards |
| **Orchestration** | 2 | Multi-app pipelines for daily ETL and anomaly detection |
| **Utilities** | 1 | Demo data regeneration |
## Data Architecture
The platform follows a medallion lakehouse architecture:
```
┌─────────────────────────────────────────┐
│ GOLD LAYER │
│ Business-ready aggregates & KPIs │
│ • customer_360 │
│ • product_performance │
│ • inventory_ledger │
└─────────────────────────────────────────┘
▲
┌─────────────────────────────────────────┐
│ SILVER LAYER │
│ Cleaned, conformed, enriched data │
│ • ticket_summaries │
│ • product_descriptions │
│ • anomaly_explanations │
└─────────────────────────────────────────┘
▲
┌─────────────────────────────────────────┐
│ BRONZE LAYER │
│ Raw ingested data from sources │
│ • orders, inventory, products │
│ • warehouse_telemetry, returns │
└─────────────────────────────────────────┘
```
## Key Workflows
### Daily Retail Pipeline
The `daily_retail_pipeline` app orchestrates a complete daily ETL:
1. Ingest orders, products, and returns
2. Build `customer_360` and `product_performance` tables
3. Generate AI-powered sales report
4. Send Slack notification
```bash
tower run daily_retail_pipeline
```
### Real-Time Anomaly Detection
The `warehouse_anomaly_pipeline` demonstrates operational intelligence:
1. Ingest latest warehouse telemetry
2. Detect anomalies in sensor data
3. Generate AI explanations
4. Alert on critical issues
```bash
tower run warehouse_anomaly_pipeline
```
## Technologies Used
- **Tower**: App orchestration, scheduling, secrets, and catalog management
- **Apache Iceberg**: Open table format for the data lakehouse
- **dltHub**: Python-first data ingestion
- **dbt**: SQL-based transformations
- **Marimo**: Reactive Python notebooks for dashboards
- **Claude**: LLM for AI automation and insights
- **Polars & PyArrow**: Columnar data processing
## Getting Started
Clone the repository and run any app locally:
```bash
git clone https://github.com/tower/tower-demo
cd tower-demo/ingest_shopify_orders
# Install dependencies
uv sync
# Run locally
tower run --local
```
Deploy all apps to Tower:
```bash
# From the repo root
for app in ingest_* run_* customer_* product_*; do
cd $app && tower deploy && cd ..
done
```
**Highlights**: Medallion architecture, dltHub, dbt, Marimo notebooks, LLM automation, Slack notifications
---
## Introduction
The [tower-examples](https://github.com/tower/tower-examples) repository on GitHub contains a collection of sample applications that can be run on Tower.
Getting started is easy. First, run the following command to clone the repository locally:
```bash
git clone https://github.com/tower/tower-examples
```
Next, go through the [Quickstart](/docs/getting-started/quick-start) guide to learn how to use these examples. The Quickstart focuses on the "Hello, World!" example to get you started. If you prefer using AI assistants, check out the [Quickstart with MCP](/docs/getting-started/quickstart-with-mcp) guide.
## Overview of Examples
Tower examples are organized around integrations and concepts:
| Category | Description |
|----------|-------------|
| [Using dltHub](./using-dlthub) | ELT pipelines with dlt to Snowflake and MotherDuck |
| [Working with Tables](./tables) | Reading, writing, and maintaining Apache Iceberg tables |
| [Working with Models](./models) | LLM inference with ollama, Hugging Face Hub, and Together.ai |
| [Orchestration](./orchestration) | Scheduling and coordinating app runs |
| [Deploying Agentic Flows](./agents) | AI agents that use Tower apps as tools |
| [Running dbt Core](./dbt) | dbt Core projects with remote seed hydration |
| [End-to-End Demo](./end-to-end-demo) | Complete data platform with ingestion, transformation, and analytics |
### Orbita Supply Co. Demo
For a comprehensive example of a production-style data platform, see the [End-to-End Demo](./end-to-end-demo). The [tower-demo](https://github.com/tower/tower-demo) repository showcases **20+ Tower apps** working together to power a fictional retail company's data infrastructure, including:
- **Ingestion** from Shopify, IoT sensors, and operational systems
- **Transformation** with dbt and Tower
- **Analytics dashboards** with Marimo notebooks
- **AI automation** with Claude for insights and anomaly detection
### Ticker Data Project
Several examples form a cohesive **ticker data project** that demonstrates how Tower apps can work together:
- **[05-write-ticker-data-to-iceberg](https://github.com/tower/tower-examples/tree/main/05-write-ticker-data-to-iceberg)** — Acquires daily stock ticker data from Yahoo Finance
- **[06-analyze-ticker-data-in-iceberg](https://github.com/tower/tower-examples/tree/main/06-analyze-ticker-data-in-iceberg)** — Creates buy/sell recommendations using LLMs
- **[08-fan-out-ticker-runs](https://github.com/tower/tower-examples/tree/main/08-fan-out-ticker-runs)** — Orchestrates parallel data downloads
- **[11-trim-ticker-table](https://github.com/tower/tower-examples/tree/main/11-trim-ticker-table)** — Maintains a rolling window by deleting old data
- **[13-ticker-update-agent](https://github.com/tower/tower-examples/tree/main/13-ticker-update-agent)** — AI agent that answers stock price questions using cached data
## Hello, World!
The [Hello World](https://github.com/tower/tower-examples/tree/main/01-hello-world) example is a minimal Tower app that prints a greeting message. It demonstrates how to use Tower app parameters to customize behavior at runtime.
---
## Working with Models
Tower provides flexible options for running LLM inference, supporting both local development with free inference and production deployments with serverless providers.
## Analyzing GitHub Issues with LLMs
This [example](https://github.com/tower/tower-examples/tree/main/07-deepseek-summarize-github) demonstrates how to acquire data from external data sources and feed it into language models to extract insights. The pipeline:
1. Fetches a GitHub issue and its comments using the GitHub API
2. Formats the thread as a conversation
3. Sends it to DeepSeek R1 for analysis and recommendations
4. Writes the results to an Iceberg table
**Inference options:**
- **Local development**: Use [ollama](https://ollama.com/) for free local inference on your GPU
- **Production**: Use serverless inference via Hugging Face Hub (e.g., Together.ai)
**Highlights**: ollama, DeepSeek R1, Hugging Face Hub, Together.ai, GitHub API, Iceberg
---
## Orchestration
Tower provides orchestration capabilities for scheduling and coordinating app runs.
## Fan-Out Pattern: Parallel Runs
This [example](https://github.com/tower/tower-examples/tree/main/08-fan-out-ticker-runs) demonstrates Tower's `run` and `wait` orchestration capabilities. It downloads data for multiple tickers by launching parallel runs of the `write-ticker-data-to-iceberg` app, each with different parameters.
The app is idempotent and designed to run on a daily schedule.
**Highlights**: `tower.run()`, `tower.wait()`, parallel execution, app dependencies
## Scheduling Apps
Many Tower apps support scheduling via the Tower CLI. For instance, the [write-ticker-data-to-iceberg](https://github.com/tower/tower-examples/tree/main/05-write-ticker-data-to-iceberg) app can be scheduled to run daily:
```bash
tower schedules create --app=write-ticker-data-to-iceberg --cron="0 9 * * *"
```
You can also create schedules with custom parameters:
```bash
tower schedules create --app=write-ticker-data-to-iceberg --cron="0 9 * * *" \
--parameter=TICKERS="MSFT,AAPL,GOOGL"
```
---
## Working with Tables
Tower integrates with Apache Iceberg for lakehouse storage. These examples demonstrate reading, writing, and maintaining Iceberg tables.
## Writing to an Iceberg Table
This [example](https://github.com/tower/tower-examples/tree/main/05-write-ticker-data-to-iceberg) downloads stock ticker data from Yahoo Finance and writes it to an Iceberg table. The pipeline uses **upsert** for idempotency—you can safely re-run without creating duplicates.
**Highlights**: Iceberg, PyArrow, yfinance, upsert
## Analyzing Data in an Iceberg Table
This [example](https://github.com/tower/tower-examples/tree/main/06-analyze-ticker-data-in-iceberg) reads ticker data from Iceberg, computes 7-day and 30-day moving averages plus volatility using Polars, and uses DeepSeek R1 to generate buy/sell/hold recommendations.
**Highlights**: Iceberg, Polars, Hugging Face Hub, DeepSeek R1
## Deleting Iceberg Table Records
This [example](https://github.com/tower/tower-examples/tree/main/11-trim-ticker-table) maintains a rolling window of data by removing records older than a specified time window. The app is idempotent and designed to run on a daily schedule alongside the write app.
**Highlights**: Iceberg delete operations, scheduling, data retention
---
## Using dltHub
Tower can run [dltHub](https://dlthub.com) pipelines with integrated secrets management. Tower integrates directly with dlt's configuration system, making it easy to manage credentials securely.
## S3 to Snowflake Pipeline
This [example](https://github.com/tower/tower-examples/tree/main/02-dlthub-s3-to-snowflake) implements a typical ELT pipeline. It reads CSV files from S3 and loads them into Snowflake, with support for replace, merge, and append write modes.
**Highlights**: dlt, S3 filesystem source, Snowflake destination
## S3 to MotherDuck Pipeline
This [example](https://github.com/tower/tower-examples/tree/main/03-dlthub-s3-to-motherduck) loads CSV files from S3 into [MotherDuck](https://motherduck.com/), a serverless analytics platform built on DuckDB. MotherDuck provides a powerful cloud-based SQL analytics experience with a free tier.
**Highlights**: dlt, S3 filesystem source, MotherDuck destination, DuckDB
---
## Download the CLI
The Tower command line interface (CLI) offers commonly used commands to create, manage and run your apps in Tower. It can be installed from `pip` as well as from packages on our [releases page](https://github.com/tower/tower-cli/releases/latest). It also includes the [Tower MCP server](/docs/getting-started/quickstart-with-mcp).
## Install from `pip`
You can get the latest version of the Tower CLI using pip.
```bash
pip install -U tower
```
## Other platforms
You can visit our [releases page](https://github.com/tower/tower-cli/releases/latest) to find packages for Linux, Windows, and MacOS.
---
## Quickstart
This guide will get you up and running using Tower quickly. It uses the publicly available Tower examples as a starting point, and should show you everything you need to know to execute your first app on Tower.
## 1: Create a Tower account
Visit [the Tower Registration](https://app.tower.dev/register) page to create a new Tower account, if you haven’t already.
## 2: Install the Tower CLI
The Tower command line interface (CLI) is one of the two main ways that you interact with the Tower system (the other one is the [Tower UI](https://app.tower.dev)). The CLI includes the [Tower MCP server](/docs/getting-started/quickstart-with-mcp). You can install the latest version of the CLI via the following command.
```bash
pip install -U tower
```
You can find other ways to install the Tower CLI in [our documentation](/docs/getting-started/download-the-cli.md).
## 3: Clone the tower-examples repository
You can go to [find the repository in Github](https://github.com/tower/tower-examples), which includes instructions on how to download it. Otherwise, simply run the following command to create a clone of the repository.
```bash
git clone https://github.com/tower/tower-examples
```
For this quick start guide, we’ll focus on the hello-world example in the examples repository.
## 4: Login to Tower
To start using Tower, you need to create a session in the CLI. You can use the tower login command in your CLI to log in. This will open a browser window that helps you with the login process.
```bash
tower login
```
```bash
_____ _____ _____ ___
|_ _/ _ \ \ / / __| _ \
| || (_) \ \/\/ /| _|| /
|_| \___/ \_/\_/ |___|_|_\
⠋ Waiting for login...
```
In the browser enter your Tower credentials or use a social login.

Sometimes a link will be displayed instead of the window opening directly, which you can just copy and paste into your browser.
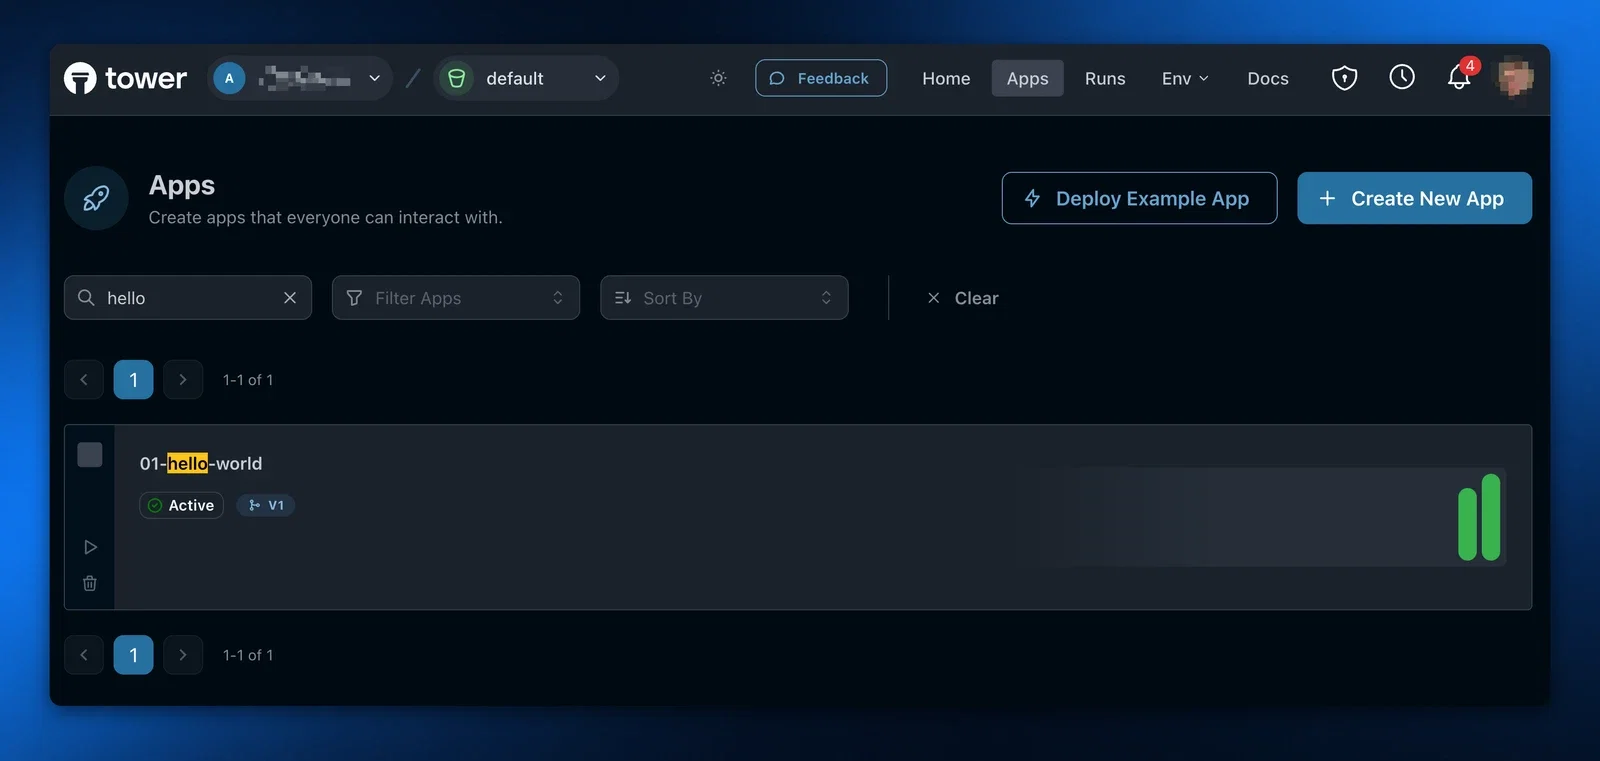
## 5: Create a hello-world example app
The examples repository you just cloned includes a simple “Hello, world!” example in the directory 01-hello-world. We’ll use that as the basis for getting started. You’ll need to create an app in your account, though, which Tower will use for executing the example.
You can create an app from the CLI using the following command.
```bash
tower apps create --name="hello-world"
```
If you look at the Towerfile in 01-hello-world, you’ll see that the name corresponds to the name of the app you just created. Whenever you’re executing the CLI inside a directory with a Towerfile, the Tower CLI will automatically infer the name from the context.
```bash
cd ./01-hello-world
cat Towerfile
```
```bash
[app]
name = "hello-world"
script = "./task.py"
source = [
"./task.py",
]
[[parameters]]
name = "friend"
description = "Someone that is close to you."
default = "Steve"
[[parameters]]
name = "foe"
description = "Something that you'd prefer to avoid."
default = "Carl"
```
Another thing to note is that the Towerfile includes a parameters section. This is where you can define parameters that can be used in your Tower application.
## 6: Deploy your app to Tower
Now that you’ve created the app in Tower, you need to deploy the code for the app to Tower. You can use the tower apps deploy command to do this. Just navigate to the directory in the cloned repository and run tower apps deploy.
```bash
cd ./01-hello-world
ls
```
```bash
Towerfile task.py
```
```bash
tower deploy
```
```bash
✔ Building package... Done!
Deploying to Tower... [00:00:00] [████████████████████████████████████████] 3.00 KiB/3.00 KiB (0s)
Success! Version `v1` of your code has been deployed to Tower!
```
The Tower CLI uses the Towerfile to determine what source code should be packaged for deployment. You can find a complete reference for the Towerfile fields in our documentation [here](/docs/reference/towerfile.md).
:::info
All of the code that you deploy to Tower is encrypted. The only place that the code is ever decrypted is in the Tower runner. This means that Tower employees and administrators cannot ever read your code!
:::
In the [Tower UI](https://app.tower.dev) (> **Apps**) you can see the deployed version of your app.
## 7: Run your new app
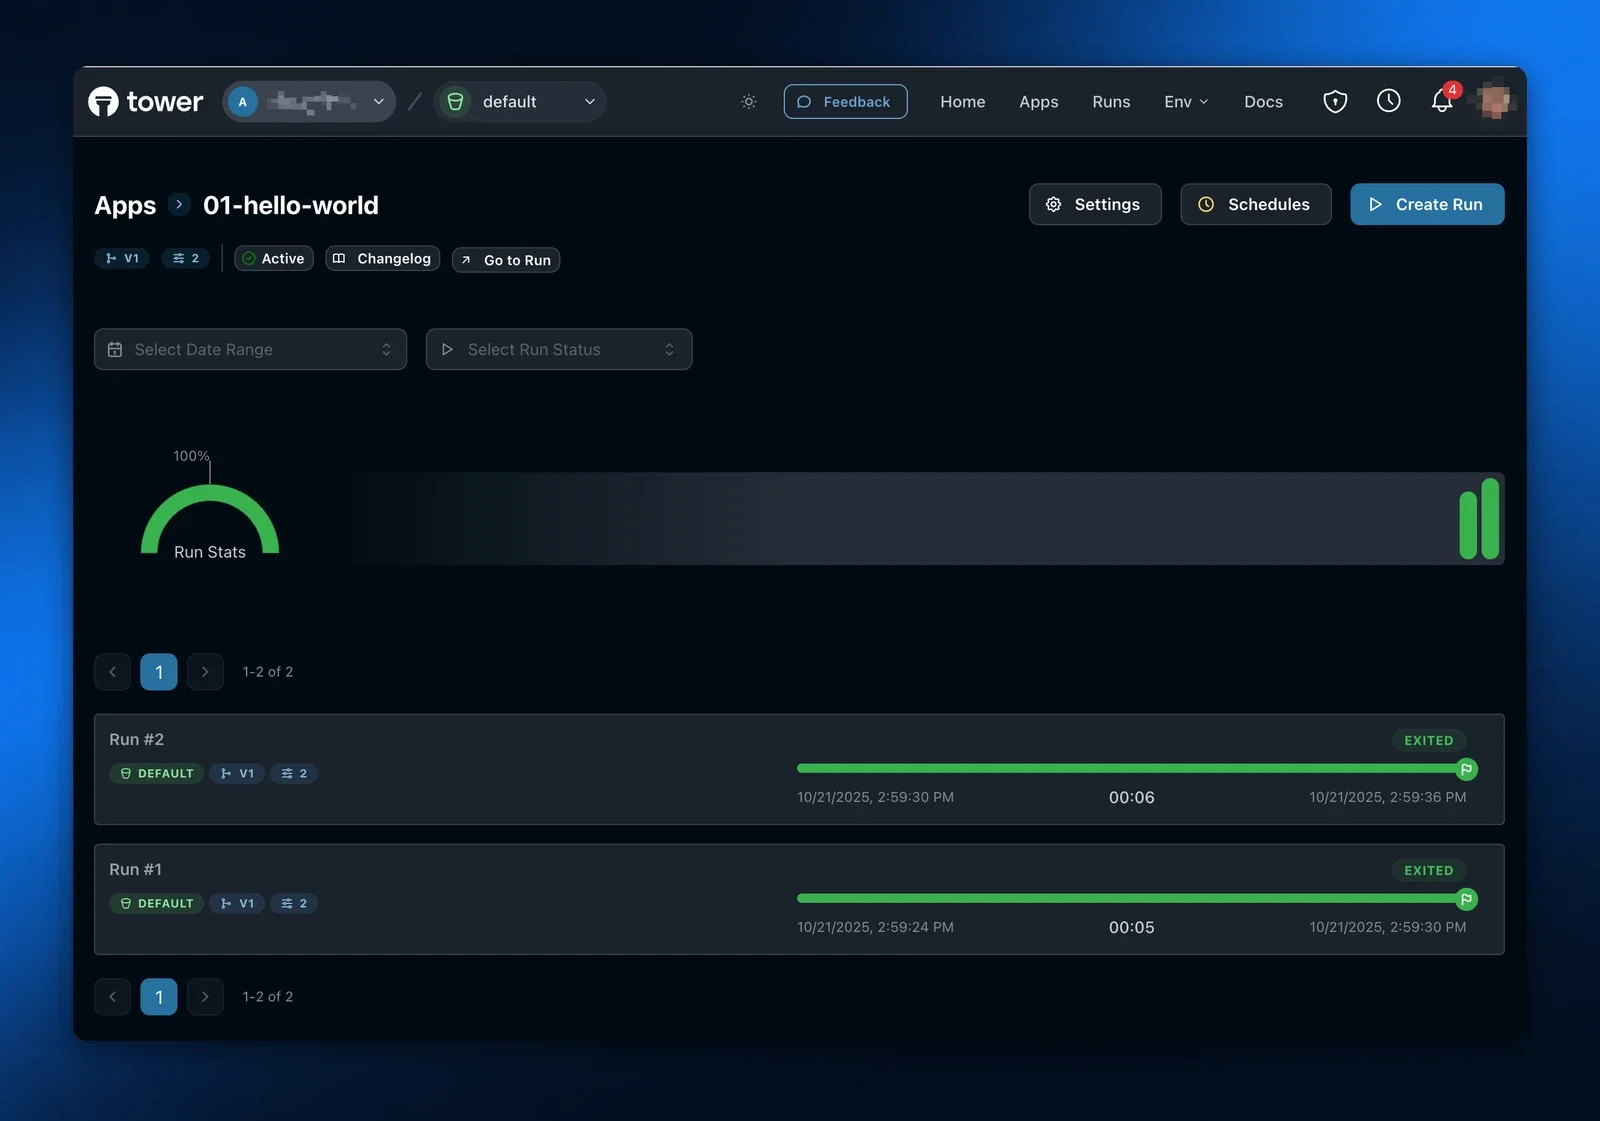
Now that you've deployed your code, you can use the tower run command to execute the application. Tower will create a new runner in the Tower infrastructure, download the latest verison of the code to the runner, and execute the application.
```bash
tower run
```
```bash
✔ Scheduling run... Done!
Success! Run #1 for app `hello-world` has been scheduled
```
You can check on the status of your run using tower apps show. Again, if you do so from a directory with a Towerfile in it, the name of the app is inferred from the Towerfile. You can specify an explicit app name, for example tower apps show hello-world.
```bash
tower apps show hello-world
```
```bash
Name: hello-world
Description:
Recent runs:
# Status Start Time Elapsed Time
----------------------------------------------
2 exited 2025-02-18 15:23:50 5s
1 exited 2025-02-18 15:22:15 5s
```
Each run gets an automatically incrementing run number. In the above example, we've invoked the hello-world app twice so the run number is 2. The run will be complete when the Status field is “exited.” If something goes wrong during the run, the Status field will be “errored.”
In the [Tower UI](https://app.tower.dev) (> **Apps** > hello-world) you can also see all the information about the hello-world app, including all its runs.
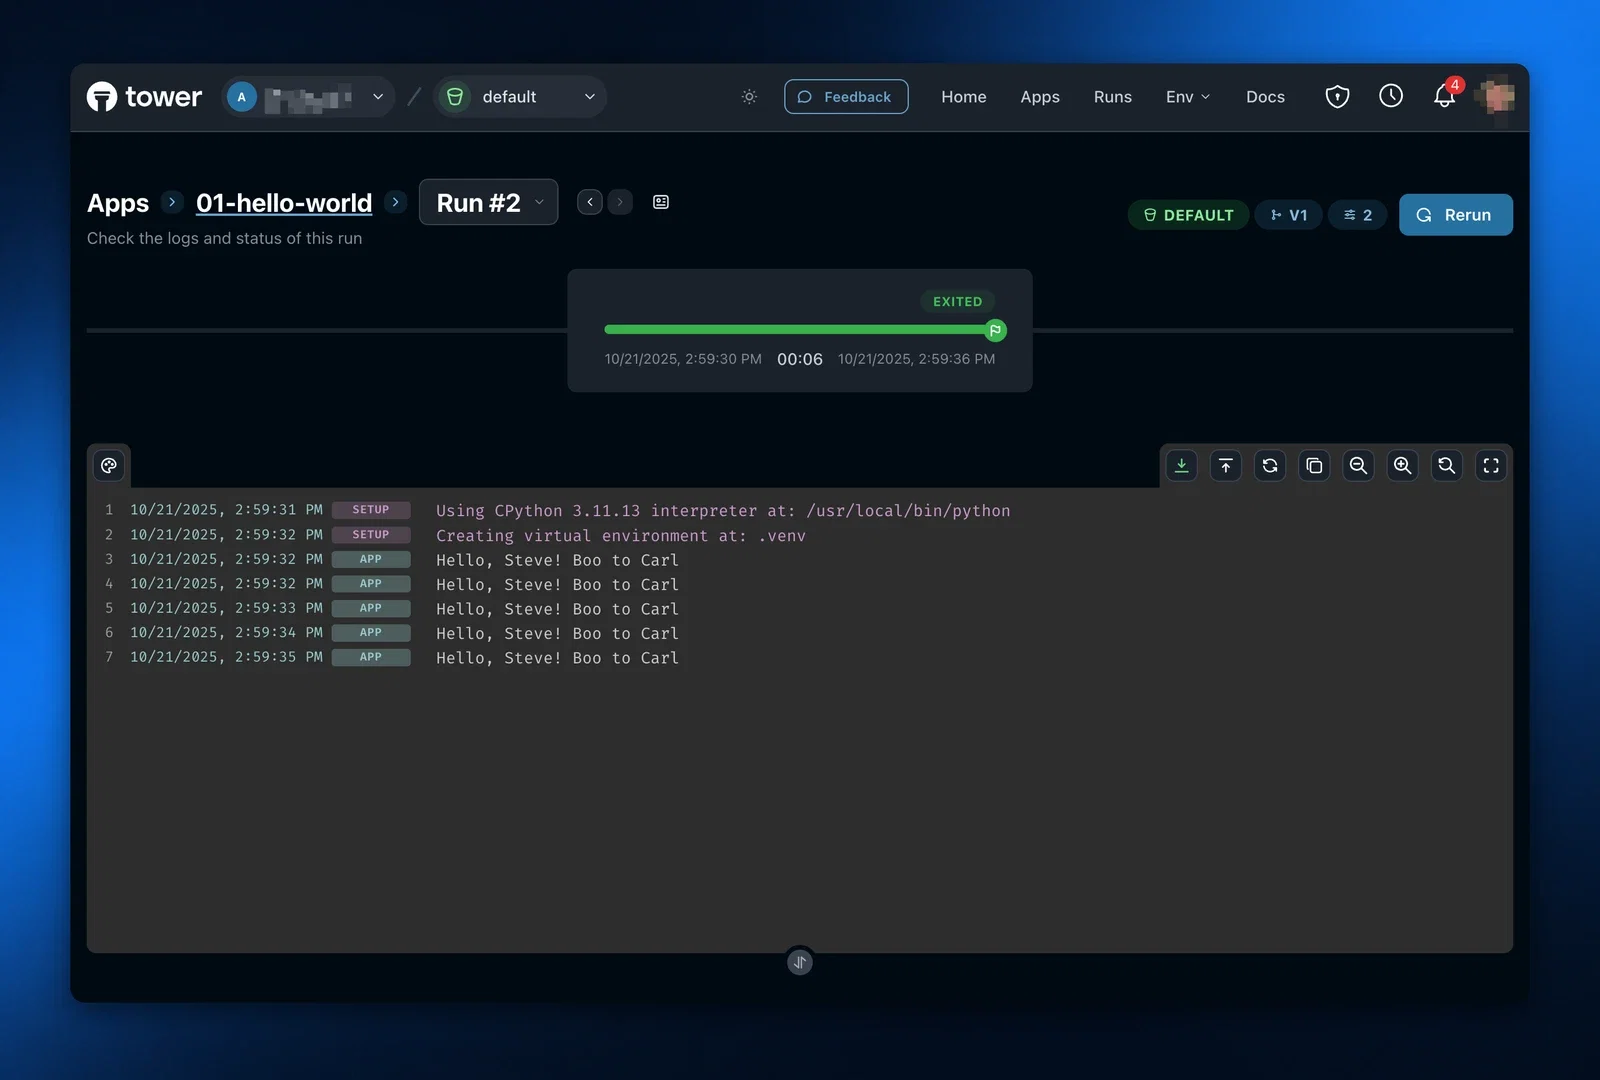
Once the run has exited, you can get the logs from the run using tower apps logs and by supplying the app name and the run number. You have to explicitly specify a run number in this case, therefor inference the app name from a local Towerfile doesn’t work with this command!
```bash
tower apps logs hello-world#2
```
```bash
✔ Fetching logs... Done!
2025-02-18 15:23:50 | Hello, Steve! Boo to Carl
2025-02-18 15:23:51 | Hello, Steve! Boo to Carl
2025-02-18 15:23:52 | Hello, Steve! Boo to Carl
2025-02-18 15:23:53 | Hello, Steve! Boo to Carl
2025-02-18 15:23:54 | Hello, Steve! Boo to Carl
```
You can also see run logs, updated in near real-time, in the [Tower UI](https://app.tower.dev) (> **Apps** > hello-world > Run #2).
And that's it! Now you have a working Tower application.
---
## Quickstart with MCP
Use the Tower MCP Server with AI coding assistants like Claude Code to build, deploy, and manage Tower apps through natural language conversations. The Tower MCP server gives your AI assistant direct access to Tower's functionality, enabling it to create apps, deploy code, and run tasks on your behalf.
## Prerequisites
1. **Tower CLI** - Install with `pip install tower`
2. **Tower account** - [Sign up at app.tower.dev](https://app.tower.dev/register)
3. **AI coding assistant** - Claude Code, Cline, or any MCP-compatible client
4. **Active session** - Run `tower login` to authenticate
## Setup
Run this command in terminal to add the tower mcp server
```bash
claude mcp add tower tower mcp-server
```
The Tower MCP server uses *stdio* transport, which means your AI tool automatically spawns and manages the Tower MCP server process - no manual setup or background processes required.
Clone the [Tower examples repository](https://github.com/tower/tower-examples) to get started with pre-built examples and let Claude learn from them:
```bash
git clone https://github.com/tower/tower-examples
```
Start a Claude session in this directory:
```bash
cd tower-examples
claude
```
Educate Claude on how Tower works and type in the Claude session:
```
Read about Tower at https://docs.tower.dev/llms-full.txt
```
## Using Tower with your AI assistant
Once configured, you can have natural conversations with your AI assistant to build Tower apps. You can ask Claude to work with any of the examples or create new Tower apps.
### Create a simple app
Use this or similar prompt:
```
Create a Python app that fetches data from an API and prints a summary.
Store all app artifacts in a new directory. Use Tower to deploy and run it.
The app should:
- Accept a URL parameter
- Fetch JSON data from that URL
- Print a nicely formatted summary
```
### Deploy and test
Use this or similar prompt:
```
Deploy this app to Tower and run it with a test URL
```
:::tip Parameter syntax
If Claude has trouble passing parameters to Tower apps, remind it:
```
When running from the app directory, use tower run --parameter=... without the app name.
The parameter format requires "=" after --parameter, e.g. tower run --parameter=par1=val1
```
:::
### Add parameters and secrets
Use this or similar prompt:
```
Modify the app to accept an API key as a secret and a "location" parameter.
Deploy and test it.
```
### Schedule the app
Use this or similar prompt:
```
Create a schedule for this app to run every day at 8am with the location set to "London"
```
That's all! You now have a data retieval job that runs in the Tower cloud on a daily schedule!
## What the MCP server provides
Your AI assistant gains access to these Tower capabilities:
- **App Management** - Create, deploy, and manage Tower apps
- **Run Execution** - Run apps locally or remotely on Tower infrastructure
- **Parameters** - Configure app parameters for different scenarios
- **Secrets** - Securely manage API keys and credentials
- **Schedules** - Set up automated runs with cron expressions
- **Logs** - View and debug app execution logs
- **Documentation** - Access Tower docs directly when needed
## Tips for effective use
1. **Be specific in prompts** - Use bullet points to clearly outline what you want
2. **Start simple** - Begin with basic functionality, then add complexity
3. **Ask for simplification** - If code looks too complex, ask the AI to simplify it
4. **Verify outputs** - Always double-check that generated code works as expected
5. **Iterate** - Use the AI's ability to deploy and test to refine your app
## Example workflow
Here's a typical development flow:
1. **Describe your app** - Tell the AI what you want to build
2. **Review & simplify** - Check the generated code and ask for simplification if needed
3. **Deploy** - Let the AI deploy the app to Tower
4. **Test** - Run the app and verify the results
5. **Refine** - Make adjustments based on the output
6. **Automate** - Add parameters, secrets, and schedules as needed
## Troubleshooting
### "Not authenticated" errors
Make sure you've run `tower login` before starting your AI client with the MCP server configured.
### AI not using MCP tools
Try explicitly mentioning Tower in your prompt: "Use Tower to deploy this app" or "Use the Tower MCP server to..."
### Server connection issues
Restart your AI client after making configuration changes to ensure the MCP server is properly initialized.
## Next steps
- Review the [MCP Server Reference](/docs/reference/mcp-server) for all available tools and configuration options
- Explore [Tower concepts](/docs/concepts/apps) to understand apps, runs, and schedules
- Learn about [parameters](/docs/concepts/apps#parameters) and [secrets](/docs/concepts/environments#secrets) for configuring apps
Happy building with AI!
---
## Introduction(Docs)
Tower is a **Python-native data flow orchestrator** for pipelines, agents, and data applications-with optional Iceberg-based lakehouse data management. Tower is designed for internal and consulting data + AI teams and SaaS providers who need a multi-tenant platform to run, secure, and operate workloads.
## Who Tower is For
- **Data teams** building internal data + AI platforms
- **Data + AI consultancies** deploying solutions across clients
- **SaaS builders** who need data processing or AI inference
## What You Can Orchestrate
Tower orchestrates a wide range of Python workloads:
- ETL / ELT pipelines
- Data transformations
- Batch inference jobs
- Web scraping workflows
- AI agents
- Scheduled jobs
- Interactive applications (notebooks)
- API services (FastAPI, etc.)
## Core Capabilities
### 🚀 Python-Native Flow Orchestration
Deploy any Python code with a simple `Towerfile`-no infrastructure configuration required. Tower handles packaging, deployment, scheduling, and execution.
### ⚡ Flexible Compute Options
Choose how and where your workloads run:
- **Tower Cloud (Serverless)**: Fully managed by Tower with automatic scaling-no infrastructure management required
- **Self-Hosted Runner**: Run on your own infrastructure (Linux, macOS, Windows, Docker) for data security, compliance, or cost control
### 🏗️ Multi-Tenant Control Plane
Built-in APIs for operating production workloads at scale:
- App lifecycle management (deploy, run, monitor)
- Environment isolation (dev / staging / prod)
- Team and organization management
- User access control
- Secrets and credentials management
- Customer / tenant separation
### 📊 Iceberg-Based Analytical Storage (Optional)
Manage lakehouse storage with Apache Iceberg:
- Iceberg REST catalog integration
- Data ingestion pipelines
- Table maintenance automation
- Works with Snowflake, Spark, and other modern query engines
## Architecture
Tower separates the **control plane** (UI, APIs, monitoring) from the **data plane** (secure execution via Tower Runner). Your code is encrypted at rest and only decrypted in the runner environment.
## Get Started
Ready to deploy your first app? Head to the [Quickstart](/docs/getting-started/quick-start) guide.
Want to use Claude Code or other AI code assistants? Start with our [MCP Quickstart](/docs/getting-started/quickstart-with-mcp) guide.
---
## Acknowledge alert
import MethodEndpoint from "@theme/ApiExplorer/MethodEndpoint";
import ParamsDetails from "@theme/ParamsDetails";
import RequestSchema from "@theme/RequestSchema";
import StatusCodes from "@theme/StatusCodes";
import OperationTabs from "@theme/OperationTabs";
import TabItem from "@theme/TabItem";
import Heading from "@theme/Heading";
import Translate from "@docusaurus/Translate";
Mark an alert as acknowledged
Request
---
## Acknowledge all alerts
import MethodEndpoint from "@theme/ApiExplorer/MethodEndpoint";
import ParamsDetails from "@theme/ParamsDetails";
import RequestSchema from "@theme/RequestSchema";
import StatusCodes from "@theme/StatusCodes";
import OperationTabs from "@theme/OperationTabs";
import TabItem from "@theme/TabItem";
import Heading from "@theme/Heading";
import Translate from "@docusaurus/Translate";
Mark all unacknowledged alerts as acknowledged for the current user in the current account
---
## Activate multiple schedules
import MethodEndpoint from "@theme/ApiExplorer/MethodEndpoint";
import ParamsDetails from "@theme/ParamsDetails";
import RequestSchema from "@theme/RequestSchema";
import StatusCodes from "@theme/StatusCodes";
import OperationTabs from "@theme/OperationTabs";
import TabItem from "@theme/TabItem";
import Heading from "@theme/Heading";
import Translate from "@docusaurus/Translate";
Activate multiple schedules to enable their execution.
Request
---
## Cancel run
import MethodEndpoint from "@theme/ApiExplorer/MethodEndpoint";
import ParamsDetails from "@theme/ParamsDetails";
import RequestSchema from "@theme/RequestSchema";
import StatusCodes from "@theme/StatusCodes";
import OperationTabs from "@theme/OperationTabs";
import TabItem from "@theme/TabItem";
import Heading from "@theme/Heading";
import Translate from "@docusaurus/Translate";
Cancel a run
Request
---
## Check webhook
import MethodEndpoint from "@theme/ApiExplorer/MethodEndpoint";
import ParamsDetails from "@theme/ParamsDetails";
import RequestSchema from "@theme/RequestSchema";
import StatusCodes from "@theme/StatusCodes";
import OperationTabs from "@theme/OperationTabs";
import TabItem from "@theme/TabItem";
import Heading from "@theme/Heading";
import Translate from "@docusaurus/Translate";
Check webhook
Request
---
## Claim a device login ticket
import MethodEndpoint from "@theme/ApiExplorer/MethodEndpoint";
import ParamsDetails from "@theme/ParamsDetails";
import RequestSchema from "@theme/RequestSchema";
import StatusCodes from "@theme/StatusCodes";
import OperationTabs from "@theme/OperationTabs";
import TabItem from "@theme/TabItem";
import Heading from "@theme/Heading";
import Translate from "@docusaurus/Translate";
Claims a device login ticket code for the authenticated user.
Request
---
## Create account
import MethodEndpoint from "@theme/ApiExplorer/MethodEndpoint";
import ParamsDetails from "@theme/ParamsDetails";
import RequestSchema from "@theme/RequestSchema";
import StatusCodes from "@theme/StatusCodes";
import OperationTabs from "@theme/OperationTabs";
import TabItem from "@theme/TabItem";
import Heading from "@theme/Heading";
import Translate from "@docusaurus/Translate";
This is the primary way that users register new accounts with Tower.
Request
---
## Create API Key
import MethodEndpoint from "@theme/ApiExplorer/MethodEndpoint";
import ParamsDetails from "@theme/ParamsDetails";
import RequestSchema from "@theme/RequestSchema";
import StatusCodes from "@theme/StatusCodes";
import OperationTabs from "@theme/OperationTabs";
import TabItem from "@theme/TabItem";
import Heading from "@theme/Heading";
import Translate from "@docusaurus/Translate";
Create API Key
Request
---
## Create app
import MethodEndpoint from "@theme/ApiExplorer/MethodEndpoint";
import ParamsDetails from "@theme/ParamsDetails";
import RequestSchema from "@theme/RequestSchema";
import StatusCodes from "@theme/StatusCodes";
import OperationTabs from "@theme/OperationTabs";
import TabItem from "@theme/TabItem";
import Heading from "@theme/Heading";
import Translate from "@docusaurus/Translate";
Create a new app in the current account.
Request
---
## Create catalog
import MethodEndpoint from "@theme/ApiExplorer/MethodEndpoint";
import ParamsDetails from "@theme/ParamsDetails";
import RequestSchema from "@theme/RequestSchema";
import StatusCodes from "@theme/StatusCodes";
import OperationTabs from "@theme/OperationTabs";
import TabItem from "@theme/TabItem";
import Heading from "@theme/Heading";
import Translate from "@docusaurus/Translate";
Create a new catalog object in the currently authenticated account.
Request
---
## Create device login ticket
import MethodEndpoint from "@theme/ApiExplorer/MethodEndpoint";
import ParamsDetails from "@theme/ParamsDetails";
import RequestSchema from "@theme/RequestSchema";
import StatusCodes from "@theme/StatusCodes";
import OperationTabs from "@theme/OperationTabs";
import TabItem from "@theme/TabItem";
import Heading from "@theme/Heading";
import Translate from "@docusaurus/Translate";
Creates a new device login ticket and returns the codes and urls needed for authentication.
---
## Create environment
import MethodEndpoint from "@theme/ApiExplorer/MethodEndpoint";
import ParamsDetails from "@theme/ParamsDetails";
import RequestSchema from "@theme/RequestSchema";
import StatusCodes from "@theme/StatusCodes";
import OperationTabs from "@theme/OperationTabs";
import TabItem from "@theme/TabItem";
import Heading from "@theme/Heading";
import Translate from "@docusaurus/Translate";
Create a new environment for an app.
Request
---
## Create guest
import MethodEndpoint from "@theme/ApiExplorer/MethodEndpoint";
import ParamsDetails from "@theme/ParamsDetails";
import RequestSchema from "@theme/RequestSchema";
import StatusCodes from "@theme/StatusCodes";
import OperationTabs from "@theme/OperationTabs";
import TabItem from "@theme/TabItem";
import Heading from "@theme/Heading";
import Translate from "@docusaurus/Translate";
Creates a new guest with access to a specific externally accessible app and returns a login URL to share with them.
Request
---
## Create Tower-provided sandbox secrets
import MethodEndpoint from "@theme/ApiExplorer/MethodEndpoint";
import ParamsDetails from "@theme/ParamsDetails";
import RequestSchema from "@theme/RequestSchema";
import StatusCodes from "@theme/StatusCodes";
import OperationTabs from "@theme/OperationTabs";
import TabItem from "@theme/TabItem";
import Heading from "@theme/Heading";
import Translate from "@docusaurus/Translate";
Creates secrets with Tower-provided default values for the specified keys in the given environment.
Request
---
## Create schedule
import MethodEndpoint from "@theme/ApiExplorer/MethodEndpoint";
import ParamsDetails from "@theme/ParamsDetails";
import RequestSchema from "@theme/RequestSchema";
import StatusCodes from "@theme/StatusCodes";
import OperationTabs from "@theme/OperationTabs";
import TabItem from "@theme/TabItem";
import Heading from "@theme/Heading";
import Translate from "@docusaurus/Translate";
Create a new schedule for an app.
Request
---
## Create secret
import MethodEndpoint from "@theme/ApiExplorer/MethodEndpoint";
import ParamsDetails from "@theme/ParamsDetails";
import RequestSchema from "@theme/RequestSchema";
import StatusCodes from "@theme/StatusCodes";
import OperationTabs from "@theme/OperationTabs";
import TabItem from "@theme/TabItem";
import Heading from "@theme/Heading";
import Translate from "@docusaurus/Translate";
Creates a new secret and associates it with the current account.
Request
---
## Create API key for service account
import MethodEndpoint from "@theme/ApiExplorer/MethodEndpoint";
import ParamsDetails from "@theme/ParamsDetails";
import RequestSchema from "@theme/RequestSchema";
import StatusCodes from "@theme/StatusCodes";
import OperationTabs from "@theme/OperationTabs";
import TabItem from "@theme/TabItem";
import Heading from "@theme/Heading";
import Translate from "@docusaurus/Translate";
Mint a new API key bound to a service account. The full identifier is only returned on this response. Team admin only.
Request
---
## Create service account
import MethodEndpoint from "@theme/ApiExplorer/MethodEndpoint";
import ParamsDetails from "@theme/ParamsDetails";
import RequestSchema from "@theme/RequestSchema";
import StatusCodes from "@theme/StatusCodes";
import OperationTabs from "@theme/OperationTabs";
import TabItem from "@theme/TabItem";
import Heading from "@theme/Heading";
import Translate from "@docusaurus/Translate";
Create a new service account in the current account. Team admin only.
Request
---
## Create session
import MethodEndpoint from "@theme/ApiExplorer/MethodEndpoint";
import ParamsDetails from "@theme/ParamsDetails";
import RequestSchema from "@theme/RequestSchema";
import StatusCodes from "@theme/StatusCodes";
import OperationTabs from "@theme/OperationTabs";
import TabItem from "@theme/TabItem";
import Heading from "@theme/Heading";
import Translate from "@docusaurus/Translate";
Create a new session and return it.
Request
---
## Create team
import MethodEndpoint from "@theme/ApiExplorer/MethodEndpoint";
import ParamsDetails from "@theme/ParamsDetails";
import RequestSchema from "@theme/RequestSchema";
import StatusCodes from "@theme/StatusCodes";
import OperationTabs from "@theme/OperationTabs";
import TabItem from "@theme/TabItem";
import Heading from "@theme/Heading";
import Translate from "@docusaurus/Translate";
Create a new team
Request
---
## Create webhook
import MethodEndpoint from "@theme/ApiExplorer/MethodEndpoint";
import ParamsDetails from "@theme/ParamsDetails";
import RequestSchema from "@theme/RequestSchema";
import StatusCodes from "@theme/StatusCodes";
import OperationTabs from "@theme/OperationTabs";
import TabItem from "@theme/TabItem";
import Heading from "@theme/Heading";
import Translate from "@docusaurus/Translate";
Create webhook
Request
---
## Deactivate multiple schedules
import MethodEndpoint from "@theme/ApiExplorer/MethodEndpoint";
import ParamsDetails from "@theme/ParamsDetails";
import RequestSchema from "@theme/RequestSchema";
import StatusCodes from "@theme/StatusCodes";
import OperationTabs from "@theme/OperationTabs";
import TabItem from "@theme/TabItem";
import Heading from "@theme/Heading";
import Translate from "@docusaurus/Translate";
Deactivate multiple schedules to disable their execution.
Request
---
## Delete alert
import MethodEndpoint from "@theme/ApiExplorer/MethodEndpoint";
import ParamsDetails from "@theme/ParamsDetails";
import RequestSchema from "@theme/RequestSchema";
import StatusCodes from "@theme/StatusCodes";
import OperationTabs from "@theme/OperationTabs";
import TabItem from "@theme/TabItem";
import Heading from "@theme/Heading";
import Translate from "@docusaurus/Translate";
Permanently delete an alert
Request
---
## Delete API key
import MethodEndpoint from "@theme/ApiExplorer/MethodEndpoint";
import ParamsDetails from "@theme/ParamsDetails";
import RequestSchema from "@theme/RequestSchema";
import StatusCodes from "@theme/StatusCodes";
import OperationTabs from "@theme/OperationTabs";
import TabItem from "@theme/TabItem";
import Heading from "@theme/Heading";
import Translate from "@docusaurus/Translate";
Delete API key
Request
---
## Delete app
import MethodEndpoint from "@theme/ApiExplorer/MethodEndpoint";
import ParamsDetails from "@theme/ParamsDetails";
import RequestSchema from "@theme/RequestSchema";
import StatusCodes from "@theme/StatusCodes";
import OperationTabs from "@theme/OperationTabs";
import TabItem from "@theme/TabItem";
import Heading from "@theme/Heading";
import Translate from "@docusaurus/Translate";
Delete one of your apps, the associated code, and all the runs as well.
Request
---
## Delete catalog
import MethodEndpoint from "@theme/ApiExplorer/MethodEndpoint";
import ParamsDetails from "@theme/ParamsDetails";
import RequestSchema from "@theme/RequestSchema";
import StatusCodes from "@theme/StatusCodes";
import OperationTabs from "@theme/OperationTabs";
import TabItem from "@theme/TabItem";
import Heading from "@theme/Heading";
import Translate from "@docusaurus/Translate";
Delete a new catalog object in the currently authenticated account.
Request
---
## Delete environment
import MethodEndpoint from "@theme/ApiExplorer/MethodEndpoint";
import ParamsDetails from "@theme/ParamsDetails";
import RequestSchema from "@theme/RequestSchema";
import StatusCodes from "@theme/StatusCodes";
import OperationTabs from "@theme/OperationTabs";
import TabItem from "@theme/TabItem";
import Heading from "@theme/Heading";
import Translate from "@docusaurus/Translate";
Delete an environment by name
Request
---
## Delete guest
import MethodEndpoint from "@theme/ApiExplorer/MethodEndpoint";
import ParamsDetails from "@theme/ParamsDetails";
import RequestSchema from "@theme/RequestSchema";
import StatusCodes from "@theme/StatusCodes";
import OperationTabs from "@theme/OperationTabs";
import TabItem from "@theme/TabItem";
import Heading from "@theme/Heading";
import Translate from "@docusaurus/Translate";
Deletes a guest and revokes their access. Any active sessions will be invalidated.
Request
---
## Delete schedule
import MethodEndpoint from "@theme/ApiExplorer/MethodEndpoint";
import ParamsDetails from "@theme/ParamsDetails";
import RequestSchema from "@theme/RequestSchema";
import StatusCodes from "@theme/StatusCodes";
import OperationTabs from "@theme/OperationTabs";
import TabItem from "@theme/TabItem";
import Heading from "@theme/Heading";
import Translate from "@docusaurus/Translate";
Delete an existing schedule for an app.
Request
---
## Delete secret
import MethodEndpoint from "@theme/ApiExplorer/MethodEndpoint";
import ParamsDetails from "@theme/ParamsDetails";
import RequestSchema from "@theme/RequestSchema";
import StatusCodes from "@theme/StatusCodes";
import OperationTabs from "@theme/OperationTabs";
import TabItem from "@theme/TabItem";
import Heading from "@theme/Heading";
import Translate from "@docusaurus/Translate";
Delete a secret by name.
Request
---
## Delete API key for service account
import MethodEndpoint from "@theme/ApiExplorer/MethodEndpoint";
import ParamsDetails from "@theme/ParamsDetails";
import RequestSchema from "@theme/RequestSchema";
import StatusCodes from "@theme/StatusCodes";
import OperationTabs from "@theme/OperationTabs";
import TabItem from "@theme/TabItem";
import Heading from "@theme/Heading";
import Translate from "@docusaurus/Translate";
Revoke an API key bound to a service account. Team admin only.
Request
---
## Delete service account
import MethodEndpoint from "@theme/ApiExplorer/MethodEndpoint";
import ParamsDetails from "@theme/ParamsDetails";
import RequestSchema from "@theme/RequestSchema";
import StatusCodes from "@theme/StatusCodes";
import OperationTabs from "@theme/OperationTabs";
import TabItem from "@theme/TabItem";
import Heading from "@theme/Heading";
import Translate from "@docusaurus/Translate";
Tombstones a service account: revokes API keys, disables owned schedules, cancels in-flight runs, then soft-deletes the SA. Team admin only.
Request
---
## Delete session
import MethodEndpoint from "@theme/ApiExplorer/MethodEndpoint";
import ParamsDetails from "@theme/ParamsDetails";
import RequestSchema from "@theme/RequestSchema";
import StatusCodes from "@theme/StatusCodes";
import OperationTabs from "@theme/OperationTabs";
import TabItem from "@theme/TabItem";
import Heading from "@theme/Heading";
import Translate from "@docusaurus/Translate";
Terminate a session and revoke the access keys associated with it.
Request
---
## Delete team invitation
import MethodEndpoint from "@theme/ApiExplorer/MethodEndpoint";
import ParamsDetails from "@theme/ParamsDetails";
import RequestSchema from "@theme/RequestSchema";
import StatusCodes from "@theme/StatusCodes";
import OperationTabs from "@theme/OperationTabs";
import TabItem from "@theme/TabItem";
import Heading from "@theme/Heading";
import Translate from "@docusaurus/Translate";
Delete a pending team invitation that you have previously sent
Request
---
## Delete team
import MethodEndpoint from "@theme/ApiExplorer/MethodEndpoint";
import ParamsDetails from "@theme/ParamsDetails";
import RequestSchema from "@theme/RequestSchema";
import StatusCodes from "@theme/StatusCodes";
import OperationTabs from "@theme/OperationTabs";
import TabItem from "@theme/TabItem";
import Heading from "@theme/Heading";
import Translate from "@docusaurus/Translate";
Delete a new team
Request
---
## Delete webhook
import MethodEndpoint from "@theme/ApiExplorer/MethodEndpoint";
import ParamsDetails from "@theme/ParamsDetails";
import RequestSchema from "@theme/RequestSchema";
import StatusCodes from "@theme/StatusCodes";
import OperationTabs from "@theme/OperationTabs";
import TabItem from "@theme/TabItem";
import Heading from "@theme/Heading";
import Translate from "@docusaurus/Translate";
Delete webhook
Request
---
## Deploy app
import MethodEndpoint from "@theme/ApiExplorer/MethodEndpoint";
import ParamsDetails from "@theme/ParamsDetails";
import RequestSchema from "@theme/RequestSchema";
import StatusCodes from "@theme/StatusCodes";
import OperationTabs from "@theme/OperationTabs";
import TabItem from "@theme/TabItem";
import Heading from "@theme/Heading";
import Translate from "@docusaurus/Translate";
Deploy a new version of an app. Accepts either a TAR file upload (application/tar) or a JSON body with source_uri (application/json) for deploying from a GitHub repository.
Request
---
## Describe account
import MethodEndpoint from "@theme/ApiExplorer/MethodEndpoint";
import ParamsDetails from "@theme/ParamsDetails";
import RequestSchema from "@theme/RequestSchema";
import StatusCodes from "@theme/StatusCodes";
import OperationTabs from "@theme/OperationTabs";
import TabItem from "@theme/TabItem";
import Heading from "@theme/Heading";
import Translate from "@docusaurus/Translate";
Get information about a specific account by name.
Request
---
## Describe app version
import MethodEndpoint from "@theme/ApiExplorer/MethodEndpoint";
import ParamsDetails from "@theme/ParamsDetails";
import RequestSchema from "@theme/RequestSchema";
import StatusCodes from "@theme/StatusCodes";
import OperationTabs from "@theme/OperationTabs";
import TabItem from "@theme/TabItem";
import Heading from "@theme/Heading";
import Translate from "@docusaurus/Translate";
Describe an app version for an app in the current account.
Request
---
## Describe app
import MethodEndpoint from "@theme/ApiExplorer/MethodEndpoint";
import ParamsDetails from "@theme/ParamsDetails";
import RequestSchema from "@theme/RequestSchema";
import StatusCodes from "@theme/StatusCodes";
import OperationTabs from "@theme/OperationTabs";
import TabItem from "@theme/TabItem";
import Heading from "@theme/Heading";
import Translate from "@docusaurus/Translate";
Get all the runs for the current account.
Request
---
## Describe authentication context
import MethodEndpoint from "@theme/ApiExplorer/MethodEndpoint";
import ParamsDetails from "@theme/ParamsDetails";
import RequestSchema from "@theme/RequestSchema";
import StatusCodes from "@theme/StatusCodes";
import OperationTabs from "@theme/OperationTabs";
import TabItem from "@theme/TabItem";
import Heading from "@theme/Heading";
import Translate from "@docusaurus/Translate";
This API endpoint returns information about the current authentication context for the user that's used for various internal processes in Tower UI.
---
## Describe catalog
import MethodEndpoint from "@theme/ApiExplorer/MethodEndpoint";
import ParamsDetails from "@theme/ParamsDetails";
import RequestSchema from "@theme/RequestSchema";
import StatusCodes from "@theme/StatusCodes";
import OperationTabs from "@theme/OperationTabs";
import TabItem from "@theme/TabItem";
import Heading from "@theme/Heading";
import Translate from "@docusaurus/Translate";
Returns details for a specific catalog, including its property names and previews.
Request
---
## Describe default catalog
import MethodEndpoint from "@theme/ApiExplorer/MethodEndpoint";
import ParamsDetails from "@theme/ParamsDetails";
import RequestSchema from "@theme/RequestSchema";
import StatusCodes from "@theme/StatusCodes";
import OperationTabs from "@theme/OperationTabs";
import TabItem from "@theme/TabItem";
import Heading from "@theme/Heading";
import Translate from "@docusaurus/Translate";
Returns the team's default catalog, provisioning it lazily if it does not yet exist.
When two concurrent first calls race to provision the catalog, the loser receives 202 Accepted; retry after a few seconds and the catalog will be ready.
---
## Describe device login session
import MethodEndpoint from "@theme/ApiExplorer/MethodEndpoint";
import ParamsDetails from "@theme/ParamsDetails";
import RequestSchema from "@theme/RequestSchema";
import StatusCodes from "@theme/StatusCodes";
import OperationTabs from "@theme/OperationTabs";
import TabItem from "@theme/TabItem";
import Heading from "@theme/Heading";
import Translate from "@docusaurus/Translate";
Checks if a device login code has been claimed and returns the user session if so.
Request
---
## Describe email preferences
import MethodEndpoint from "@theme/ApiExplorer/MethodEndpoint";
import ParamsDetails from "@theme/ParamsDetails";
import RequestSchema from "@theme/RequestSchema";
import StatusCodes from "@theme/StatusCodes";
import OperationTabs from "@theme/OperationTabs";
import TabItem from "@theme/TabItem";
import Heading from "@theme/Heading";
import Translate from "@docusaurus/Translate";
Describes the current user's email preferences.
---
## Describe environment
import MethodEndpoint from "@theme/ApiExplorer/MethodEndpoint";
import ParamsDetails from "@theme/ParamsDetails";
import RequestSchema from "@theme/RequestSchema";
import StatusCodes from "@theme/StatusCodes";
import OperationTabs from "@theme/OperationTabs";
import TabItem from "@theme/TabItem";
import Heading from "@theme/Heading";
import Translate from "@docusaurus/Translate";
Describe an environment and counts of its resources
Request
---
## Describe organization usage
import MethodEndpoint from "@theme/ApiExplorer/MethodEndpoint";
import ParamsDetails from "@theme/ParamsDetails";
import RequestSchema from "@theme/RequestSchema";
import StatusCodes from "@theme/StatusCodes";
import OperationTabs from "@theme/OperationTabs";
import TabItem from "@theme/TabItem";
import Heading from "@theme/Heading";
import Translate from "@docusaurus/Translate";
Describe usage statistics for the user's organization for the current billing cycle.
---
## Describe plan
import MethodEndpoint from "@theme/ApiExplorer/MethodEndpoint";
import ParamsDetails from "@theme/ParamsDetails";
import RequestSchema from "@theme/RequestSchema";
import StatusCodes from "@theme/StatusCodes";
import OperationTabs from "@theme/OperationTabs";
import TabItem from "@theme/TabItem";
import Heading from "@theme/Heading";
import Translate from "@docusaurus/Translate";
Get the current plan for the account.
Request
---
## Describe run graph
import MethodEndpoint from "@theme/ApiExplorer/MethodEndpoint";
import ParamsDetails from "@theme/ParamsDetails";
import RequestSchema from "@theme/RequestSchema";
import StatusCodes from "@theme/StatusCodes";
import OperationTabs from "@theme/OperationTabs";
import TabItem from "@theme/TabItem";
import Heading from "@theme/Heading";
import Translate from "@docusaurus/Translate";
Describe the graph that a run belongs to.
Request
---
## Describe run logs
import MethodEndpoint from "@theme/ApiExplorer/MethodEndpoint";
import ParamsDetails from "@theme/ParamsDetails";
import RequestSchema from "@theme/RequestSchema";
import StatusCodes from "@theme/StatusCodes";
import OperationTabs from "@theme/OperationTabs";
import TabItem from "@theme/TabItem";
import Heading from "@theme/Heading";
import Translate from "@docusaurus/Translate";
Retrieves the logs associated with a particular run of an app.
Request
---
## Describe run
import MethodEndpoint from "@theme/ApiExplorer/MethodEndpoint";
import ParamsDetails from "@theme/ParamsDetails";
import RequestSchema from "@theme/RequestSchema";
import StatusCodes from "@theme/StatusCodes";
import OperationTabs from "@theme/OperationTabs";
import TabItem from "@theme/TabItem";
import Heading from "@theme/Heading";
import Translate from "@docusaurus/Translate";
Describe a run of an app.
Request
---
## Describe encryption key
import MethodEndpoint from "@theme/ApiExplorer/MethodEndpoint";
import ParamsDetails from "@theme/ParamsDetails";
import RequestSchema from "@theme/RequestSchema";
import StatusCodes from "@theme/StatusCodes";
import OperationTabs from "@theme/OperationTabs";
import TabItem from "@theme/TabItem";
import Heading from "@theme/Heading";
import Translate from "@docusaurus/Translate";
Gets the encryption key used for encrypting secrets that you want to create in Tower.
Request
---
## Describe service account
import MethodEndpoint from "@theme/ApiExplorer/MethodEndpoint";
import ParamsDetails from "@theme/ParamsDetails";
import RequestSchema from "@theme/RequestSchema";
import StatusCodes from "@theme/StatusCodes";
import OperationTabs from "@theme/OperationTabs";
import TabItem from "@theme/TabItem";
import Heading from "@theme/Heading";
import Translate from "@docusaurus/Translate";
Fetch a single service account by ID or name. Team admin only.
Request
---
## Describe session
import MethodEndpoint from "@theme/ApiExplorer/MethodEndpoint";
import ParamsDetails from "@theme/ParamsDetails";
import RequestSchema from "@theme/RequestSchema";
import StatusCodes from "@theme/StatusCodes";
import OperationTabs from "@theme/OperationTabs";
import TabItem from "@theme/TabItem";
import Heading from "@theme/Heading";
import Translate from "@docusaurus/Translate";
Validate your current session and return the user information associated with the session.
---
## Describe team
import MethodEndpoint from "@theme/ApiExplorer/MethodEndpoint";
import ParamsDetails from "@theme/ParamsDetails";
import RequestSchema from "@theme/RequestSchema";
import StatusCodes from "@theme/StatusCodes";
import OperationTabs from "@theme/OperationTabs";
import TabItem from "@theme/TabItem";
import Heading from "@theme/Heading";
import Translate from "@docusaurus/Translate";
Get details about a team, including its members and invitations.
Request
---
## Describe webhook
import MethodEndpoint from "@theme/ApiExplorer/MethodEndpoint";
import ParamsDetails from "@theme/ParamsDetails";
import RequestSchema from "@theme/RequestSchema";
import StatusCodes from "@theme/StatusCodes";
import OperationTabs from "@theme/OperationTabs";
import TabItem from "@theme/TabItem";
import Heading from "@theme/Heading";
import Translate from "@docusaurus/Translate";
Describe webhook
Request
---
## Describe whoami
import MethodEndpoint from "@theme/ApiExplorer/MethodEndpoint";
import ParamsDetails from "@theme/ParamsDetails";
import RequestSchema from "@theme/RequestSchema";
import StatusCodes from "@theme/StatusCodes";
import OperationTabs from "@theme/OperationTabs";
import TabItem from "@theme/TabItem";
import Heading from "@theme/Heading";
import Translate from "@docusaurus/Translate";
Returns an RS256-signed identity JWT for the authenticated user. The token's signature can be verified using the public keys served at /.well-known/jwks.json. Intended for downstream consumers (e.g. Convex) that need a verifiable user identity.
---
## Export catalogs
import MethodEndpoint from "@theme/ApiExplorer/MethodEndpoint";
import ParamsDetails from "@theme/ParamsDetails";
import RequestSchema from "@theme/RequestSchema";
import StatusCodes from "@theme/StatusCodes";
import OperationTabs from "@theme/OperationTabs";
import TabItem from "@theme/TabItem";
import Heading from "@theme/Heading";
import Translate from "@docusaurus/Translate";
Lists all the catalogs in your current account and re-encrypt them with the public key you supplied.
Request
---
## Export secrets
import MethodEndpoint from "@theme/ApiExplorer/MethodEndpoint";
import ParamsDetails from "@theme/ParamsDetails";
import RequestSchema from "@theme/RequestSchema";
import StatusCodes from "@theme/StatusCodes";
import OperationTabs from "@theme/OperationTabs";
import TabItem from "@theme/TabItem";
import Heading from "@theme/Heading";
import Translate from "@docusaurus/Translate";
Lists all the secrets in your current account and re-encrypt them with the public key you supplied.
Request
---
## Generate app statistics
import MethodEndpoint from "@theme/ApiExplorer/MethodEndpoint";
import ParamsDetails from "@theme/ParamsDetails";
import RequestSchema from "@theme/RequestSchema";
import StatusCodes from "@theme/StatusCodes";
import OperationTabs from "@theme/OperationTabs";
import TabItem from "@theme/TabItem";
import Heading from "@theme/Heading";
import Translate from "@docusaurus/Translate";
Generates current statistics about apps
Request
---
## Generate organization usage
import MethodEndpoint from "@theme/ApiExplorer/MethodEndpoint";
import ParamsDetails from "@theme/ParamsDetails";
import RequestSchema from "@theme/RequestSchema";
import StatusCodes from "@theme/StatusCodes";
import OperationTabs from "@theme/OperationTabs";
import TabItem from "@theme/TabItem";
import Heading from "@theme/Heading";
import Translate from "@docusaurus/Translate";
Get the previous 30 days of usage as a time series.
---
## Generate run statistics
import MethodEndpoint from "@theme/ApiExplorer/MethodEndpoint";
import ParamsDetails from "@theme/ParamsDetails";
import RequestSchema from "@theme/RequestSchema";
import StatusCodes from "@theme/StatusCodes";
import OperationTabs from "@theme/OperationTabs";
import TabItem from "@theme/TabItem";
import Heading from "@theme/Heading";
import Translate from "@docusaurus/Translate";
Generates statistics about runs over a specified time period.
Request
---
## Generate runner credentials
import MethodEndpoint from "@theme/ApiExplorer/MethodEndpoint";
import ParamsDetails from "@theme/ParamsDetails";
import RequestSchema from "@theme/RequestSchema";
import StatusCodes from "@theme/StatusCodes";
import OperationTabs from "@theme/OperationTabs";
import TabItem from "@theme/TabItem";
import Heading from "@theme/Heading";
import Translate from "@docusaurus/Translate";
Uses your current authentication context to generate runner credentials that are used for authenticating runner requests
---
## Get feature flag value
import MethodEndpoint from "@theme/ApiExplorer/MethodEndpoint";
import ParamsDetails from "@theme/ParamsDetails";
import RequestSchema from "@theme/RequestSchema";
import StatusCodes from "@theme/StatusCodes";
import OperationTabs from "@theme/OperationTabs";
import TabItem from "@theme/TabItem";
import Heading from "@theme/Heading";
import Translate from "@docusaurus/Translate";
Get the current value of a feature flag. Returns the flag value if enabled, or a default falsey value if disabled.
Request
---
## Invite team member
import MethodEndpoint from "@theme/ApiExplorer/MethodEndpoint";
import ParamsDetails from "@theme/ParamsDetails";
import RequestSchema from "@theme/RequestSchema";
import StatusCodes from "@theme/StatusCodes";
import OperationTabs from "@theme/OperationTabs";
import TabItem from "@theme/TabItem";
import Heading from "@theme/Heading";
import Translate from "@docusaurus/Translate";
Invite a new team
Request
---
## Leave team
import MethodEndpoint from "@theme/ApiExplorer/MethodEndpoint";
import ParamsDetails from "@theme/ParamsDetails";
import RequestSchema from "@theme/RequestSchema";
import StatusCodes from "@theme/StatusCodes";
import OperationTabs from "@theme/OperationTabs";
import TabItem from "@theme/TabItem";
import Heading from "@theme/Heading";
import Translate from "@docusaurus/Translate";
Remove yourself from a team. If you're the last member of a team, you cannot remove yourself. You should delete the team instead.
Request
---
## List alerts
import MethodEndpoint from "@theme/ApiExplorer/MethodEndpoint";
import ParamsDetails from "@theme/ParamsDetails";
import RequestSchema from "@theme/RequestSchema";
import StatusCodes from "@theme/StatusCodes";
import OperationTabs from "@theme/OperationTabs";
import TabItem from "@theme/TabItem";
import Heading from "@theme/Heading";
import Translate from "@docusaurus/Translate";
List alerts for the current account with optional filtering
Request
---
## List API keys
import MethodEndpoint from "@theme/ApiExplorer/MethodEndpoint";
import ParamsDetails from "@theme/ParamsDetails";
import RequestSchema from "@theme/RequestSchema";
import StatusCodes from "@theme/StatusCodes";
import OperationTabs from "@theme/OperationTabs";
import TabItem from "@theme/TabItem";
import Heading from "@theme/Heading";
import Translate from "@docusaurus/Translate";
List all the API keys associated with your current account.
Request
---
## List app environments
import MethodEndpoint from "@theme/ApiExplorer/MethodEndpoint";
import ParamsDetails from "@theme/ParamsDetails";
import RequestSchema from "@theme/RequestSchema";
import StatusCodes from "@theme/StatusCodes";
import OperationTabs from "@theme/OperationTabs";
import TabItem from "@theme/TabItem";
import Heading from "@theme/Heading";
import Translate from "@docusaurus/Translate";
Generates a list of all the known environments for a given app in the current account.
Request
---
## List app versions
import MethodEndpoint from "@theme/ApiExplorer/MethodEndpoint";
import ParamsDetails from "@theme/ParamsDetails";
import RequestSchema from "@theme/RequestSchema";
import StatusCodes from "@theme/StatusCodes";
import OperationTabs from "@theme/OperationTabs";
import TabItem from "@theme/TabItem";
import Heading from "@theme/Heading";
import Translate from "@docusaurus/Translate";
List all versions of an app in the current account, sorted with the most recent first.
Request
---
## List apps
import MethodEndpoint from "@theme/ApiExplorer/MethodEndpoint";
import ParamsDetails from "@theme/ParamsDetails";
import RequestSchema from "@theme/RequestSchema";
import StatusCodes from "@theme/StatusCodes";
import OperationTabs from "@theme/OperationTabs";
import TabItem from "@theme/TabItem";
import Heading from "@theme/Heading";
import Translate from "@docusaurus/Translate";
Get all the apps for the current account.
Request
---
## List catalogs
import MethodEndpoint from "@theme/ApiExplorer/MethodEndpoint";
import ParamsDetails from "@theme/ParamsDetails";
import RequestSchema from "@theme/RequestSchema";
import StatusCodes from "@theme/StatusCodes";
import OperationTabs from "@theme/OperationTabs";
import TabItem from "@theme/TabItem";
import Heading from "@theme/Heading";
import Translate from "@docusaurus/Translate";
Lists all the catalogs associated with your current account.
Request
---
## List environments
import MethodEndpoint from "@theme/ApiExplorer/MethodEndpoint";
import ParamsDetails from "@theme/ParamsDetails";
import RequestSchema from "@theme/RequestSchema";
import StatusCodes from "@theme/StatusCodes";
import OperationTabs from "@theme/OperationTabs";
import TabItem from "@theme/TabItem";
import Heading from "@theme/Heading";
import Translate from "@docusaurus/Translate";
List all environments in your account.
Request
---
## List guests
import MethodEndpoint from "@theme/ApiExplorer/MethodEndpoint";
import ParamsDetails from "@theme/ParamsDetails";
import RequestSchema from "@theme/RequestSchema";
import StatusCodes from "@theme/StatusCodes";
import OperationTabs from "@theme/OperationTabs";
import TabItem from "@theme/TabItem";
import Heading from "@theme/Heading";
import Translate from "@docusaurus/Translate";
Lists all guests for the current account, optionally filtered by app.
Request
---
## List my team invitations
import MethodEndpoint from "@theme/ApiExplorer/MethodEndpoint";
import ParamsDetails from "@theme/ParamsDetails";
import RequestSchema from "@theme/RequestSchema";
import StatusCodes from "@theme/StatusCodes";
import OperationTabs from "@theme/OperationTabs";
import TabItem from "@theme/TabItem";
import Heading from "@theme/Heading";
import Translate from "@docusaurus/Translate";
List your pending invitations for teams
---
## List runners
import MethodEndpoint from "@theme/ApiExplorer/MethodEndpoint";
import ParamsDetails from "@theme/ParamsDetails";
import RequestSchema from "@theme/RequestSchema";
import StatusCodes from "@theme/StatusCodes";
import OperationTabs from "@theme/OperationTabs";
import TabItem from "@theme/TabItem";
import Heading from "@theme/Heading";
import Translate from "@docusaurus/Translate";
Get all self-hosted runners for the current account.
Request
---
## List runs
import MethodEndpoint from "@theme/ApiExplorer/MethodEndpoint";
import ParamsDetails from "@theme/ParamsDetails";
import RequestSchema from "@theme/RequestSchema";
import StatusCodes from "@theme/StatusCodes";
import OperationTabs from "@theme/OperationTabs";
import TabItem from "@theme/TabItem";
import Heading from "@theme/Heading";
import Translate from "@docusaurus/Translate";
Generates a list of all the runs for a given app. The list is paginated based on the query string parameters passed in.
Request
---
## List schedules
import MethodEndpoint from "@theme/ApiExplorer/MethodEndpoint";
import ParamsDetails from "@theme/ParamsDetails";
import RequestSchema from "@theme/RequestSchema";
import StatusCodes from "@theme/StatusCodes";
import OperationTabs from "@theme/OperationTabs";
import TabItem from "@theme/TabItem";
import Heading from "@theme/Heading";
import Translate from "@docusaurus/Translate";
Lists all schedules for the current account, optionally filtered by environment and app.
Request
---
## List secret environments
import MethodEndpoint from "@theme/ApiExplorer/MethodEndpoint";
import ParamsDetails from "@theme/ParamsDetails";
import RequestSchema from "@theme/RequestSchema";
import StatusCodes from "@theme/StatusCodes";
import OperationTabs from "@theme/OperationTabs";
import TabItem from "@theme/TabItem";
import Heading from "@theme/Heading";
import Translate from "@docusaurus/Translate";
Lists all the environments associated with secrets.
---
## List secrets
import MethodEndpoint from "@theme/ApiExplorer/MethodEndpoint";
import ParamsDetails from "@theme/ParamsDetails";
import RequestSchema from "@theme/RequestSchema";
import StatusCodes from "@theme/StatusCodes";
import OperationTabs from "@theme/OperationTabs";
import TabItem from "@theme/TabItem";
import Heading from "@theme/Heading";
import Translate from "@docusaurus/Translate";
Lists all the secrets associated with your current account.
Request
---
## List API keys for service account
import MethodEndpoint from "@theme/ApiExplorer/MethodEndpoint";
import ParamsDetails from "@theme/ParamsDetails";
import RequestSchema from "@theme/RequestSchema";
import StatusCodes from "@theme/StatusCodes";
import OperationTabs from "@theme/OperationTabs";
import TabItem from "@theme/TabItem";
import Heading from "@theme/Heading";
import Translate from "@docusaurus/Translate";
List API keys bound to a service account. Team admin only.
Request
---
## List service accounts
import MethodEndpoint from "@theme/ApiExplorer/MethodEndpoint";
import ParamsDetails from "@theme/ParamsDetails";
import RequestSchema from "@theme/RequestSchema";
import StatusCodes from "@theme/StatusCodes";
import OperationTabs from "@theme/OperationTabs";
import TabItem from "@theme/TabItem";
import Heading from "@theme/Heading";
import Translate from "@docusaurus/Translate";
List all service accounts in the current account. Team admin only.
Request
---
## List team invitations
import MethodEndpoint from "@theme/ApiExplorer/MethodEndpoint";
import ParamsDetails from "@theme/ParamsDetails";
import RequestSchema from "@theme/RequestSchema";
import StatusCodes from "@theme/StatusCodes";
import OperationTabs from "@theme/OperationTabs";
import TabItem from "@theme/TabItem";
import Heading from "@theme/Heading";
import Translate from "@docusaurus/Translate";
List the pending invitations for a team
Request
---
## List team members
import MethodEndpoint from "@theme/ApiExplorer/MethodEndpoint";
import ParamsDetails from "@theme/ParamsDetails";
import RequestSchema from "@theme/RequestSchema";
import StatusCodes from "@theme/StatusCodes";
import OperationTabs from "@theme/OperationTabs";
import TabItem from "@theme/TabItem";
import Heading from "@theme/Heading";
import Translate from "@docusaurus/Translate";
List the members of a team
Request
---
## List teams
import MethodEndpoint from "@theme/ApiExplorer/MethodEndpoint";
import ParamsDetails from "@theme/ParamsDetails";
import RequestSchema from "@theme/RequestSchema";
import StatusCodes from "@theme/StatusCodes";
import OperationTabs from "@theme/OperationTabs";
import TabItem from "@theme/TabItem";
import Heading from "@theme/Heading";
import Translate from "@docusaurus/Translate";
List all the teams that you are a member of.
Request
---
## List webhooks
import MethodEndpoint from "@theme/ApiExplorer/MethodEndpoint";
import ParamsDetails from "@theme/ParamsDetails";
import RequestSchema from "@theme/RequestSchema";
import StatusCodes from "@theme/StatusCodes";
import OperationTabs from "@theme/OperationTabs";
import TabItem from "@theme/TabItem";
import Heading from "@theme/Heading";
import Translate from "@docusaurus/Translate";
List webhooks
Request
---
## Refresh session
import MethodEndpoint from "@theme/ApiExplorer/MethodEndpoint";
import ParamsDetails from "@theme/ParamsDetails";
import RequestSchema from "@theme/RequestSchema";
import StatusCodes from "@theme/StatusCodes";
import OperationTabs from "@theme/OperationTabs";
import TabItem from "@theme/TabItem";
import Heading from "@theme/Heading";
import Translate from "@docusaurus/Translate";
If your access tokens expire, this API endpoint takes a Refresh Token and returns a new set of Access Tokens for your session. Note that we don't rotate the Refresh Token itself, and it's not returned by this API endpoint.
Request
---
## Regenerate guest login URL
import MethodEndpoint from "@theme/ApiExplorer/MethodEndpoint";
import ParamsDetails from "@theme/ParamsDetails";
import RequestSchema from "@theme/RequestSchema";
import StatusCodes from "@theme/StatusCodes";
import OperationTabs from "@theme/OperationTabs";
import TabItem from "@theme/TabItem";
import Heading from "@theme/Heading";
import Translate from "@docusaurus/Translate";
Creates a new login URL for an existing guest. Use this if the previous URL expired or was compromised.
Request
---
## Remove team member
import MethodEndpoint from "@theme/ApiExplorer/MethodEndpoint";
import ParamsDetails from "@theme/ParamsDetails";
import RequestSchema from "@theme/RequestSchema";
import StatusCodes from "@theme/StatusCodes";
import OperationTabs from "@theme/OperationTabs";
import TabItem from "@theme/TabItem";
import Heading from "@theme/Heading";
import Translate from "@docusaurus/Translate";
Remove team member
Request
---
## Resend team invitation
import MethodEndpoint from "@theme/ApiExplorer/MethodEndpoint";
import ParamsDetails from "@theme/ParamsDetails";
import RequestSchema from "@theme/RequestSchema";
import StatusCodes from "@theme/StatusCodes";
import OperationTabs from "@theme/OperationTabs";
import TabItem from "@theme/TabItem";
import Heading from "@theme/Heading";
import Translate from "@docusaurus/Translate";
Resend a team invitation to a user if they need a reminder or if they lost it
Request
---
## Run app
import MethodEndpoint from "@theme/ApiExplorer/MethodEndpoint";
import ParamsDetails from "@theme/ParamsDetails";
import RequestSchema from "@theme/RequestSchema";
import StatusCodes from "@theme/StatusCodes";
import OperationTabs from "@theme/OperationTabs";
import TabItem from "@theme/TabItem";
import Heading from "@theme/Heading";
import Translate from "@docusaurus/Translate";
Runs an app with the supplied parameters.
Request
---
## Search runs
import MethodEndpoint from "@theme/ApiExplorer/MethodEndpoint";
import ParamsDetails from "@theme/ParamsDetails";
import RequestSchema from "@theme/RequestSchema";
import StatusCodes from "@theme/StatusCodes";
import OperationTabs from "@theme/OperationTabs";
import TabItem from "@theme/TabItem";
import Heading from "@theme/Heading";
import Translate from "@docusaurus/Translate";
Search, filter, and list runs across all of the apps in your account.
Request
---
## Stream alert notifications
import MethodEndpoint from "@theme/ApiExplorer/MethodEndpoint";
import ParamsDetails from "@theme/ParamsDetails";
import RequestSchema from "@theme/RequestSchema";
import StatusCodes from "@theme/StatusCodes";
import OperationTabs from "@theme/OperationTabs";
import TabItem from "@theme/TabItem";
import Heading from "@theme/Heading";
import Translate from "@docusaurus/Translate";
Streams alert notifications in real-time
---
## Stream run logs
import MethodEndpoint from "@theme/ApiExplorer/MethodEndpoint";
import ParamsDetails from "@theme/ParamsDetails";
import RequestSchema from "@theme/RequestSchema";
import StatusCodes from "@theme/StatusCodes";
import OperationTabs from "@theme/OperationTabs";
import TabItem from "@theme/TabItem";
import Heading from "@theme/Heading";
import Translate from "@docusaurus/Translate";
Streams the logs associated with a particular run of an app in real-time.
Request
---
## Stream shouldertaps
import MethodEndpoint from "@theme/ApiExplorer/MethodEndpoint";
import ParamsDetails from "@theme/ParamsDetails";
import RequestSchema from "@theme/RequestSchema";
import StatusCodes from "@theme/StatusCodes";
import OperationTabs from "@theme/OperationTabs";
import TabItem from "@theme/TabItem";
import Heading from "@theme/Heading";
import Translate from "@docusaurus/Translate";
Stream events over SSE that notify you of potential data staleness
---
## Tower API
import ApiLogo from "@theme/ApiLogo";
import Heading from "@theme/Heading";
import SchemaTabs from "@theme/SchemaTabs";
import TabItem from "@theme/TabItem";
import Export from "@theme/ApiExplorer/Export";
REST API to interact with Tower Services.
API key created by a Tower user or Tower service account to authenticate an API request.
Security Scheme Type:
apiKey
Header parameter name:
X-API-Key
Access token authentication scheme which uses an access token provided by the Tower API as part of a Tower session (see documentation about creating sessions).
Security Scheme Type:
http
HTTP Authorization Scheme:
bearer
Contact
Tower Computing GmbH: [hello@tower.dev](mailto:hello@tower.dev)
URL: [https://tower.dev](https://tower.dev)
Terms of Service
{'https://tower.dev/terms'}
---
## Update account
import MethodEndpoint from "@theme/ApiExplorer/MethodEndpoint";
import ParamsDetails from "@theme/ParamsDetails";
import RequestSchema from "@theme/RequestSchema";
import StatusCodes from "@theme/StatusCodes";
import OperationTabs from "@theme/OperationTabs";
import TabItem from "@theme/TabItem";
import Heading from "@theme/Heading";
import Translate from "@docusaurus/Translate";
Update the properties of an account
Request
---
## Update app environment
import MethodEndpoint from "@theme/ApiExplorer/MethodEndpoint";
import ParamsDetails from "@theme/ParamsDetails";
import RequestSchema from "@theme/RequestSchema";
import StatusCodes from "@theme/StatusCodes";
import OperationTabs from "@theme/OperationTabs";
import TabItem from "@theme/TabItem";
import Heading from "@theme/Heading";
import Translate from "@docusaurus/Translate";
Update the configuration of an app in a specific environment, such as which version is deployed.
Request
---
## Update app
import MethodEndpoint from "@theme/ApiExplorer/MethodEndpoint";
import ParamsDetails from "@theme/ParamsDetails";
import RequestSchema from "@theme/RequestSchema";
import StatusCodes from "@theme/StatusCodes";
import OperationTabs from "@theme/OperationTabs";
import TabItem from "@theme/TabItem";
import Heading from "@theme/Heading";
import Translate from "@docusaurus/Translate";
Update an app in the currently authenticated account.
Request
---
## Update catalog
import MethodEndpoint from "@theme/ApiExplorer/MethodEndpoint";
import ParamsDetails from "@theme/ParamsDetails";
import RequestSchema from "@theme/RequestSchema";
import StatusCodes from "@theme/StatusCodes";
import OperationTabs from "@theme/OperationTabs";
import TabItem from "@theme/TabItem";
import Heading from "@theme/Heading";
import Translate from "@docusaurus/Translate";
Update a new catalog object in the currently authenticated account.
Request
---
## Update email preferences
import MethodEndpoint from "@theme/ApiExplorer/MethodEndpoint";
import ParamsDetails from "@theme/ParamsDetails";
import RequestSchema from "@theme/RequestSchema";
import StatusCodes from "@theme/StatusCodes";
import OperationTabs from "@theme/OperationTabs";
import TabItem from "@theme/TabItem";
import Heading from "@theme/Heading";
import Translate from "@docusaurus/Translate";
Updates the set of email preferences the current user has. If a partial set of preferences is submitted, it will be updated accordingly.
Request
---
## Update environment
import MethodEndpoint from "@theme/ApiExplorer/MethodEndpoint";
import ParamsDetails from "@theme/ParamsDetails";
import RequestSchema from "@theme/RequestSchema";
import StatusCodes from "@theme/StatusCodes";
import OperationTabs from "@theme/OperationTabs";
import TabItem from "@theme/TabItem";
import Heading from "@theme/Heading";
import Translate from "@docusaurus/Translate";
Rename your environment
Request
---
## Update my team invitation
import MethodEndpoint from "@theme/ApiExplorer/MethodEndpoint";
import ParamsDetails from "@theme/ParamsDetails";
import RequestSchema from "@theme/RequestSchema";
import StatusCodes from "@theme/StatusCodes";
import OperationTabs from "@theme/OperationTabs";
import TabItem from "@theme/TabItem";
import Heading from "@theme/Heading";
import Translate from "@docusaurus/Translate";
Update a team invitation that you have pending
Request
---
## Update organization
import MethodEndpoint from "@theme/ApiExplorer/MethodEndpoint";
import ParamsDetails from "@theme/ParamsDetails";
import RequestSchema from "@theme/RequestSchema";
import StatusCodes from "@theme/StatusCodes";
import OperationTabs from "@theme/OperationTabs";
import TabItem from "@theme/TabItem";
import Heading from "@theme/Heading";
import Translate from "@docusaurus/Translate";
Update an organization's name. Only the current owner can perform this operation.
Request
---
## Update plan
import MethodEndpoint from "@theme/ApiExplorer/MethodEndpoint";
import ParamsDetails from "@theme/ParamsDetails";
import RequestSchema from "@theme/RequestSchema";
import StatusCodes from "@theme/StatusCodes";
import OperationTabs from "@theme/OperationTabs";
import TabItem from "@theme/TabItem";
import Heading from "@theme/Heading";
import Translate from "@docusaurus/Translate";
Update plan
Request
---
## Update schedule
import MethodEndpoint from "@theme/ApiExplorer/MethodEndpoint";
import ParamsDetails from "@theme/ParamsDetails";
import RequestSchema from "@theme/RequestSchema";
import StatusCodes from "@theme/StatusCodes";
import OperationTabs from "@theme/OperationTabs";
import TabItem from "@theme/TabItem";
import Heading from "@theme/Heading";
import Translate from "@docusaurus/Translate";
Update an existing schedule for an app.
Request
---
## Update secret
import MethodEndpoint from "@theme/ApiExplorer/MethodEndpoint";
import ParamsDetails from "@theme/ParamsDetails";
import RequestSchema from "@theme/RequestSchema";
import StatusCodes from "@theme/StatusCodes";
import OperationTabs from "@theme/OperationTabs";
import TabItem from "@theme/TabItem";
import Heading from "@theme/Heading";
import Translate from "@docusaurus/Translate";
Updates a secret that has previously been created in your account
Request
---
## Update service account
import MethodEndpoint from "@theme/ApiExplorer/MethodEndpoint";
import ParamsDetails from "@theme/ParamsDetails";
import RequestSchema from "@theme/RequestSchema";
import StatusCodes from "@theme/StatusCodes";
import OperationTabs from "@theme/OperationTabs";
import TabItem from "@theme/TabItem";
import Heading from "@theme/Heading";
import Translate from "@docusaurus/Translate";
Update one or more fields on an existing service account. Team admin only.
Request
---
## Update team member
import MethodEndpoint from "@theme/ApiExplorer/MethodEndpoint";
import ParamsDetails from "@theme/ParamsDetails";
import RequestSchema from "@theme/RequestSchema";
import StatusCodes from "@theme/StatusCodes";
import OperationTabs from "@theme/OperationTabs";
import TabItem from "@theme/TabItem";
import Heading from "@theme/Heading";
import Translate from "@docusaurus/Translate";
Update team member
Request
---
## Update team
import MethodEndpoint from "@theme/ApiExplorer/MethodEndpoint";
import ParamsDetails from "@theme/ParamsDetails";
import RequestSchema from "@theme/RequestSchema";
import StatusCodes from "@theme/StatusCodes";
import OperationTabs from "@theme/OperationTabs";
import TabItem from "@theme/TabItem";
import Heading from "@theme/Heading";
import Translate from "@docusaurus/Translate";
Update a team with a new name or name. Note that updating the team with a new name will cause all your URLs to change!
Request
---
## Update user profile
import MethodEndpoint from "@theme/ApiExplorer/MethodEndpoint";
import ParamsDetails from "@theme/ParamsDetails";
import RequestSchema from "@theme/RequestSchema";
import StatusCodes from "@theme/StatusCodes";
import OperationTabs from "@theme/OperationTabs";
import TabItem from "@theme/TabItem";
import Heading from "@theme/Heading";
import Translate from "@docusaurus/Translate";
Updates your current user profile.
Request
---
## Update webhook
import MethodEndpoint from "@theme/ApiExplorer/MethodEndpoint";
import ParamsDetails from "@theme/ParamsDetails";
import RequestSchema from "@theme/RequestSchema";
import StatusCodes from "@theme/StatusCodes";
import OperationTabs from "@theme/OperationTabs";
import TabItem from "@theme/TabItem";
import Heading from "@theme/Heading";
import Translate from "@docusaurus/Translate";
Updates webhook. Note: it is not possible to update the URL. To do so, you should delete and recreate the webhook instead.
Request
---
## Vend catalog credentials
import MethodEndpoint from "@theme/ApiExplorer/MethodEndpoint";
import ParamsDetails from "@theme/ParamsDetails";
import RequestSchema from "@theme/RequestSchema";
import StatusCodes from "@theme/StatusCodes";
import OperationTabs from "@theme/OperationTabs";
import TabItem from "@theme/TabItem";
import Heading from "@theme/Heading";
import Translate from "@docusaurus/Translate";
Mints a short-lived OAuth bearer token for browser or SDK access to a managed (tower-catalog) catalog. Defaults to read-only (`mode: "read"`); pass `mode: "read-write"` in the body (requires the catalogs:data:write scope) for a token bound to the read-write principal. Team membership is enforced before vending; the master Polaris credentials never leave Tower.
Request
---
## MCP Server
The Tower CLI includes an MCP (Model Context Protocol) server that allows AI assistants and editors to interact with your Tower account directly.
Without MCP, your AI assistant can only suggest Tower commands for you to run - and it has to guess at things like Towerfile syntax, which it'll often get wrong. With MCP, it can generate Towerfiles from your actual `pyproject.toml`, execute commands directly, and see the results - so it can deploy your code, notice an error, and fix it without you copy-pasting anything.
## Prerequisites
Before using the MCP server, ensure you're logged into Tower:
```bash
tower login
```
The MCP server uses your existing Tower CLI authentication.
## Transport Modes
The Tower MCP server supports three transport modes:
| Transport | Best For | Notes |
|-----------|----------|-------|
| **stdio** (recommended) | Claude Code, most AI tools | Simplest setup, no background process needed |
| **http** | Streamable HTTP clients | Real-time streaming with logging notifications |
| **sse** | Legacy clients, Cursor | Server-Sent Events, requires background process |
### stdio (Recommended)
The stdio transport is the simplest to configure and doesn't require running a background server. The AI tool spawns the MCP server process directly.
```bash
tower mcp-server --transport stdio
```
### HTTP Streaming
For clients that support streamable HTTP with real-time logging notifications:
```bash
tower mcp-server --transport http --port 34567
```
The server runs on `http://127.0.0.1:34567/mcp`.
### SSE (Server-Sent Events)
For clients that require SSE transport:
```bash
tower mcp-server --transport sse --port 34567
```
The server runs on `http://127.0.0.1:34567/sse`. Keep the terminal open while using the MCP server, or run it in the background with `&`.
## Client Configuration
### Claude Code (stdio - recommended)
Add the Tower MCP server using stdio transport:
```bash
claude mcp add tower -- tower mcp-server
```
Or add directly to your Claude Code configuration (`.claude.json` or `~/.claude.json`):
```json
{
"mcpServers": {
"tower": {
"command": "tower",
"args": ["mcp-server"]
}
}
}
```
### Cursor
[](https://cursor.com/en-US/install-mcp?name=tower&config=eyJjb21tYW5kIjoidG93ZXIgbWNwLXNlcnZlciJ9)
Or [open this link directly](cursor://anysphere.cursor-deeplink/mcp/install?name=tower&config=eyJjb21tYW5kIjoidG93ZXIiLCJhcmdzIjpbIm1jcC1zZXJ2ZXIiXX0=).
Or manually add to your Cursor MCP settings (`mcp.json`):
```json
{
"mcpServers": {
"tower": {
"command": "tower",
"args": ["mcp-server"]
}
}
}
```
### VS Code
First, enable MCP integrations by setting `Chat > MCP: Enabled` to true in your settings.
[Install Tower MCP Server in VS Code](vscode:mcp/install?%7B%22name%22%3A%22tower%22%2C%22command%22%3A%22tower%22%2C%22args%22%3A%5B%22mcp-server%22%5D%7D)
Or add to your `mcp.json`:
```json
{
"servers": {
"tower": {
"command": "tower",
"args": ["mcp-server"]
}
}
}
```
### Gemini CLI
Add to `~/.gemini/settings.json`:
```json
{
"mcpServers": {
"tower": {
"command": "tower",
"args": ["mcp-server"]
}
}
}
```
### Windsurf
Add to `~/.codeium/windsurf/mcp_config.json`:
```json
{
"mcpServers": {
"tower": {
"command": "tower",
"args": ["mcp-server"]
}
}
}
```
Or access via Windsurf Settings → Cascade → Manage MCPs → View raw config.
**Logs:** `~/.codeium/windsurf/logs`
### Zed
Add to your Zed `settings.json`:
```json
{
"context_servers": {
"tower": {
"command": "tower",
"args": ["mcp-server"]
}
}
}
```
### SSE Configuration (Legacy)
If your client doesn't support stdio transport, you can use SSE. First start the server:
```bash
tower mcp-server --transport sse --port 34567 &
```
Then configure your client to connect to `http://127.0.0.1:34567/sse` with SSE transport.
## Available Tools
The MCP server exposes the following tools:
### Apps
| Tool | Description |
|------|-------------|
| `tower_apps_list` | List all Tower apps in your account |
| `tower_apps_create` | Create a new Tower app |
| `tower_apps_show` | Show details for a Tower app and its recent runs |
| `tower_apps_logs` | Get logs for a specific Tower app run |
| `tower_apps_delete` | Delete a Tower app |
### Deployment & Execution
| Tool | Description |
|------|-------------|
| `tower_deploy` | Deploy your app to Tower cloud |
| `tower_run_local` | Run your app locally using the Towerfile |
| `tower_run_remote` | Run your app remotely on Tower cloud |
### Towerfile Management
| Tool | Description |
|------|-------------|
| `tower_file_generate` | Generate a Towerfile from pyproject.toml |
| `tower_file_read` | Read and parse the current Towerfile configuration |
| `tower_file_update` | Update Towerfile app configuration |
| `tower_file_add_parameter` | Add a new parameter to the Towerfile |
| `tower_file_validate` | Validate the current Towerfile configuration |
### Schedules
| Tool | Description |
|------|-------------|
| `tower_schedules_list` | List all schedules for apps |
| `tower_schedules_create` | Create a schedule to run an app on a cron schedule |
| `tower_schedules_update` | Update an existing schedule |
| `tower_schedules_delete` | Delete a schedule |
### Secrets
| Tool | Description |
|------|-------------|
| `tower_secrets_list` | List secrets in your Tower account (previews only) |
| `tower_secrets_create` | Create a new secret in Tower |
| `tower_secrets_delete` | Delete a secret from Tower |
### Teams
| Tool | Description |
|------|-------------|
| `tower_teams_list` | List teams you belong to |
| `tower_teams_switch` | Switch context to a different team |
### Help
| Tool | Description |
|------|-------------|
| `tower_workflow_help` | Show the recommended workflow for Tower app development |
## Workflow
The typical workflow when using the MCP server:
1. **Create a Towerfile** - Use `tower_file_generate` to create from an existing `pyproject.toml`
2. **Test locally** - Use `tower_run_local` to verify your app works
3. **Create the app** - Use `tower_apps_create` to register your app with Tower
4. **Deploy** - Use `tower_deploy` to push your code to Tower cloud
5. **Run remotely** - Use `tower_run_remote` to execute on Tower infrastructure
6. **Schedule** - Use `tower_schedules_create` for recurring execution
For a hands-on quickstart guide, see the [Quickstart with MCP](/docs/getting-started/quickstart-with-mcp).
---
## Tower CLI
The Tower CLI is one of the primary ways to interact with the Tower service. It lets you deploy apps to Tower, run them, and then manage them. It also lets you set up the runtime environment for apps (e.g. define secrets). Additionally, you can create and manage teams that hold your apps.
## `tower deploy`
Builds a new version of your app from the Towerfile in your local directory and deploys it. Every successful run of `tower deploy` produces a new immutable version (`v1`, `v2`, `v3`, ...) and deploys it to one or more environments — versions in Tower are **always deployed to an environment**, never floating.
This command should be run from a directory containing a Towerfile. Before deploying an app, you should first create the app in Tower by using the [`tower apps create`](/docs/reference/tower-cli#tower-apps-create) command. If you forget to create the app first, the CLI will offer to create one based on your Towerfile.
### Options
- `--help` shows a help message and exits
- `--environment` deploys the new version to the named environment. If omitted, the new version is deployed to the `default` environment only.
- `--all` deploys the new version to **every** environment that exists for this app. Mutually exclusive with `--environment`.
### Deploying to a single environment (default)
A bare `tower deploy` creates a new version and deploys it to the `default` environment. Other environments (e.g. `production`) keep whatever version they were already deployed to.
```bash
tower deploy
```
```bash
✔ Building package... Done!
Deploying to Tower... [00:00:01] [████████████████████████████████████████] 2.13 MiB/2.13 MiB (0s)
Success! Version `v11` of your code has been deployed to Tower!
```
### Deploying to a named environment
Use `--environment` to deploy the new version to a specific environment. Other environments are not changed. This is the standard way to deploy to `staging`, `production`, or any environment you've created.
```bash
tower deploy --environment=production
```
```bash
✔ Building package... Done!
Deploying to Tower... [00:00:01] [████████████████████████████████████████] 2.13 MiB/2.13 MiB (0s)
Success! Version `v12` of your code has been deployed to Tower!
```
### Deploying to all environments at once
Use `--all` to create a new version and deploy it to every environment of the app in a single step. This is convenient for the first deploy of an app, or for hotfixes that need to roll out everywhere immediately.
```bash
tower deploy --all
```
```bash
✔ Building package... Done!
Deploying to Tower... [00:00:01] [████████████████████████████████████████] 2.13 MiB/2.13 MiB (0s)
Success! Version `v13` of your code has been deployed to Tower!
```
:::info
For more on how versions, environments, and promotion fit together, see [Versions, environments, and promotion](/docs/concepts/environments#versions-environments-and-promotion).
:::
## `tower run`
Runs a Tower app, either locally or remotely. This command should be run from a directory containing a Towerfile.
### Options
- `--help` shows a help message and exits
- `--local` runs the app locally instead of in the Tower cloud
- `--environment` is the environment configuration to use for this run. This _only_ applies to remote runs.
### Example
```bash
tower run --local
```
```bash
✔ Getting secrets... Done!
✔ Building package... Done!
Success! App `hello-world` has been launched
2024-11-20 08:32:42 | Hello, world!
2024-11-20 08:32:43 | Hello, world!
2024-11-20 08:32:44 | Hello, world!
2024-11-20 08:32:45 | Hello, world!
2024-11-20 08:32:46 | Hello, world!
Success! Your app exited cleanly.
```
# `tower apps`
The primary interface in to manaing your apps. This command supports multiple subcommands.
## `tower apps list`
List all of your Tower apps.
### Options
- `--help` shows a help message and exits
### Example
```bash
tower apps list
```
```bash
* my-first-app
No description
* my-second-app
A simple 'Hello, world!' app for demonstrating Tower.
```
## `tower apps create`
Create a new app in Tower.
### Options
- `--help` shows a help message and exits
- `--name` (required) the name for the new app
- `--description` (optional) a short description for the app
### Example
```bash
tower apps create --name=my-new-app --description="An example app to show off Tower"
```
```bash
✔ Creating app Done!
Success! App "my-new-app" was created
```
## `tower apps show `
Shows the details of an app as well as the latest run status.
### Arguments
- `` is the name of the app to show details for
### Options
- `--help` shows a help message and exits
### Example
```bash
tower apps show
```
```bash
hello-world 130 ↵
Name: hello-world
Description:
A simple 'Hello, world!' app for demonstrating Tower.
Recent runs:
# Status Start Time Elapsed Time
------------------------------------------------
11 exited 2024-11-19 20:14:46 9s
10 exited 2024-11-19 20:14:20 5s
9 crashed 2024-11-19 20:13:36 3s
8 exited 2024-11-19 19:46:01 7s
7 exited 2024-11-16 15:31:23 7s
6 exited 2024-11-15 15:40:23 7s
5 exited 2024-11-15 11:07:51 5s
4 exited 2024-11-15 08:44:23 10s
3 exited 2024-11-14 16:02:31 8s
2 exited 2024-11-13 20:37:03 7s
```
## `tower apps delete `
Delete an app in Tower. Once an app is deleted, it cannot be recovered.
### Arguments
- `` is the name of the app to delete
### Options
- `--help` shows a help message and exits
### Example
```bash
tower apps delete my-new-app
```
```bash
✔ Deleting app... Done!
Success! App "my-new-app" was deleted
```
## `tower apps logs #`
Fetches and displays the logs for a specific Tower app run. To address a specific run, you have to supply the app name _and_ a run number. You can get the latest runs from `tower apps show`. See the example below for a detailed example.
### Arguments
- `` is the name of the app to get logs for
- `` is the run sequence number to get logs for
### Options
- `--help` shows a help message and exits
### Example
```bash
tower apps logs hello-world#11
```
```bash
✔ Fetching logs... Done!
2024-11-19 20:14:46 | Hello, world!
2024-11-19 20:14:47 | Hello, world!
2024-11-19 20:14:48 | Hello, world!
2024-11-19 20:14:49 | Hello, world!
2024-11-19 20:14:50 | Hello, world!
```
# `tower secrets`
Secrets are sensitive data that gets injected into the runtime environment at runtime, but can be managed externally. The secrets can be used in multiple environments, and even locally! It's a great way to share data with your colleagues.
See the documentation on [Secrets](/docs/concepts/environments#secrets) for more details on how they behave.
## `tower secrets list`
List all the secrets that you have configured in Tower. By default, only a preview of the secrets is shown. You can supply the `--show` (or `-s`) option to see the secrets in plain text.
For more details on how your secrets are secured, see the documentation on [secrets](/docs/concepts/environments#secrets).
By default, when you run `tower secrets list` with no options, you will show all secrets in your default environment only.
### Options
- `--help` shows a help message and exits
- `--environment` shows how secrets would appear in a certain environment
- `--all` shows all secrets
- `--show` shows the secrets in plain text
### Example
```bash
tower secrets list
```
```bash
Secret Environment Preview
------------------------------------
my_secret default XXXXXXXXXX
```
## `tower secrets create`
Create a new secret in Tower. For more details on how your secrets are secured, see the documentation on [Secrets](/docs/concepts/environments#secrets).
### Options
- `--help` shows a help message and exits
- `--name` is the name of the secret to create
- `--value` is the plain text value to create
- `--environment` is the environment this secret value should be used in
### Example
```bash
tower secrets create --name=my_secret --value=its_a_secret
```
```bash
✔ Creating secret... Done!
Success! Secret "my_secret" was created
```
## `tower secrets delete `
Delete a secret in Tower.
### Options
- `--help` shows a help message and exits
### Example
```bash
tower secrets delete my_secret
```
```bash
✔ Deleting secret... Done!
Success! Secret "my_secret" was deleted
```
# `tower teams`
By creating a `team` in Tower you are setting up a group to collaboratively work on developing and making modifications to apps. Teams also allow you controlling who can deploy and run shared apps. Teams encompass apps, their runtime environments (secrets) and members.
See the [Working in Teams](/docs/using-tower/working-in-teams.md) guide for more details on how they behave.
## `tower teams list`
Lists all teams you are member of and includes your personal account. Indicates with an asterisk which team or personal account is currently active.
### Options
- `--help` shows a help message and exits
### Example
```bash
tower teams list
```
```bash
Slug Team Name
-----------------------------------------
team-1 Team 1
team-2 Team 2
* account-123 First Last
* indicates currently active team
```
## `tower teams switch `
Make the specified team account active in the Tower CLI session. All further commands that relate to apps and secrets will be executed in the context of the selected team.
### Options
- `--help` shows a help message and exits
### Example
```bash
tower teams switch team-1
```
```bash
Success! Switched to team: Team 1
```
---
## Tower SDK
The Tower SDK provides helpful extensions to your Python code, including easy access to Apache Iceberg tables, LLMs, and orchestrating the execution of multiple apps.
You install the Tower SDK together with installing the [Tower CLI](/docs/reference/tower-cli).
```bash
pip install tower
```
To start using the Tower SDK, import it in your app code:
```python
import tower
```
You don't need to use the SDK (import it into your app code) to run apps on Tower. If you don't want to access Iceberg tables or LLMs or orchestrate several apps in a control flow, you can skip the above 'import' step.
## [Tower Tables](#tower-tables)
### Table
`Table` is a wrapper around an Iceberg table. It provides methods to read and write data to the table.
#### [Table.read](#tableread)
Reads all data from the Iceberg table and returns it as a Polars DataFrame.
This method executes a full table scan and materializes the results into memory as a Polars DataFrame. For large tables, consider using `to_polars()` to get a LazyFrame that can be processed incrementally.
**Returns:**
- `pl.DataFrame`: A Polars DataFrame containing all rows from the table.
**Example:**
```python
table = tower.tables("my_table").load()
# Read all data into a DataFrame
df = table.read()
# Perform operations on the DataFrame
filtered_df = df.filter(pl.col("age") > 30)
# Get basic statistics
print(df.describe())
```
#### [Table.to_polars](#tableto_polars)
Converts the table to a Polars LazyFrame for efficient, lazy evaluation.
This method returns a LazyFrame that allows for building complex query plans without immediately executing them. This is particularly useful for:
- Processing large tables that don't fit in memory
- Building complex transformations and aggregations
- Optimizing query performance through Polars' query optimizer
**Returns:**
- `pl.LazyFrame`: A Polars LazyFrame representing the table data.
**Example:**
```python
table = tower.tables("my_table").load()
# Create a lazy query plan
lazy_df = table.to_polars()
# Build complex transformations
result = (lazy_df
.filter(pl.col("age") > 30)
.groupby("department")
.agg(pl.col("salary").mean())
.sort("department"))
# Execute the plan
final_df = result.collect()
```
#### [Table.rows_affected](#tablerows_affected)
Returns statistics about the number of rows affected by write operations on the table.
This method tracks the cumulative number of rows that have been inserted or updated through operations like `insert()` and `upsert()`. Note that delete operations are not currently tracked due to limitations in the underlying Iceberg implementation.
**Returns:**
- `RowsAffectedInformation`: An object containing:
- `inserts` (int): Total number of rows inserted
- `updates` (int): Total number of rows updated
**Example:**
```python
table = tower.tables("my_table").load()
# Insert some data
table.insert(new_data)
# Upsert some data
table.upsert(updated_data, join_cols=["id"])
# Check the impact of our operations
stats = table.rows_affected()
print(f"Inserted {stats.inserts} rows")
print(f"Updated {stats.updates} rows")
```
#### [Table.insert](#tableinsert)
Inserts new rows into the Iceberg table.
This method appends the provided data to the table. The data must be provided as a PyArrow table with a schema that matches the table's schema. The operation is tracked in the table's statistics, incrementing the insert count.
**Args:**
- `data` (pa.Table): The data to insert into the table. The schema of this table must match the schema of the target table.
**Returns:**
- `TTable`: The table instance with the newly inserted rows, allowing for method chaining.
**Example:**
```python
table = tower.tables("my_table").load()
# Create a PyArrow table with new data
new_data = pa.table({
"id": [1, 2, 3],
"name": ["Alice", "Bob", "Charlie"],
"age": [25, 30, 35]
})
# Insert the data
table.insert(new_data)
# Verify the insertion
stats = table.rows_affected()
print(f"Inserted {stats.inserts} rows")
```
#### [Table.upsert](#tableupsert)
Performs an upsert operation (update or insert) on the Iceberg table.
This method will:
- Update existing rows if they match the join columns
- Insert new rows if no match is found
All operations are case-sensitive by default.
**Args:**
- `data` (pa.Table): The data to upsert into the table. The schema of this table must match the schema of the target table.
- `join_cols` (Optional[list[str]]): The columns that form the key to match rows on. If not provided, all columns will be used for matching.
**Returns:**
- `TTable`: The table instance with the upserted rows, allowing for method chaining.
**Note:**
- The operation is always case-sensitive
- When a match is found, all columns are updated
- When no match is found, the row is inserted
- The operation is tracked in the table's statistics
**Example:**
```python
table = tower.tables("my_table").load()
# Create a PyArrow table with data to upsert
data = pa.table({
"id": [1, 2, 3],
"name": ["Alice", "Bob", "Charlie"],
"age": [26, 31, 36] # Updated ages
})
# Upsert the data using 'id' as the key
table.upsert(data, join_cols=["id"])
# Verify the operation
stats = table.rows_affected()
print(f"Updated {stats.updates} rows")
print(f"Inserted {stats.inserts} rows")
```
#### [Table.delete](#tabledelete)
Deletes rows from the Iceberg table that match the specified filter conditions.
This method removes rows from the table based on the provided filter expressions. The operation is always case-sensitive. Note that the number of deleted rows cannot be tracked due to limitations in the underlying Iceberg implementation.
**Args:**
- `filters` (Union[str, List[pc.Expression]]): The filter conditions to apply. Can be either:
- A single PyArrow compute expression
- A list of PyArrow compute expressions (combined with AND)
- A string expression
**Returns:**
- `TTable`: The table instance with the deleted rows, allowing for method chaining.
**Note:**
- The operation is always case-sensitive
- The number of deleted rows cannot be tracked in the table statistics
- To get the number of deleted rows, you would need to compare snapshots
**Example:**
```python
table = tower.tables("my_table").load()
# Delete rows where age is greater than 30
table.delete(table.column("age") > 30)
# Delete rows matching multiple conditions
table.delete([
table.column("age") > 30,
table.column("department") == "IT"
])
# Delete rows using a string expression
table.delete("age > 30 AND department = 'IT'")
```
#### [Table.schema](#tableschema)
Returns the schema of the table as a PyArrow schema.
This method converts the underlying Iceberg table schema into a PyArrow schema, which can be used for type information and schema validation.
**Returns:**
- `pa.Schema`: The PyArrow schema representation of the table's structure.
**Example:**
```python
table = tower.tables("my_table").load()
schema = table.schema()
```
#### [Table.column](#tablecolumn)
Returns a column from the table as a PyArrow compute expression.
This method is useful for creating column-based expressions that can be used in operations like filtering, sorting, or aggregating data. The returned expression can be used with PyArrow's compute functions.
**Args:**
- `name` (str): The name of the column to retrieve from the table schema.
**Returns:**
- `pa.compute.Expression`: A PyArrow compute expression representing the column.
**Raises:**
- `ValueError`: If the specified column name is not found in the table schema.
**Example:**
```python
table = tower.tables("my_table").load()
# Create a filter expression for rows where age > 30
age_expr = table.column("age") > 30
# Use the expression in a delete operation
table.delete(age_expr)
```
### TableReference
#### [TableReference.load](#tablereferenceload)
Loads an existing Iceberg table from the catalog.
This method resolves the table's namespace and name, then loads the table from the catalog. If the table doesn't exist, this will raise an error. Use `create()` or `create_if_not_exists()` to create new tables.
**Returns:**
- `Table`: A new Table instance wrapping the loaded Iceberg table.
**Raises:**
- `TableNotFoundError`: If the table doesn't exist in the catalog.
**Example:**
```python
# Load the existing table
table = tower.tables("my_table", namespace="my_namespace").load()
# Now you can use the table
df = table.read()
```
#### [TableReference.create](#tablereferencecreate)
Creates a new Iceberg table with the specified schema.
This method will:
1. Resolve the table's namespace (using default if not specified)
2. Create the namespace if it doesn't exist
3. Create a new table with the provided schema
4. Return a Table instance for the newly created table
**Args:**
- `schema` (pa.Schema): The PyArrow schema defining the structure of the table. This will be converted to an Iceberg schema internally.
**Returns:**
- `Table`: A new Table instance wrapping the created Iceberg table.
**Raises:**
- `TableAlreadyExistsError`: If a table with the same name already exists in the namespace.
- `NamespaceError`: If there are issues creating or accessing the namespace.
**Example:**
```python
# Define the table schema
schema = pa.schema([
pa.field("id", pa.int64()),
pa.field("name", pa.string()),
pa.field("age", pa.int32())
])
# Create the table
table = tower.tables("my_table", namespace="my_namespace").create(schema)
# Now you can use the table
table.insert(new_data)
```
#### [TableReference.create_if_not_exists](#tablereferencecreate_if_not_exists)
Creates a new Iceberg table if it doesn't exist, or returns the existing table.
This method will:
1. Resolve the table's namespace (using default if not specified)
2. Create the namespace if it doesn't exist
3. Create a new table with the provided schema if it doesn't exist
4. Return the existing table if it already exists
5. Return a Table instance for the table
Unlike `create()`, this method will not raise an error if the table already exists. Instead, it will return the existing table, making it safe for idempotent operations.
**Args:**
- `schema` (pa.Schema): The PyArrow schema defining the structure of the table. This will be converted to an Iceberg schema internally. Note that this schema is only used if the table needs to be created.
**Returns:**
- `Table`: A Table instance wrapping either the newly created or existing Iceberg table.
**Raises:**
- `NamespaceError`: If there are issues creating or accessing the namespace.
**Example:**
```python
# Define the table schema
schema = pa.schema([
pa.field("id", pa.int64()),
pa.field("name", pa.string()),
pa.field("age", pa.int32())
])
# Create the table if it doesn't exist
table = tower.tables("my_table", namespace="my_namespace").create_if_not_exists(schema)
# This is safe to call multiple times
table = tower.tables("my_table", namespace="my_namespace").create_if_not_exists(schema)
```
### [tables](#tables)
Creates a reference to an Iceberg table that can be used to load or create tables.
This function is the main entry point for working with Iceberg tables in Tower. It returns a TableReference object that can be used to either load an existing table or create a new one. The actual table operations (read, write, etc.) are performed through the Table instance obtained by calling `load()` or `create()` on the returned reference.
**Args:**
- `name` (str): The name of the table to reference. This will be used to either load an existing table or create a new one.
- `catalog` (Union[str, Catalog], optional): The catalog to use. Can be either:
- A string name of the catalog (defaults to "default")
- A Catalog instance (useful for testing or custom catalog implementations)
Defaults to "default".
- `namespace` (Optional[str], optional): The namespace in which the table exists or should be created. If not provided, a default namespace will be used.
**Returns:**
- `TableReference`: A reference object that can be used to:
- Load an existing table using `load()`
- Create a new table using `create()`
- Create a table if it doesn't exist using `create_if_not_exists()`
**Raises:**
- `CatalogError`: If there are issues accessing or loading the specified catalog.
- `TableNotFoundError`: When trying to load a non-existent table (only if `load()` is called).
**Examples:**
```python
# Load an existing table from the default catalog
table = tower.tables("my_table").load()
df = table.read()
# Create a new table in a specific namespace
schema = pa.schema([
pa.field("id", pa.int64()),
pa.field("name", pa.string())
])
table = tower.tables("new_table", namespace="my_namespace").create(schema)
# Use a specific catalog
table = tower.tables("my_table", catalog="my_catalog").load()
# Create a table if it doesn't exist
table = tower.tables("my_table").create_if_not_exists(schema)
```
## [Large Language Models](#large-language-models)
### [Llm](#llm)
A language model interface for the Tower system.
This class provides a unified interface for interacting with language models through different inference providers (e.g. Ollama for local inference, Hugging Face Hub for remote). It abstracts away model name resolution, inference provider selection, and local/remote inference API differences to provide a consistent interface for text generation tasks.
The class supports both chat-based interactions (similar to OpenAI Chat Completions API) and simple prompt-based interactions (similar to legacy OpenAI Completions API).
This class is typically instantiated through the `llms()` factory function rather than directly.
**Examples:**
```python
# Create an Llm instance (typically done via the llms() factory function)
llm = tower.llms("llama3.2", max_tokens=1000)
# Use for chat completions
messages = [
{"role": "system", "content": "You are a helpful assistant."},
{"role": "user", "content": "Hello!"}
]
response = llm.complete_chat(messages)
# Use for simple prompts
response = llm.prompt("What is the capital of France?")
```
#### [Llm.complete_chat](#llmcomplete_chat)
Mimics the OpenAI Chat Completions API by sending a list of messages to the language model and returning the generated response.
This function provides a unified interface for chat-based interactions with different language model providers (Ollama, Hugging Face Hub, etc.) while maintaining compatibility with the OpenAI Chat Completions API format.
**Args:**
- `messages` (List): A list of message dictionaries, each containing 'role' and 'content' keys. Follows the OpenAI Chat Completions API message format.
**Returns:**
- `str`: The generated response from the language model.
**Examples:**
```python
messages = [
{"role": "system", "content": "You are a helpful assistant."},
{"role": "user", "content": "Hello, how are you?"}
]
response = llm.complete_chat(messages)
```
#### [Llm.prompt](#llmprompt)
Mimics the old-style OpenAI Completions API by sending a single prompt string to the language model and returning the generated response.
This function provides a simple interface for single-prompt interactions, similar to the legacy OpenAI /v1/completions endpoint. It internally converts the prompt to a chat message format and uses the complete_chat method.
**Args:**
- `prompt` (str): A single string containing the prompt to send to the language model.
**Returns:**
- `str`: The generated response from the language model.
**Examples:**
```python
response = llm.prompt("What is the capital of France?")
```
### [llms](#llms)
Creates a language model instance for the Tower system.
This factory function creates an Llm instance configured with the specified model parameters. It automatically resolves the model name based on the available inference providers (Ollama for local inference, Hugging Face Hub for remote). The max_tokens parameter is used to set the maximum number of tokens to generate in responses.
**Args:**
- `model_name` (str): Can be a model family name (e.g., "llama3.2", "gemma3.2", "deepseek-r1") or a specific model identifier (e.g., "deepseek-r1:14b", "deepseek-ai/DeepSeek-R1-0528"). The function will automatically resolve the exact model name based on available models in the configured inference provider.
- `max_tokens` (int): Maximum number of tokens to generate in responses. Defaults to 1000.
**Returns:**
- `Llm`: A configured language model instance that can be used for text generation, chat completions, and other language model interactions.
**Raises:**
- `ValueError`: If the configured inference router is not supported or if the model cannot be resolved.
**Examples:**
```python
# Create a language model instance
llm = tower.llms("llama3.2", max_tokens=500)
# Use for chat completions
messages = [
{"role": "system", "content": "You are a helpful assistant."},
{"role": "user", "content": "Hello!"}
]
response = llm.complete_chat(messages)
# Use for simple prompts
response = llm.prompt("What is the capital of France?")
```
## [Utility Functions](#utility-functions)
### [secret](#secret)
Retrieves a secret value from environment variables.
This function provides a convenient way to access secrets that have been injected into your Tower app's runtime environment. Secrets are typically configured through the Tower UI or CLI and are made available as environment variables during execution.
**Args:**
- `name` (str): The name of the secret (environment variable) to retrieve.
- `default` (str, optional): The default value to return if the secret is not found. Defaults to an empty string.
**Returns:**
- `str`: The value of the secret or the default value if not found.
**Examples:**
```python
# Get a database password
db_password = tower.secret("DATABASE_PASSWORD")
# Get an API key with a default value
api_key = tower.secret("API_KEY", default="dev-key")
```
### [param](#param)
Retrieves a parameter value from the current invocation.
This function accesses parameters that were passed to the app run, either through the Tower UI, CLI, or API. Parameters are made available as environment variables during execution.
**Args:**
- `name` (str): The name of the parameter (environment variable) to retrieve.
- `default` (str, optional): The default value to return if the parameter is not found. Defaults to an empty string.
**Returns:**
- `str`: The value of the parameter or the default value if not found.
**Examples:**
```python
# Get a required parameter
input_file = tower.param("input_file")
# Get an optional parameter with a default
batch_size = tower.param("batch_size", default="100")
```
### [parameter](#parameter)
Alias for the `param()` function to retrieve a parameter value.
This is an alternative name for the `param()` function that provides the same functionality. Use whichever name you prefer for consistency in your code.
**Args:**
- `name` (str): The name of the parameter (environment variable) to retrieve.
- `default` (str, optional): The default value to return if the parameter is not found. Defaults to an empty string.
**Returns:**
- `str`: The value of the parameter or the default value if not found.
**Examples:**
```python
# Get a parameter using the parameter() alias
config_file = tower.parameter("config_file", default="config.json")
```
## [Runtime Information](#runtime-information)
The Tower SDK provides several functions to access information about the current run's execution context. These functions are available through the `tower.info` module and provide details about the run, app, environment, and execution infrastructure.
### [tower.info.run_id](#towerinforun_id)
Retrieves the unique identifier of the current run. This is useful for
diagnostic purposes when communicating with Tower support. It can be `None`
only for local runs using the Tower CLI.
**Returns:**
- `Optional[str]`: The ID of the run if available, otherwise `None`.
**Examples:**
```python
# Get the current run ID
current_run_id = tower.info.run_id()
if current_run_id:
print(f"Running with ID: {current_run_id}")
```
### [tower.info.run_number](#towerinforun_number)
Retrieves the sequential run number for the current run. It can be `None` for
local runs using the Tower CLI.
**Returns:**
- `Optional[int]`: The run number if available, otherwise `None`.
**Examples:**
```python
# Get the current run number
run_num = tower.info.run_number()
if run_num:
print(f"This is run #{run_num}")
```
### [tower.info.app_name](#towerinfoapp_name)
Retrieves the name of the app being executed in this run.
**Returns:**
- `str`: The name of the app or an empty string if unknown.
**Examples:**
```python
# Get the app name
app = tower.info.app_name()
print(f"Running app: {app}")
```
### [tower.info.team_name](#towerinfoteam_name)
Retrieves the name of the team associated with this run.
**Returns:**
- `str`: The name of the team or an empty string if unknown.
**Examples:**
```python
# Get the account name
account = tower.info.team_name()
print(f"Running under team: {team}")
```
### [tower.info.environment](#towerinfoenvironment)
Retrieves the name of the environment this run is executing in.
**Returns:**
- `str`: The name of the environment or an empty string if unknown.
**Examples:**
```python
# Get the environment name
env = tower.info.environment()
if env == "production":
print("Running in production!")
```
### [tower.info.schedule_id](#towerinfoschedule_id)
Retrieves the ID of the schedule that triggered this run.
This function returns `None` if the run was not triggered by a schedule.
**Returns:**
- `Optional[str]`: The ID of the schedule if the run was scheduled, otherwise `None`.
**Examples:**
```python
# Check if run was scheduled and get schedule ID
schedule_id = tower.info.schedule_id()
if schedule_id:
print(f"Triggered by schedule: {schedule_id}")
```
### [tower.info.schedule_name](#towerinfoschedule_name)
Retrieves the name of the schedule that triggered this run.
This function returns `None` if the run was not triggered by a schedule.
**Returns:**
- `Optional[str]`: The name of the schedule if the run was scheduled, otherwise `None`.
**Examples:**
```python
# Get the schedule name
schedule = tower.info.schedule_name()
if schedule:
print(f"Triggered by schedule: {schedule}")
```
### [tower.info.is_scheduled_run](#towerinfois_scheduled_run)
Checks whether the current run was triggered by a schedule.
**Returns:**
- `bool`: `True` if the run was triggered by a schedule, `False` otherwise.
**Examples:**
```python
# Check if this is a scheduled run
if tower.info.is_scheduled_run():
print("This run was triggered by a schedule")
else:
print("This run was triggered manually or via API")
```
### [tower.info.is_manual_run](#towerinfois_manual_run)
Checks whether the current run was manually triggered.
**Returns:**
- `bool`: `True` if the run was manually triggered, `False` otherwise.
**Examples:**
```python
# Check if this is a manual run
if tower.info.is_manual_run():
print("This run was manually triggered")
```
### [tower.info.runner_id](#towerinforunner_id)
Retrieves the ID of the runner executing this run.
**Returns:**
- `str`: The ID of the runner or an empty string if unknown.
**Examples:**
```python
# Get the runner ID
runner = tower.info.runner_id()
print(f"Running on runner: {runner}")
```
### [tower.info.runner_name](#towerinforunner_name)
Retrieves the name of the runner executing this run.
**Returns:**
- `str`: The name of the runner or an empty string if unknown.
**Examples:**
```python
# Get the runner name
runner = tower.info.runner_name()
print(f"Running on runner: {runner}")
```
### [tower.info.hostname](#towerinfohostname)
Retrieves the hostname assigned to this run by the runtime environment.
**Returns:**
- `Optional[str]`: The hostname if available, otherwise `None`.
**Examples:**
```python
# Get the hostname
host = tower.info.hostname()
if host:
print(f"Accessible at: {host}")
```
### [tower.info.port](#towerinfoport)
Retrieves the port number assigned to this run by the runtime environment.
**Returns:**
- `Optional[int]`: The port number if available, otherwise `None`.
**Examples:**
```python
# Get the port number
port = tower.info.port()
if port:
print(f"Listening on port: {port}")
```
### [tower.info.is_cloud_run](#towerinfois_cloud_run)
Checks whether the current run is executing in the Tower cloud environment.
**Returns:**
- `bool`: `True` if running in Tower cloud, `False` if running on a self-hosted runner.
**Examples:**
```python
# Check if running in cloud
if tower.info.is_cloud_run():
print("Running in Tower cloud")
else:
print("Running on self-hosted infrastructure")
```
## [Packages](#packages)
Tower CLI v0.3.49 introduces a native Rust-backed packaging engine. The `tower.packages` module exposes this engine directly so you can build packages programmatically — useful for CI pipelines, custom tooling, or any workflow that needs a `.tar.gz` artifact without shelling out to the CLI.
### [build_package](#build_package)
`build_package(dir: str, output: str)`
Builds a Tower package from a local project directory and writes the resulting artifact to a specified output path.
Under the hood, `build_package` delegates all heavy lifting to the `tower_package` Rust library, which runs inside a Tokio async runtime for concurrent file I/O and network access. This makes builds faster, more memory-efficient, and more consistent across platforms than the previous Python-based implementation.
**How it works:**
1. **Towerfile Discovery** — reads `Towerfile` in `dir` to construct the `PackageSpec` (entry point, dependencies, runtime configuration, etc.)
2. **Native Resolution** — the `tower_package` Rust crate resolves dependencies and determines the set of files and build steps needed
3. **Tokio Runtime** — an async Rust runtime handles concurrent file I/O and any network requests (e.g. fetching remote dependencies) in parallel
4. **Artifact Generation** — files are staged in a temporary build directory, compressed into a `.tar.gz` archive, then copied to `output`
**Args:**
- `dir` (str): Path to the directory containing your `Towerfile`. The packager looks for the `Towerfile` at the root of this directory.
- `output` (str): Destination path for the built `.tar.gz` package. Parent directories must already exist; the file will be created or overwritten.
**Raises:**
- `RuntimeError`: If the build fails for any reason (missing `Towerfile`, dependency resolution error, I/O failure, etc.). The exception message contains the error detail from the Rust layer.
**Example:**
```python
import tower
try:
tower.packages.build_package(
dir="./projects/my-app",
output="./dist/app_v1.tar.gz"
)
print("Build successful!")
except RuntimeError as e:
print(f"Build failed: {e}")
```
**Requirements:**
- Tower CLI ≥ v0.3.49
- A valid `Towerfile` must be present in `dir`
## [Orchestration](#orchestration)
### [run_app](#run_app)
Runs a Tower application with specified parameters and environment.
This function initiates a new run of a Tower application identified by its slug. The run can be configured with an optional environment override and runtime parameters. If no environment is specified, the default environment from the Tower context is used.
**Args:**
- `slug` (str): The unique identifier of the application to run.
- `environment` (Optional[str]): The environment to run the application in. If not provided, uses the default environment from the Tower context.
- `parameters` (Optional[Dict[str, str]]): A dictionary of key-value pairs to pass as parameters to the application run.
**Returns:**
- `Run`: A Run object containing information about the initiated application run, including the app_slug and run number.
**Raises:**
- `RuntimeError`: If there is an error initiating the run or if the Tower API returns an error response.
**Examples:**
```python
# Run an app with default environment
run = tower.run_app("my-app")
# Run an app with custom environment and parameters
params = {"input_file": "data.csv", "output_dir": "results"}
run = tower.run_app("my-app", environment="prod", parameters=params)
```
### [wait_for_run](#wait_for_run)
Waits for a Tower app run to reach a terminal state by polling the Tower API.
This function continuously polls the Tower API every 2 seconds (defined by WAIT_TIMEOUT) to check the status of the specified run. The function returns when the run reaches a terminal state (exited, errored, cancelled, or crashed).
**Args:**
- `run` (Run): The Run object containing the app_slug and number of the run to monitor.
- `timeout` (Optional[float]): Maximum time to wait in seconds before raising a TimeoutException. Defaults to one day (86,400 seconds).
- `raise_on_failure` (bool): If True, raises a RunFailedError when the run fails. If False, returns the failed run object. Defaults to False.
**Returns:**
- `Run`: The final state of the run after completion or failure.
**Raises:**
- `TimeoutException`: If the specified timeout is reached before the run completes.
- `RunFailedError`: If raise_on_failure is True and the run fails.
- `UnhandledRunStateException`: If the run enters an unexpected state.
- `UnknownException`: If there are persistent problems communicating with the Tower API.
- `NotFoundException`: If the run cannot be found.
- `UnauthorizedException`: If the API key is invalid or unauthorized.
**Examples:**
```python
# Wait for a run to complete with default settings
run = tower.run_app("my-app")
final_run = tower.wait_for_run(run)
# Wait for a run with custom timeout and failure handling
run = tower.run_app("my-app")
try:
final_run = tower.wait_for_run(run, timeout=3600, raise_on_failure=True)
except RunFailedError as e:
print(f"Run failed: {e}")
```
### [wait_for_runs](#wait_for_runs)
Waits for multiple Tower app runs to reach terminal states by polling the Tower API.
This function continuously polls the Tower API every 2 seconds (defined by WAIT_TIMEOUT) to check the status of all specified runs. The function returns when all runs reach terminal states (`exited`, `errored`, `cancelled`, or `crashed`).
**Args:**
- `runs` (List[Run]): A list of Run objects to monitor.
- `timeout` (Optional[float]): Maximum time to wait in seconds before raising a TimeoutException. Defaults to one day (86,400 seconds).
- `raise_on_failure` (bool): If True, raises a RunFailedError when any run fails. If False, failed runs are returned in the failed_runs list. Defaults to False.
**Returns:**
- `tuple[List[Run], List[Run]]`: A tuple containing two lists:
- `successful_runs`: List of runs that completed successfully (status: 'exited')
- `failed_runs`: List of runs that failed (status: 'crashed', 'cancelled', or 'errored')
**Raises:**
- `TimeoutException`: If the specified timeout is reached before all runs complete.
- `RunFailedError`: If raise_on_failure is True and any run fails.
- `UnhandledRunStateException`: If a run enters an unexpected state.
- `UnknownException`: If there are persistent problems communicating with the Tower API.
- `NotFoundException`: If any run cannot be found.
- `UnauthorizedException`: If the API key is invalid or unauthorized.
**Examples:**
```python
# Wait for multiple runs to complete
runs = [tower.run_app("app1"), tower.run_app("app2")]
successful, failed = tower.wait_for_runs(runs)
# Wait for multiple runs with custom settings
runs = [tower.run_app("app1"), tower.run_app("app2")]
try:
successful, failed = tower.wait_for_runs(runs, timeout=3600, raise_on_failure=True)
except RunFailedError as e:
print(f"One or more runs failed: {e}")
```
---
## Towerfile
A Towerfile is a text file that contains Tower instructions for how to package an application and how to run it in a Tower runner.
It contains information such as the app name, the main script, files that need to be packaged together, and the app parameters. Each Towerfile starts with the [app] section declaration.
**[app]**
- name : string, mandatory
- script : string, mandatory
- source : list of strings, optional
- import_paths: list of strings, optional
- parameters : list of structs, optional
- name : string, mandatory
- description : string, optional
- default : string, optional
Here is an example of a Towerfile with all sections
```
[app]
name = "hello-world"
script = "./task.py" # or "./task.sh"
source = [
"./.dlt/config.toml",
"./**/*.py",
"./*.py",
"requirements.txt",
"./_data/*",
"./task.sh",
"./dlt_project.yml"
]
[[parameters]]
name = "param1"
description = "First parameter"
default = "some value"
[[parameters]]
name = "param2"
description = "Second parameter"
default = "another value"
```
## name
- **Required**: Yes
- **Description**: App name. Can be used to refer to the app on command line and in source code.
## script
- **Required**: Yes
- **Description**: Main script of the application. Will be launched by the Tower runner when the app is run.
- **Values**: Tower currently supports .py Python scripts and .sh shell scripts. Specify paths that terminate in .py or .sh extensions.
## source
- **Required**: No
- **Description**: A list of strings, representing globs of files you want to include in the app. If blank, then all files under your current directory will be packaged.
- **Values**: Paths can be glob patterns, and they are always relative to the folder containing the Towerfile.
- **Important**: If you choose to be explicit about what code you package, you must include the path to your `script`, otherwise the script won't be made part of the app package and the app run will fail.
## import_paths
- **Required**: No
- **Description**: A list of strings, which are relative paths to other Python code you want imported
- **Values**: Relative paths to directories containing Python modules and shared code you want to import at runtime. These paths will be added to your `PYTHONPATH` such that you can import from them at runtime.
## parameters
- **Required**: No
- **Description**: A list of sections, one section per parameter, all separated by `[[parameters]]`. In each `[[parameters]]` section there should be the following 3 fields
- name: name of the parameter
- description: short description of the parameter
- default: default value to use when the parameter is omitted
- **Example**:
Assume an app with a Towerfile that defines two parameters: iceberg_table and AWS_REGION.
```
[[parameters]]
name = "iceberg_table"
description = "The name of the input iceberg table"
default = "invalid_table"
[[parameters]]
name = "AWS_REGION"
description = "The region of S3 endpoint"
default = "us-east-1"
```
To run this app from the command line, add both parameters to the command:
```bash
tower run\
--parameter=AWS_REGION='eu-central-1'\
--parameter=iceberg_table='default.japan_trade_stats_2017_2020'
```
---
## Advanced use cases
## Programmatically determining the environment
Sometimes you will want to adjust your app logic depending on the environment the app is running in. For example, you might want to write to DuckDB when the app is running locally, and to Snowflake when the app is running in the Tower cloud. If you were using Snowflake in both cases, you could have solved this by having different secrets values in your local and production environments. But when you want to use different databases, libraries, or connectors, you need to use conditional logic and define entirely different secrets.
Tower provides two ways to access the environment your code is running in: the `tower.info.environment()` function from the [Tower SDK](/docs/reference/tower-sdk.md#towerinfoenvironment), and the `TOWER_ENVIRONMENT` environment variable.
### Using the Tower SDK (recommended)
```python
import tower
env = tower.info.environment()
if env == "production":
print("Running in production!")
else:
print(f"You are in {env}!")
```
The `tower.info.environment()` function returns the name of the current environment as a string. See the [API reference](/docs/reference/tower-sdk.md#towerinfoenvironment) for details.
### Using the environment variable
Alternatively, you can read the `TOWER_ENVIRONMENT` environment variable directly:
```python
import os
tower_env = os.getenv("TOWER_ENVIRONMENT")
print(f"You are in {tower_env}!")
```
### Example output
When run with the `--local` parameter:
```bash
tower run --local
```
```bash
...
You are in local!
```
When run without the `--local` parameter:
```bash
tower run
```
```bash
✔ Scheduling run... Done!
Success! Run #2 for app `datafusion-transform` has been scheduled
```
```bash
tower apps logs datafusion-transform#2
```
```bash
✔ Fetching logs... Done!
You are in default!
```
---
## API keys
You can use API keys to programmatically access Tower's APIs, and in general you can access any endpoint with an API key.
## How to create an API key
To create an API key, go to your team settings, then to API Keys, and click _Create new API key_.
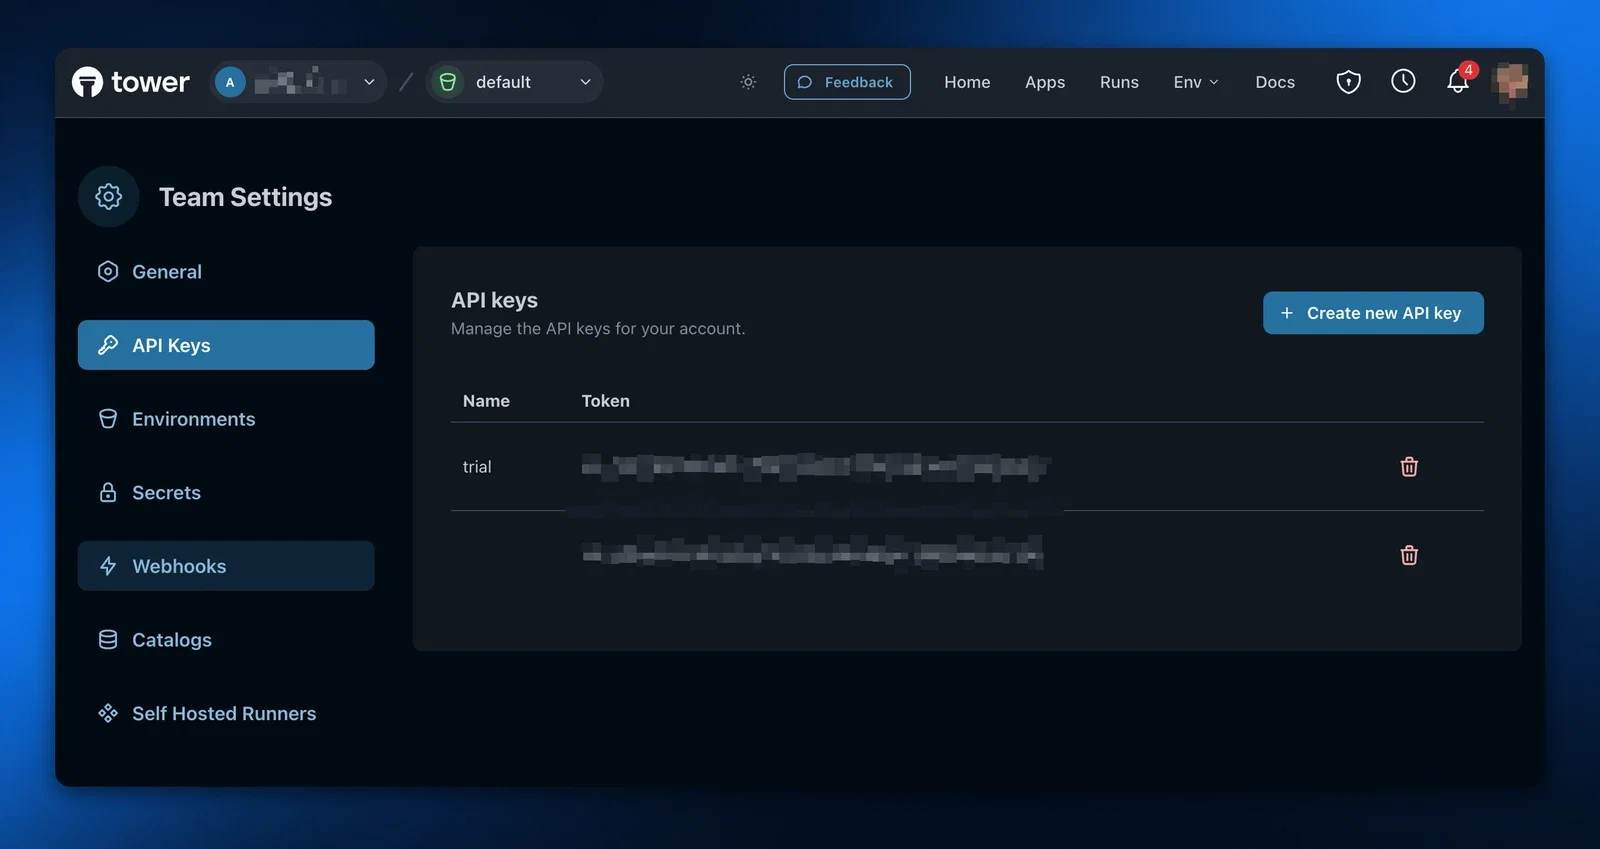
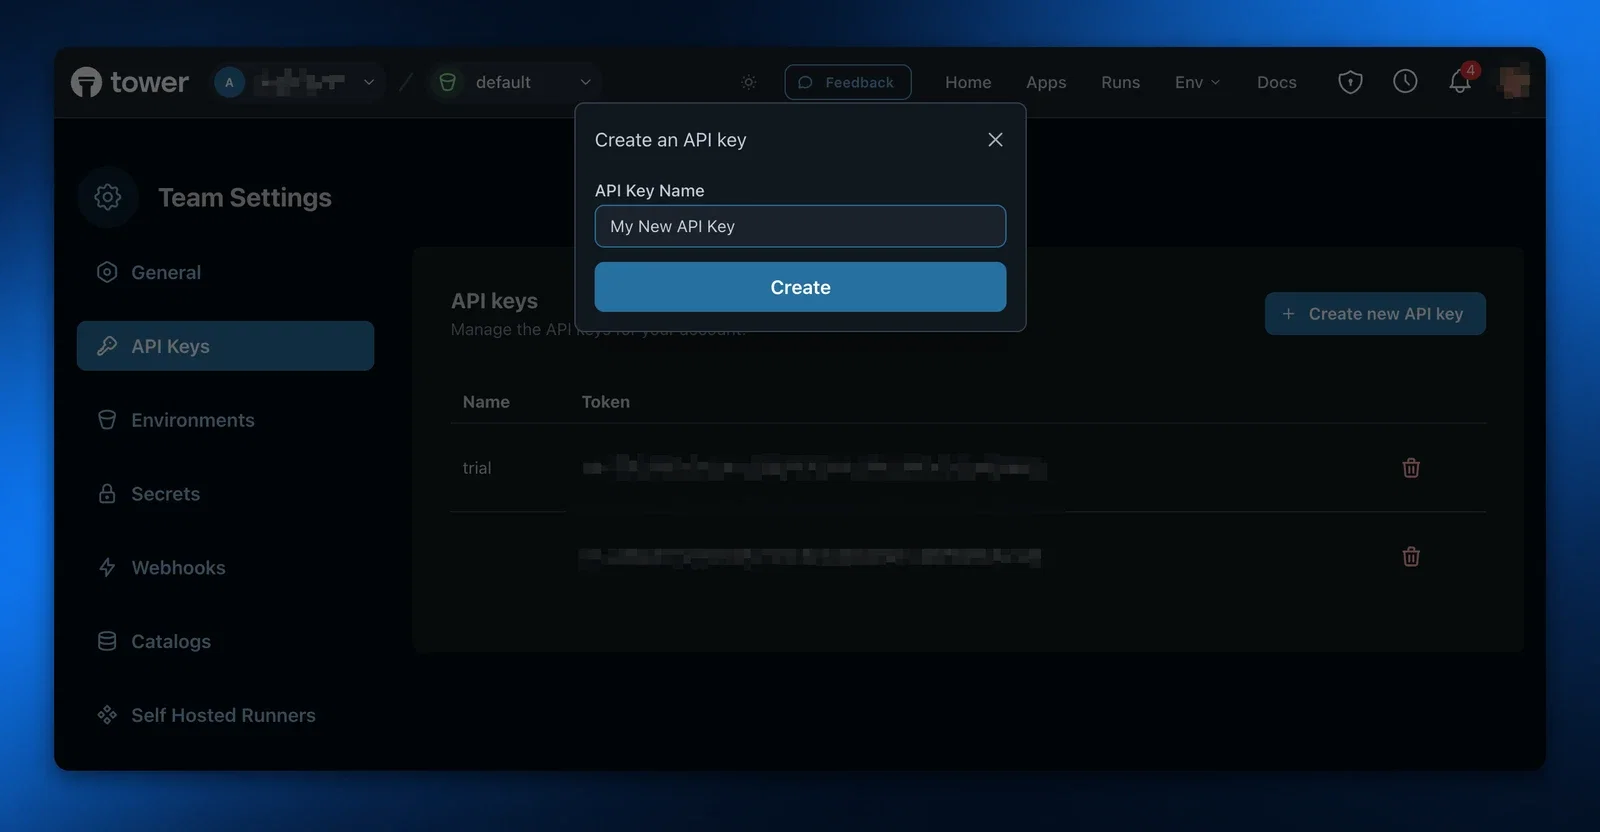
After giving it a name, and clicking _Create_, you'll see your new key in the table.
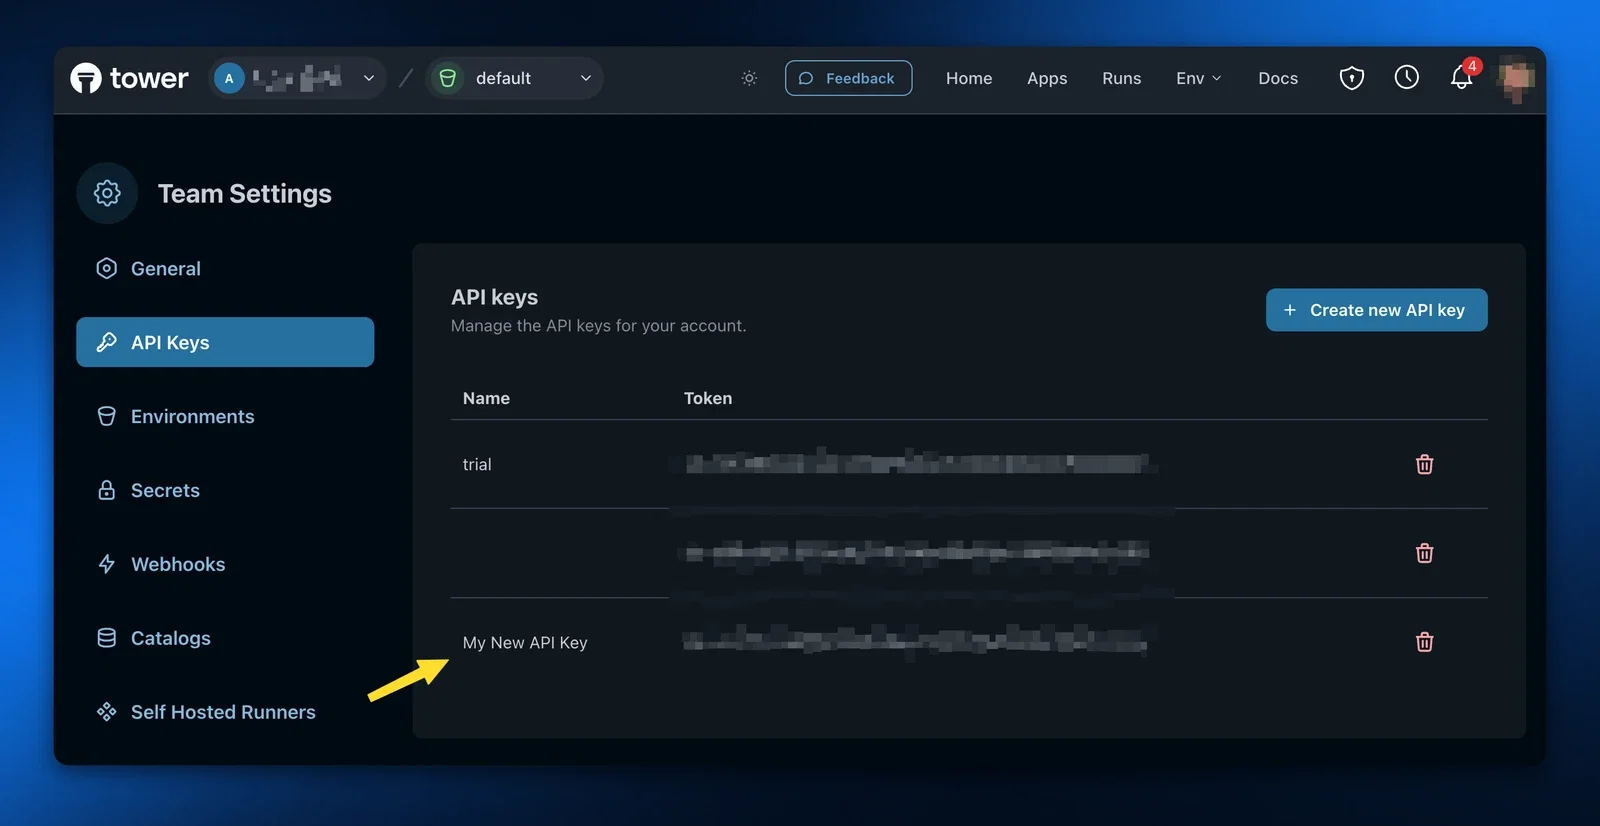
## How to use an API key
You can use the API key by adding it to the `X-API-Key` header of any Tower API request. Note that all Tower API keys are prefixed with `sk-`.
**Example**
```bash
curl 'https://api.tower.dev/v1/apps' \
-H 'X-API-Key: sk-FAKE+0gUsddrrdNawuhd4NHCaSN/63YXPIG7aZ3kxjT0'
```
Each Tower API endpoint has a scope that your API key must have to perform the action, which is listed on the [API documentation pages](/docs/reference/api/tower-api) under the _Authorization_ section. If your API key does not have the correct scope you'll receive a 403 Forbidden in response.
## Reducing the scope of the API key
By default, API keys are created with the permissions from the account that created them; if you create an API key as an account with the Admin role, the API key will also have the Admin role.
However, in some cases you may want to create API keys with a reduced set of privileges, such as when you know the API key should only be used for specific actions. You can create a reduced permission API key using the `create-api-key` API, passing `scopes` as a parameter in the body. See [Available scopes](#available-scopes) for a list of scopes you can provide, and note that you can't create an API key with more privileges than your current account.
```bash
curl 'https://api.tower.dev/v1/api-keys' \
-H 'Content-Type: application/json' \
-H 'Accept: application/json' \
-H 'X-API-Key: sk-FAKE+0gUsddrrdNawuhd4NHCaSN/63YXPIG7aZ3kxjT0' \
-d '{
"name": "Can only perform runs",
"scopes": "apps:run"
}'
```
See the [Create API Key](/docs/reference/api/create-api-key) documentation for more details about how to create API keys, including about other parameters like `team`.
### Available scopes
The following is a list of available scopes you can add to an API key.
| Key | Description |
| ---------------------------- | ---------------------------------------------------------- |
| `api_keys` | Access to all API key operations. |
| `api_keys:read` | Read access for API keys. |
| `api_keys:create` | Create access for API keys. |
| `api_keys:delete` | Delete access for API keys. |
| `apps` | Access to all apps operations. |
| `apps:read` | Read access for apps. |
| `apps:run` | Allows the API to run apps. |
| `apps:deploy` | Allows the API key to be used to deploy a new app version. |
| `apps:create` | Create access for apps. |
| `apps:update` | Update access for apps (e.g. renaming app). |
| `apps:delete` | Delete access for apps. |
| `catalogs` | Access to all Tower catalog operations. |
| `catalogs:read` | Read access for catalogs. |
| `catalogs:create` | Create access for catalogs. |
| `catalogs:update` | Update access for catalogs. |
| `catalogs:delete` | Delete access for catalogs. |
| `catalogs:export` | Export access for catalogs. |
| `envs` | Access to all environment operations. |
| `envs:create` | Create access for environments. |
| `envs:read` | Read access for environments. |
| `envs:update` | Update access for environments. |
| `notifications` | Access to all notification operations. |
| `notifications:read` | Read access for notifications. |
| `notifications:delete` | Delete access for notifications. |
| `runs` | Access to all run operations. |
| `runs:read` | Read access for runs. |
| `runs:cancel` | Allows for canceling an active run. |
| `runs:logs` | Read access for run logs, including the stream of logs. |
| `runners` | Access to all self-hosted runner operations. |
| `runners:read` | Read access to runners. |
| `runners:credentials:create` | Allows for creating credentials for self-hosted runners. |
| `sandbox` | Access to all Tower sandbox operations. |
| `sandbox:secrets:create` | Allows for creating a new secret in a sandbox. |
| `schedules` | Access to all schedules operations. |
| `schedules:create` | Create access for schedules. |
| `schedules:read` | Read access for schedules. |
| `schedules:update` | Update access for schedules. |
| `schedules:delete` | Delete access for schedules. |
| `secrets` | Access to all secrets operations. |
| `secrets:read` | Read access for secrets. |
| `secrets:create` | Create access for secrets. |
| `secrets:update` | Update access for secrets. |
| `secrets:delete` | Delete access for secrets. |
| `teams` | Access to all team operations. |
| `teams:create` | Create access for teams. |
| `teams:read` | Read access for teams. |
| `teams:update` | Update access for teams. |
| `teams:delete` | Delete access for teams. |
| `webhooks` | Access to all webhooks operations. |
| `webhooks:read` | Read access for webhooks. |
| `webhooks:create` | Create access for webhooks. |
| `webhooks:update` | Update access for webhooks. |
| `webhooks:delete` | Delete access for webhooks. |
---
## Develop apps
In Tower, you will be developing data applications, or “apps” for short. All *source code-based* data engineering artifacts - ETL/ELT pipelines, batch inference jobs, scripts, tasks of a larger DAG - are “apps” in Tower’s parlance. If you wondered what other data engineering artifacts there are, the answer is: "Tables! Data Sets!".
To manage and run one of these apps in Tower, you should install the Tower CLI and create an app in Tower.
## Install the Tower CLI
if you haven’t already, run in the shell
```bash
pip install -U tower
```
## Login to Tower
Run in the shell
```bash
tower login
```
## Create an app in Tower
```bash
tower apps create --name="hello-world"
```
You will next prepare the code artifacts and a special manifest file called the Towerfile.
## Navigate to folder with source code
If you maintain your app code in a git repo, clone it. For example, this is how you can clone Tower's example repo.
```bash
git clone https://github.com/tower/tower-examples
```
Otherwise, just change to the directory with the source code
```bash
cd tower-examples/01-hello-world
```
## Prepare a manifest file (Towerfile)
In your favorite text editor (vim, nano, Cursor etc), create a [toml-formatted](https://toml.io) file named [Towerfile](https://docs.tower.dev/docs/reference/towerfile) with at least the following keys: `name`, `script` (see next sections for tips on what to put into the Towerfile).
Tower can deal with pretty much any Python code that you've already written. Anything that you can run by calling `python script.py` will also run in Tower. Tower does expect certain files to be present in your project folder, though.
**Main script**: At the minimum your Tower app needs a main script containing your app logic. You will specify the main script in the `script` section of the Towerfile. Tower currently supports Python scripts and Shell scripts. When using Shell scripts instead of Python scripts, you can use them to specify several steps executed in a sequence. For example, here is a shell script that builds a dlt+ project [example](https://github.com/tower/tower-examples/blob/main/04-dlthub-data-pond/task.sh).
```bash
dlt project clean
dlt pipeline -l
dlt pipeline events_to_lake run
dlt transformation . run
dlt dataset reports_dataset info
```
**requirements.txt file**: If you need any Python libraries installed, you will need to provide a requirements.txt file. Create one in your project folder, and specify it in the `source` section of the Towerfile.
### Controlling what gets packaged in your app
By default, the Tower CLI will package all the files under the directory containing your Towerfile into your app. There are cases where you might want to be explicit about what gets packaged, however. You can use the `source` keyword in your Towerfile for this.
If you have other source files, perhaps in folders, or if you want to reference data files from your code, add them to the `source` section of your Towerfile.
```toml
source = [
"./.dlt/config.toml",
"./**/*.py",
"requirements.txt",
"./_data/*",
"./task.sh",
"./dlt_project.yml"
]
```
### Packaging shared code in your app
Often times, apps live together in a repository with other code that is shared. To import this code at package time and runtime, you can use the `import_paths` keyword in your Towerfile.
The `import_paths` keyword should be a list relative paths to directories that contain modules you want to package. When you run `tower deploy`, the Tower CLI will use this information to package the code in those directories. At runtime, the Tower runtime will set `PYTHONPATH` to the correct values such that you can import from those modules.
```toml
import_paths = [
"../lib",
]
```
## Change your app to pass secrets and define app parameters
While Tower lets you run pretty much any Python code, you will want to customize the behavior of your app when it runs in Tower. In Tower you do this by defining [app parameters](https://docs.tower.dev/docs/concepts/apps#parameters).
You will also want to remove hard-coded database connection settings and passwords from your source code, before they get checked into a code repository. At runtime, you will want to pass the database credentials and other config settings to the app. In Tower you can define [secrets](/docs/concepts/environments#secrets) for that.
Both secrets and parameters will be injected into your application as environment variables. Secrets will be passed to your application implicitly without you specifying them on the command line, while for parameters you will need to specify them on the Tower command line (via `--parameter=X=Y`) when running the app.
When deciding which variables to pass as secrets or parameters, consider the following.
Best to pass as **secrets**:
+ Variables that your teammates should not be able to explicitly read (e.g. credentials to your databases and cloud access keys)
+ Variables that your app needs across many of its runs and not just for one run
+ Variables that all of your apps need to have access to
+ Variables that you want to differentiate by the environment, e.g., have different values for "production" and "test"
To pass a secret to all apps in your account on each and every of their runs, create a new secret
```bash
tower secrets create --name=snowflake_url \
--value=https://abc123.snowflake.com
```
Best to pass as **parameters**:
+ Variables whose values change from app run to app run
+ Variables that are not *secret* in nature and are safe to share with your teammates
To pass a parameter to an application at run time, you will specify the value of this parameter on the command line, when running the app.
```bash
tower run --parameter=iceberg_table=”default.trade_stats”
```
Values of secrets and parameters can be accessed in your app code by calling `os.getenv`.
```bash
import os
snowflake_url = os.getenv("snowflake_url")
iceberg_table_name= os.getenv("iceberg_table")
```
For well-known environment variables, such as AWS_REGION, AWS_ACCESS_KEY_ID, or PYICEBERG_CATALOG__DEFAULT__URI, you don’t have to explicitly get their values and then use them in your code, because the libraries that you will be using (e.g. s3fs or pyiceberg) check the values of these well-known environment variables automatically.
---
## Observe and improve
Tower's observability features help you monitor the health of your data system, quickly identify issues, and take targeted action where needed. This guide explains how to use Tower's observability tools to maintain optimal performance.
## Understanding system health
In Tower, you can assess the health of your data system by observing your apps and understanding which of them are healthy or need attention.
Tower uses a simple status model to help you quickly assess system health.
| App Status | Meaning | Action Required |
| ---------- | -------------------------------------- | ----------------------- |
| Running | Run in progress | None - normal operation |
| Successful | Latest run completed without errors | None - normal operation |
| Failed | Latest run encountered errors | Investigate and fix |
| Disabled | App manually deactivated (coming soon) | None - intended state |
Except for the Running and Disabled app statuses, the remaining two app statuses - Successful and Failed - are based on the statuses of the _last completed run_.
| Last Run Status | Resulting App Status | Description |
| --------------- | -------------------- | ------------------------------------------ |
| Exited | Successful | Last Run completed successfully |
| Scheduled | Successful | A new Run is planned for future execution |
| Errored | Failed | Last Run failed due to system-level issues |
| Crashed | Failed | Last Run failed due to issues in user code |
## Monitoring system health in the Tower UI
The Tower Home Page serves as your observability dashboard, providing multiple ways to assess system health.
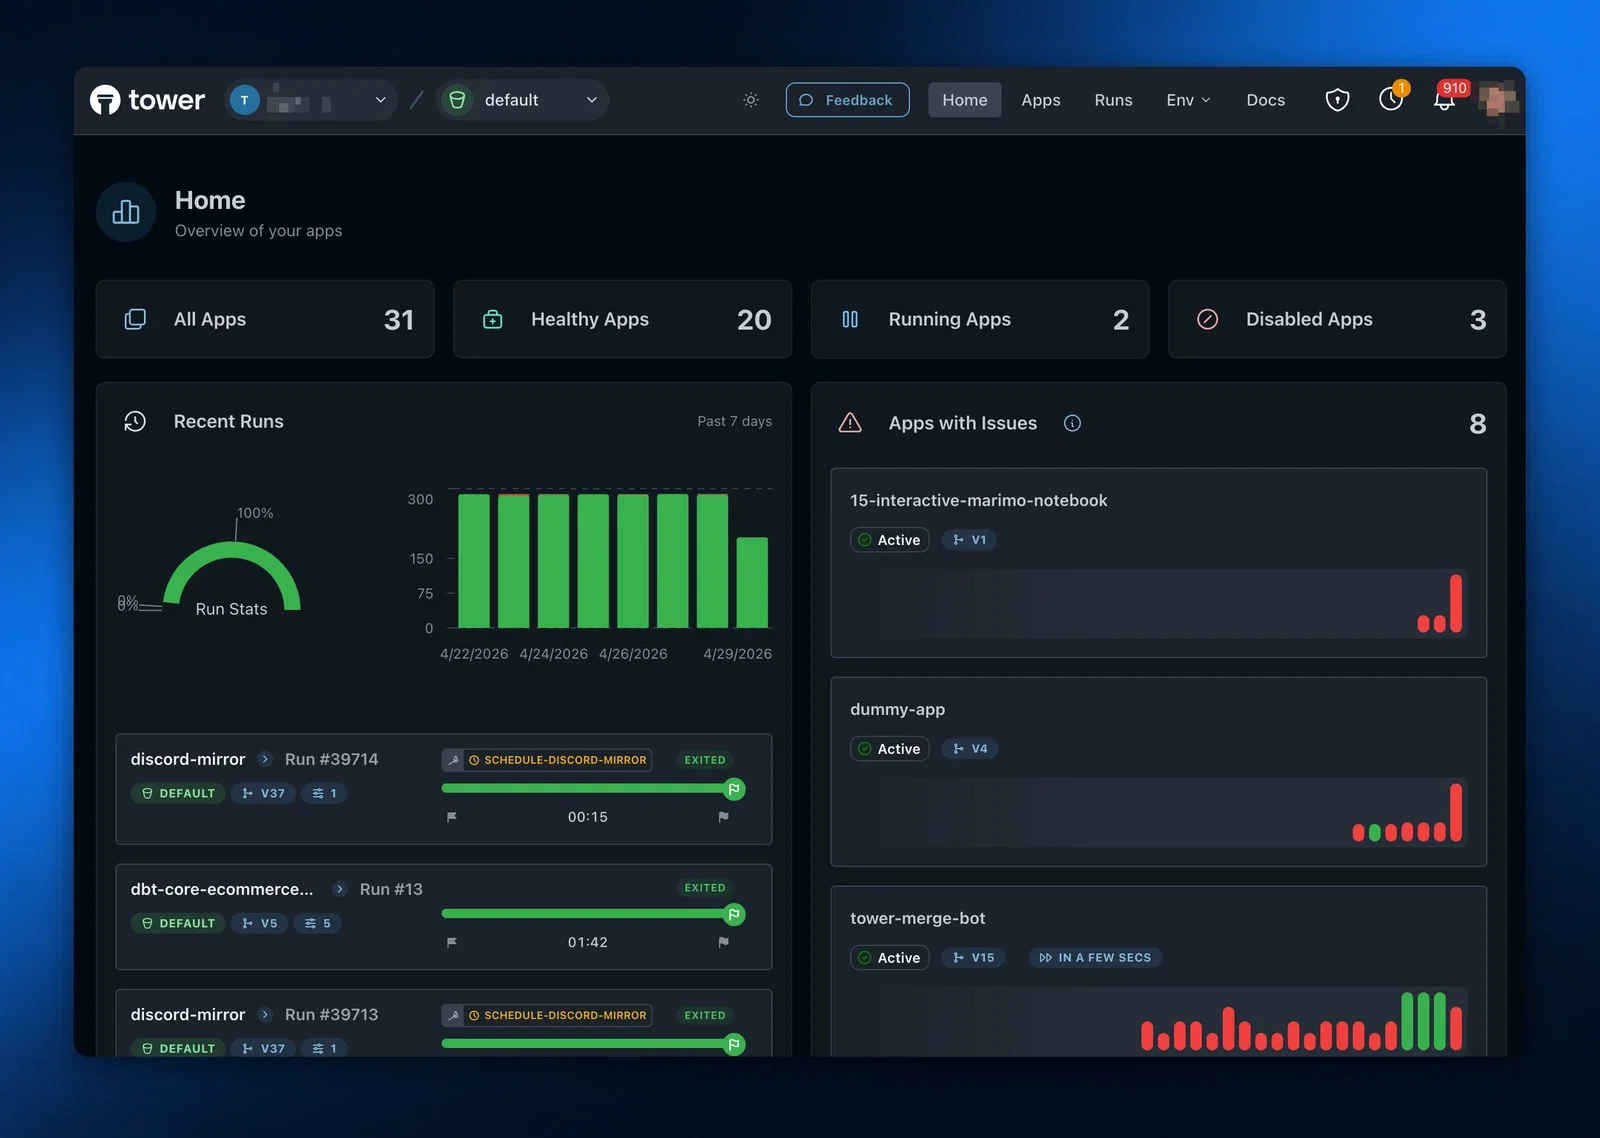
The Home Page includes:
1. **App Statistics** - Shows the overall statistics of your team.
2. **Run History Chart** - Displays successfully exited vs. errored/crashed runs over time, helping you spot trends or sudden increases in failures.
3. **Apps With Issues** - Shows all active apps that have at least 2 failed or crashed runs within their last 10 runs, helping you quickly spot recurring problems.
## Using the CLI to monitor system health
In addition to observability capabilities in the Tower UI, Tower also provides them in the CLI.
_Coming soon_
## Finding apps that need attention
To identify and fix problematic apps:
1. Click the "Failed" app status in the App Status Summary to filter the list to only failed apps
2. Select a specific date range from the dropdown in the Run History Chart to focus on recent failures
3. Click any app card to view detailed run information
## Setting up automatic alerting
Tower provides configurable alerting capabilities to keep you informed about your apps' status and any potential issues.
### Alert Channels
Tower offers two notification channels to keep you informed:
1. **In-app notifications**: An alert bell icon in the Tower UI displays the count of unacknowledged alerts. This provides immediate visibility into issues requiring your attention.
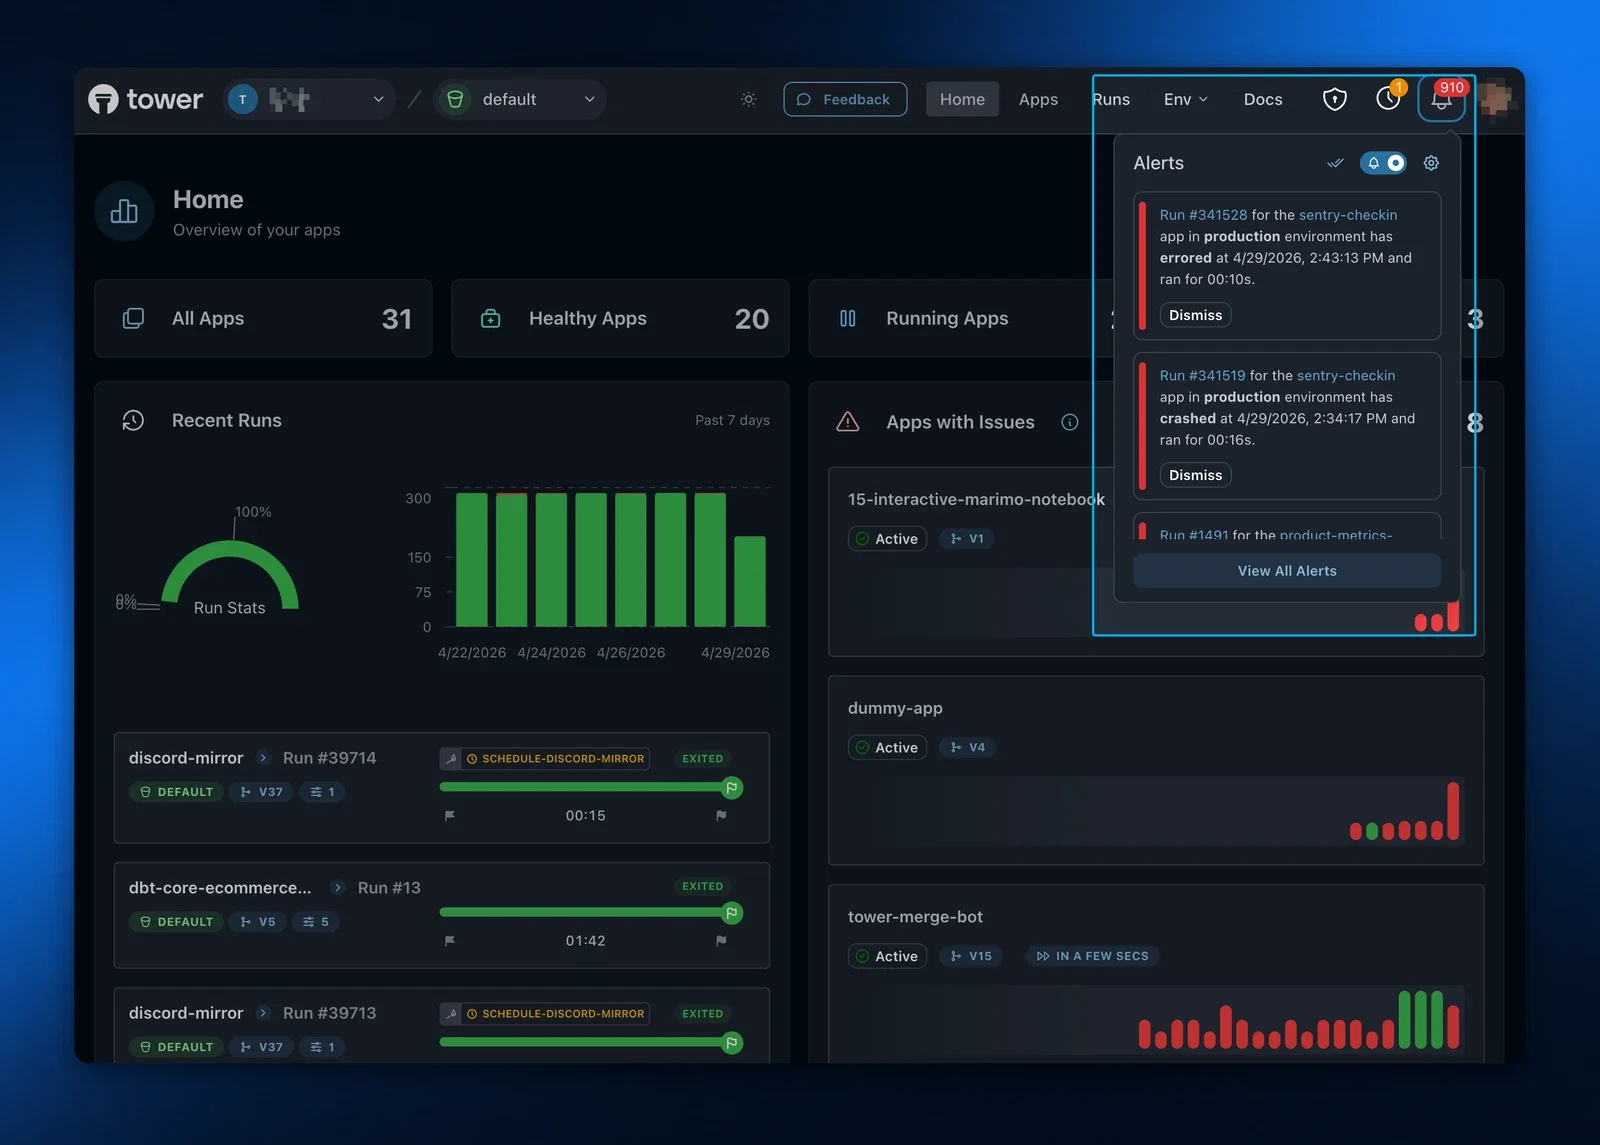
2. **Email notifications**: Tower automatically sends email notifications when app runs fail, ensuring you're promptly informed of issues even when away from the UI.
### Alert Conditions
Tower triggers alerts when an app run enters one of the Failed states, specifically when it exits in Crashed or Errored states. This helps you quickly identify and address issues that require intervention.
### Managing Alert Settings
You can customize your alert preferences through the Alerts interface under Account Settings, where you can enable or disable notifications based on your needs.
## Investigating and fixing issues
When you identify a failed app:
1. Navigate to the App Details page by clicking the app card
2. Review the list of runs, focusing on the most recent failed run
3. Click on the failed run to open the Run Details page
4. Analyze the logs to identify the specific error:
- For **Crashed** runs: Focus on user code-level exceptions, input data issues, or configuration problems
- For **Errored** runs: Note the error and contact Tower administrators if it appears to be a platform issue
### Common Issues and Solutions
| Issue Type | Common Signs | Typical Solutions |
| ------------------- | ------------------------ | -------------------------------------------- |
| Data format changes | Schema validation errors | Update code to handle new formats |
| Resource limits | Memory/CPU errors | Optimize code or request increased resources |
| Authentication | Permission denied errors | Update or rotate credentials |
| System dependencies | Import or library errors | Update dependencies or contact admin |
After making code changes, test locally using the guidance in our [Test guide](/docs/using-tower/test) before redeploying the app to Tower.
---
## Orchestrate apps
Orchestration in Tower gives you control over when and how your apps execute, allowing you to automate and compose more complex flows.
Tower's orchestration capabilities help you:
- Run apps on demand
- Define a control flow and run several apps in parallel or in a sequence
- Schedule regular runs at specific intervals
## Run Apps On Demand
### Run Apps in CLI
Use the Tower CLI when you need to run an app on demand or as part of your own automation scripts:
```bash
tower run my-app
```
For additional options like passing parameters, see the [tower run](/docs/reference/tower-cli#tower-run) command documentation.
### Run Apps in Tower UI
Navigate to the App Details page, click on the "Create Run" button on the top right of the screen and follow the prompts to launch a Run.
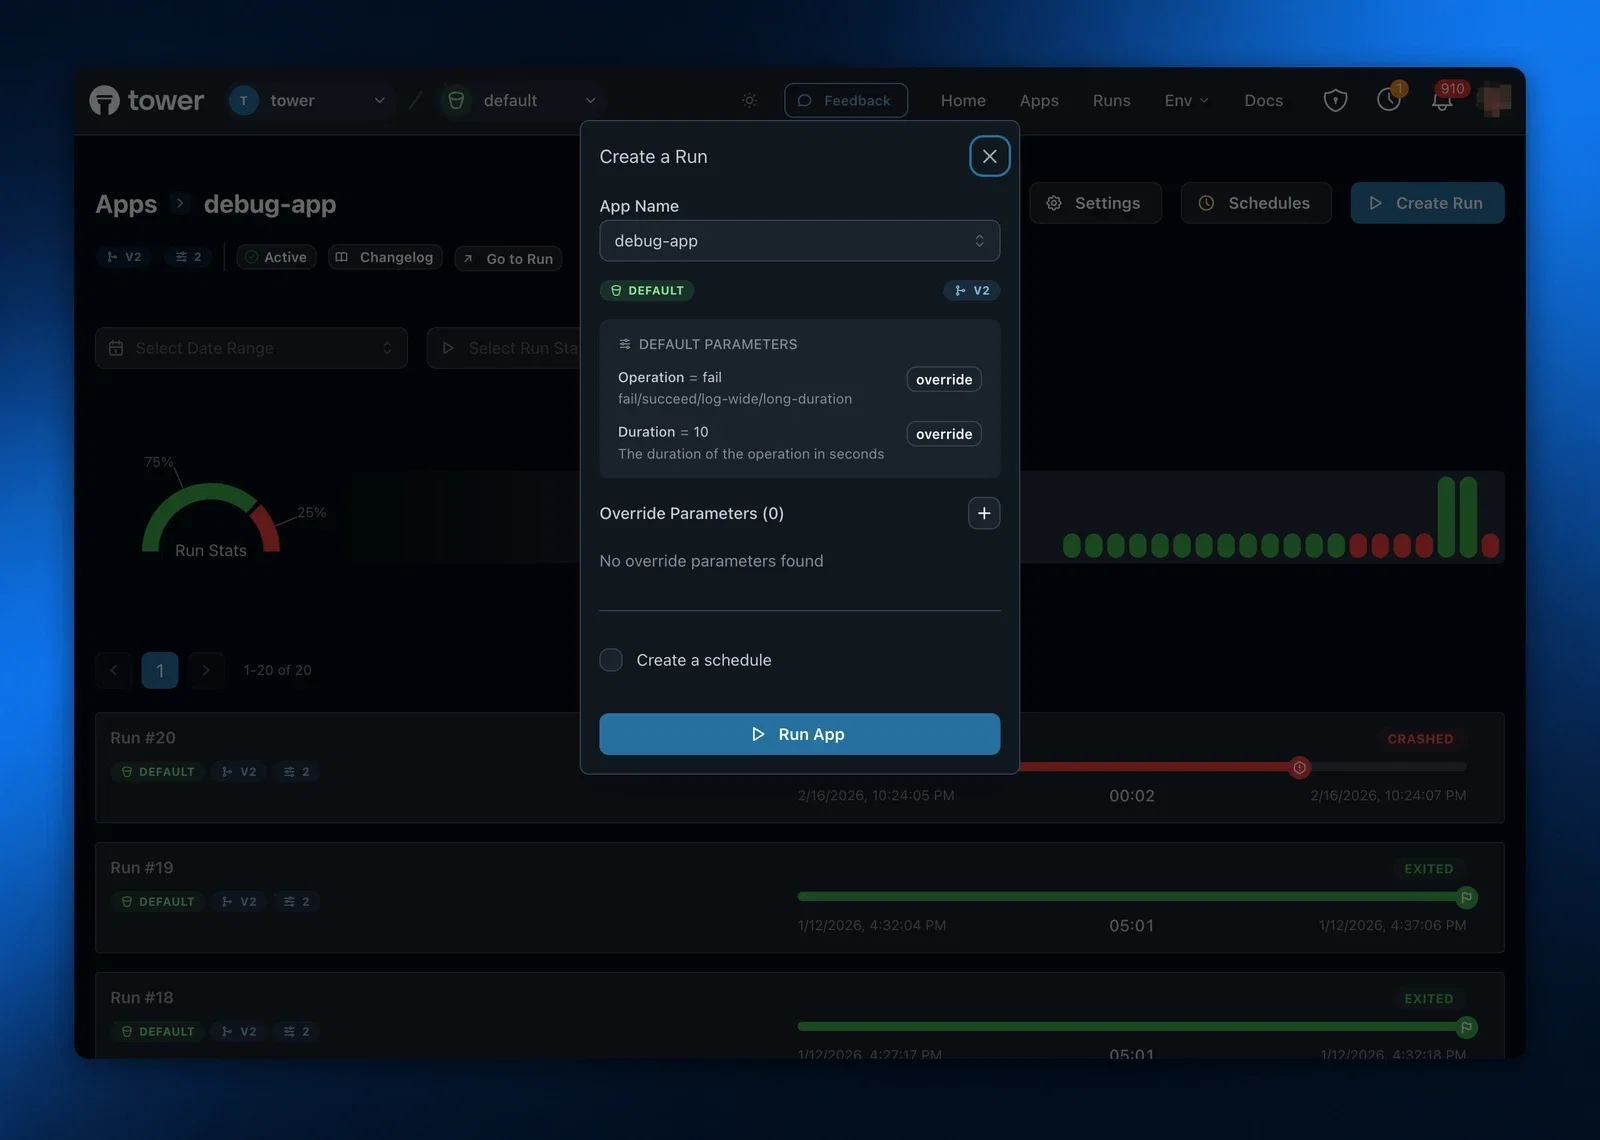
### Run Apps via Tower API
For programmatic control or integration with external systems, use the Tower API:
```bash
curl -X POST https://api.tower.dev/v1/apps//runs \
-H "Authorization: Bearer "
```
See the [Run App API](/docs/reference/api/run-app) documentation for complete details.
## Compose Flows
Tower apps can call other Tower apps and wait for their completion. The `run` and `wait` helper functions allow you to define flows of any complexity.
The control flows can be as simple as running two or three apps in a sequence. They can also be as complex as creating a list of app runs depending on the input parameters or the data your received, launching these apps in parallel execution, waiting for the completion of all or some of these apps, and then doing some post-processing at the end.
### Run Apps
To run an app, use the [`run_app`](/docs/reference/tower-sdk#run_app) helper function and specify the app slug.
You can also pass parameters to the app the same way you pass parameters via the CLI or API.
```python
from tower import run_app
# Run an app with default environment
run = run_app("my-app")
# Run an app with custom environment and parameters
params = {"input_file": "data.csv", "output_dir": "results"}
run = run_app("my-app", parameters=params)
```
To run multiple apps in parallel, call `run_app` multiple times.
You can even launch apps dependent on the input data, and you can do it in loops or conditionals. This allows you creating dynamic control flows.
Tower example [fan-out-ticker-runs](https://github.com/tower/tower-examples/tree/main/08-fan-out-ticker-runs) shows how to:
```python
tickers_str="AAPL,MSFT,GOOGL"
ticker_list = [ticker.strip() for ticker in tickers_str.split(",")]
# Process each ticker's data
child_runs = []
for ticker in ticker_list:
params = {
"PULL_DATE": f"{pull_date_str}",
"TICKERS": f"{ticker}"
}
run = tower.run_app("write-ticker-data-to-iceberg", parameters=params)
child_runs.append(run)
```
In the above example, multiple runs of the same app `"write-ticker-data-to-iceberg"` will be started, one per ticker.
Each run will have a different value for the ticker parameter.
### Wait for App Run Completions
In a typical control flow you will want to wait for the completion of a run or set of runs before proceeding to the next step.
You might also want to deal with failure of one of the runs.
The [`wait_for_run()`](/docs/reference/tower-sdk#wait_for_run) helper function will wait for the completion of the run that you pass as parameter.
It will return a `Run` object that you can inspect for run status.
```python
run = tower.run_app("my-app")
# Wait for a run to complete
final_run = tower.wait_for_run(run)
```
Its multi-run sibling [`wait_for_runs()`](/docs/reference/tower-sdk#wait_for_runs) waits for the completion of multiple runs that you started.
It will return a tuple containing two lists on `Run` objects: `successful_runs` and `failed_runs`.
You can inspect these lists to define what to do next, e.g. retry one of the apps, log the errors and terminate etc.
In our Tower example [fan-out-ticker-runs](https://github.com/tower/tower-examples/tree/main/08-fan-out-ticker-runs), we use `wait_for_runs` and pass the `child_runs` list that we created by launching multiple apps.
In return we get the runs that were successful and not.
```python
successful, unsuccessful = tower.wait_for_runs(child_runs)
print(f"Successful ticker downloads: {len(successful)}")
print(f"Unsuccessful ticker downloads: {len(unsuccessful)}")
```
If, instead of waiting for the completion of every run you want to break on any failure, use the `raise_on_failure=True` parameter.
```python
# Wait for multiple runs with custom settings
try:
successful, unsuccessful = tower.wait_for_runs(child_runs, raise_on_failure=True)
except RunFailedError as e:
print(f"One or more runs failed: {e}")
```
## Schedule App Runs
Schedules allow your apps to run automatically at predetermined times
recurrently. You manage app schedules separately from apps and environments.
Schedules can be managed in using the Tower CLI or the Tower UI.
### How schedules pick up new versions
Schedules inherit the version deployed to their environment. They are never deployed to a specific app version on their own. When you promote a new version of an app to an environment (for example with `tower deploy --environment=production`), every active schedule for that app in `production` automatically starts running the new version on its next scheduled tick. There is no separate "update the schedule" step.
This is intentional: The schedule's job is to run the app on a cadence, and the environment's job is to say what version of the app exists there. Keeping these concerns separate means rollbacks and promotions just work — repin the environment and every schedule for it follows.
### Adding a schedule
Tower CLI provides commands for adding schedules directly from your command line.
```bash
tower schedules create --help
Create a new schedule for an app
Usage: tower schedules create [OPTIONS] --app --cron
Options:
-a, --app The name of the app to schedule
-e, --environment The environment to run the app in [default: default]
-c, --cron The cron expression defining when the app should run
-p, --parameter Parameters (key=value) to pass to the app
-h, --help Print help
```
```bash
tower schedules create --app="hello-world" --cron="every 15 minutes" --parameter=friend=Brad --parameter=foe=Alice
```
Alternatively, you can use the Tower UI to create and manage schedules. You can
find the schedules editor in the top right corner of every Tower screen.
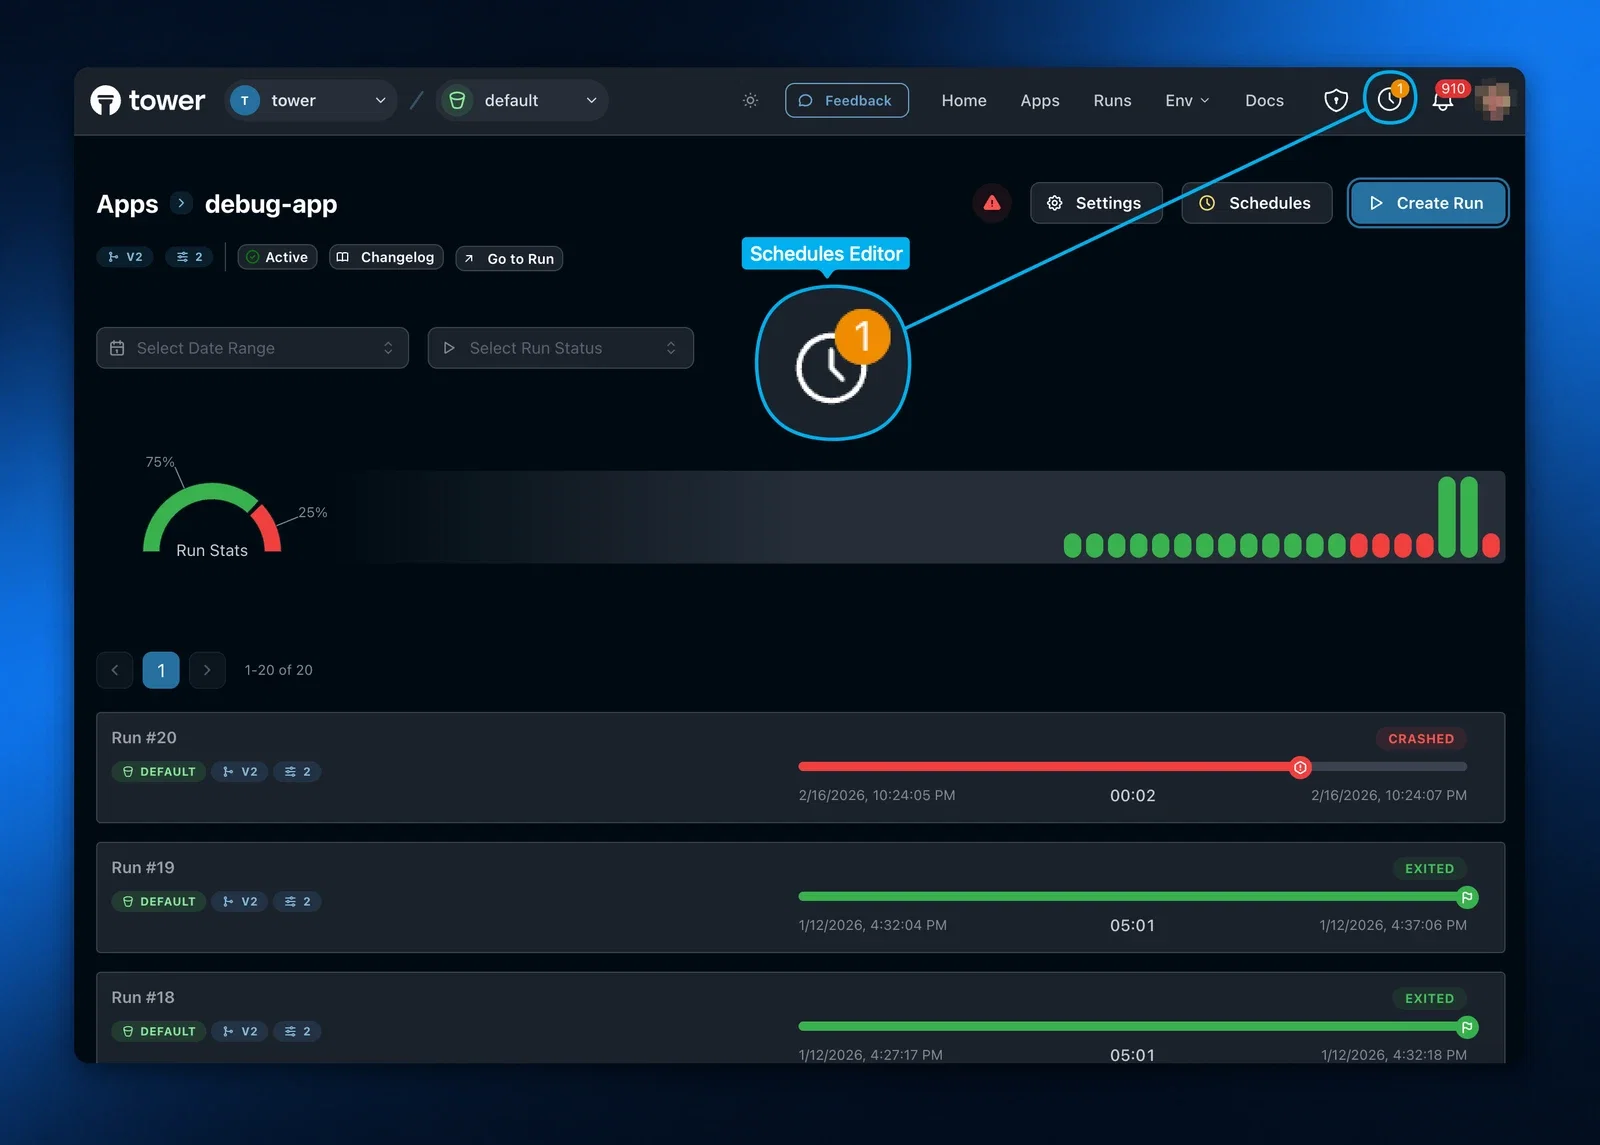
### Listing schedules you have configured
```bash
tower schedules list
ID App Environment Cron Status
-------------------------------------------------------------------------------------
529fa2f2-6568-4fed-842c-a765f7e94228 tower-daily production 0 0 6 * * * active
fdbd0276-787b-4c2e-8db1-b2c6be1f546c tower-daily production 0 0 7 * * * active
297af2b9-0e35-49de-8ce6-6eac6945b425 tower-daily production 0 0 6 * * * active
```
#### Schedule Syntax Options
Tower supports two schedule syntax formats:
**Natural Language Format**:
Some examples of acceptable schedules.
```
every 15 minutes
every hour
```
**Cron Syntax**:
For more complex scheduling needs, use standard cron syntax:
```
*/15 * * * * # Every 15 minutes
0 * * * * # Top of every hour
0 2 * * * # 2am daily
0 9 * * 1 # 9am every Monday
0 0 1 * * # Midnight on first of every month
```
### Schedule Limitations
- Minimum interval is 1 minute
- Schedules are executed in UTC time zone
### Managing Schedules
#### Updating a Schedule
To modify an existing schedule, you can again use either the Tower CLI or the
schedules editor in Tower UI.
```bash
tower schedules update --help
Update an existing schedule
Usage: tower schedules update [OPTIONS] [SCHEDULE_ID]
Options:
-c, --cron The cron expression defining when the app should run
-p, --parameter Parameters (key=value) to pass to the app
-h, --help Print help
```
#### Removing a Schedule
To delete a schedule, you can also use either the Tower CLI or the schedules
editor in Tower UI.
```bash
tower schedules delete --help
Delete a schedule
Usage: tower schedules delete [COMMAND]
Options:
-h, --help Print help
```
#### Viewing Scheduled Runs
Monitor your scheduled runs in the Tower UI:
1. Navigate to your app's details page
2. The next scheduled run shows you the next scheduled execution
3. The history of scheduled runs and their status are also found on this page
## Orchestration Best Practices
For effective app orchestration in Tower:
### Schedule Frequency
- Consider data volumes: Schedule frequency should align with expected data processing volumes
- Resource efficiency: Avoid scheduling too frequently if data doesn't change often
- Dependency awareness: Schedule dependent apps after their upstream data sources or dependencies get updated. Or use control flows to orchestrate multiple apps.
### Monitoring
- Regularly check the Tower dashboard for failed scheduled runs
- Set up notifications for scheduled run failures (Coming soon)
### Troubleshooting
If scheduled runs aren't executing as expected:
- Verify the app has been successfully deployed with the schedule
- Check for any error messages in the Tower logs
- Ensure your app has the necessary permissions and that all Secrets are up to date
- Confirm your schedule syntax is valid
---
## Retrying failed runs
Tower can automatically retry runs that fail due to infrastructure errors (`errored`) or application crashes (`crashed`). Retry policies let you configure how many times to retry, how long to wait between attempts, and whether to use exponential backoff.
## Configuring a retry policy on an app
A retry policy set on an app applies to every future run of that app. Configure it via the Tower API when updating an app:
```bash
curl -X PATCH https://api.tower.dev/v1/apps/my-app \
-H "Authorization: Bearer " \
-H "Content-Type: application/json" \
-d '{
"retry_policy": {
"max_retries": 3,
"retry_delay_seconds": 60,
"use_exponential_backoff": false
}
}'
```
You can also configure the retry policy from the app settings panel in the Tower UI.
### Retry policy fields
| Field | Type | Description | Range |
|---|---|---|---|
| `max_retries` | integer | Maximum number of retry attempts after the initial run. `0` disables retries. | 0–10 |
| `retry_delay_seconds` | integer | Seconds to wait before dispatching the next attempt. | 0–3600 |
| `use_exponential_backoff` | boolean | When `true`, doubles the delay with each retry attempt, capped at 1 hour. | — |
Setting `max_retries` to `0` (the default) disables automatic retries entirely.
### Exponential backoff
When `use_exponential_backoff` is `true`, the wait before the Nth retry is:
```
delay × 2^(N-1)
```
For example, with `retry_delay_seconds: 30` and three retries:
| Retry | Wait |
|---|---|
| 1st | 30 seconds |
| 2nd | 60 seconds |
| 3rd | 120 seconds |
The maximum wait between retries is 1 hour, regardless of the backoff factor.
## Overriding the retry policy for a single run
You can override the app's retry policy for a specific run by passing `retry_policy` in the run request body:
```bash
curl -X POST https://api.tower.dev/v1/apps/my-app/runs \
-H "Authorization: Bearer " \
-H "Content-Type: application/json" \
-d '{
"retry_policy": {
"max_retries": 5,
"retry_delay_seconds": 30,
"use_exponential_backoff": true
}
}'
```
When a `retry_policy` is provided in the run request it takes effect only for that run; the app's default policy is not modified.
## How retries work
When a run finishes with `crashed` or `errored` status and a retry policy is configured:
1. Tower records the current attempt (its status, timing, and exit code) in the run's attempt history.
2. The run transitions to **`retrying`** status and waits for the configured delay.
3. After the delay, Tower dispatches the run again as a new attempt on the same run record.
4. This repeats until the run succeeds (`exited`) or the attempt limit is exhausted.
A run in `retrying` status is considered **active** — it appears in active run counts and can be cancelled.
### What is and is not retried
| Final status | Retried? |
|---|---|
| `crashed` | Yes |
| `errored` | Yes |
| `exited` | No |
| `cancelled` | No |
Tower also skips retries if the app is disabled at the time of the retry check.
## Viewing attempt history
Each attempt within a run is recorded separately. The run's `num_attempts` field tells you how many attempts have been made. The full history is available in the run detail response under the `attempts` array (it is omitted from list responses):
```json
{
"run_id": "abc123",
"status": "retrying",
"num_attempts": 2,
"retry_policy": {
"max_retries": 3,
"retry_delay_seconds": 60,
"use_exponential_backoff": false
},
"attempts": [
{
"seq": 1,
"status": "crashed",
"started_at": "2024-11-20T08:00:00Z",
"ended_at": "2024-11-20T08:01:05Z",
"exit_code": 1
}
]
}
```
The `seq` field is 1-based: `seq: 1` is the original run, `seq: 2` is the first retry, and so on.
### Log lines and attempts
Each log line includes an `attempt_seq` field indicating which attempt produced it. This lets you filter or correlate logs with a specific retry attempt when inspecting run output.
## Cancelling a retrying run
A run that is waiting to retry (status `retrying`) can be cancelled just like a pending or running run. Cancellation stops the retry cycle and marks the run as `cancelled`.
## Removing a retry policy
To disable retries on an app, set `max_retries` to `0`:
```bash
curl -X PATCH https://api.tower.dev/v1/apps/my-app \
-H "Authorization: Bearer " \
-H "Content-Type: application/json" \
-d '{"retry_policy": {"max_retries": 0, "retry_delay_seconds": 30, "use_exponential_backoff": false}}'
```
---
## Install and run Self-Hosted runners
This guide covers installing, configuring, and operating the Tower Runner on your own infrastructure across Linux, macOS, Windows, and Docker.
# Self‑Hosted Data Plane Mode
For an architectural overview and behavior of Self‑Hosted Data Plane mode, see: [Data Plane → Self‑Hosted Data Plane](/docs/architecture/data-plane#2-self-hosted-data-plane)
## Download locations
Get the full URL you need from the table below. Latest links are fixed; versioned links show an example (`0.8.17`).
| Platform | Format | Arch | Latest URL | Versioned example (0.8.17) |
| --- | --- | --- | --- | --- |
| Debian/Ubuntu | .deb | amd64 | `https://tower-packages.s3.us-east-1.amazonaws.com/releases/tower-runner/latest/tower-runner_amd64.deb` | `https://tower-packages.s3.us-east-1.amazonaws.com/releases/tower-runner/0.8.17/tower-runner_0.8.17-1_amd64.deb` |
| Debian/Ubuntu | .deb | arm64 | `https://tower-packages.s3.us-east-1.amazonaws.com/releases/tower-runner/latest/tower-runner_arm64.deb` | `https://tower-packages.s3.us-east-1.amazonaws.com/releases/tower-runner/0.8.17/tower-runner_0.8.17-1_arm64.deb` |
| Linux | tar.gz | x86_64 | `https://tower-packages.s3.us-east-1.amazonaws.com/releases/tower-runner/latest/tower-runner-linux-x86_64.tar.gz` | `https://tower-packages.s3.us-east-1.amazonaws.com/releases/tower-runner/0.8.17/tower-runner-linux-x86_64-0.8.17.tar.gz` |
| Linux | tar.gz | aarch64 | `https://tower-packages.s3.us-east-1.amazonaws.com/releases/tower-runner/latest/tower-runner-linux-aarch64.tar.gz` | `https://tower-packages.s3.us-east-1.amazonaws.com/releases/tower-runner/0.8.17/tower-runner-linux-aarch64-0.8.17.tar.gz` |
| macOS | tar.gz | arm64 | `https://tower-packages.s3.us-east-1.amazonaws.com/releases/tower-runner/latest/tower-runner-macos-aarch64.tar.gz` | `https://tower-packages.s3.us-east-1.amazonaws.com/releases/tower-runner/0.8.17/tower-runner-macos-aarch64-0.8.17.tar.gz` |
| macOS | tar.gz | x86_64 | `https://tower-packages.s3.us-east-1.amazonaws.com/releases/tower-runner/latest/tower-runner-macos-x86_64.tar.gz` | `https://tower-packages.s3.us-east-1.amazonaws.com/releases/tower-runner/0.8.17/tower-runner-macos-x86_64-0.8.17.tar.gz` |
| Windows | MSI | x64 | `https://tower-packages.s3.us-east-1.amazonaws.com/releases/tower-runner/latest/tower-runner-x64.msi` | `https://tower-packages.s3.us-east-1.amazonaws.com/releases/tower-runner/0.8.17/tower-runner-x64-0.8.17.msi` |
| Windows | MSI | arm64 | `https://tower-packages.s3.us-east-1.amazonaws.com/releases/tower-runner/latest/tower-runner-arm64.msi` | `https://tower-packages.s3.us-east-1.amazonaws.com/releases/tower-runner/0.8.17/tower-runner-aarch64-0.8.17.msi` |
| Windows | ZIP | x86_64 | `https://tower-packages.s3.us-east-1.amazonaws.com/releases/tower-runner/latest/tower-runner-windows-x86_64.zip` | `https://tower-packages.s3.us-east-1.amazonaws.com/releases/tower-runner/0.8.17/tower-runner-windows-x86_64-0.8.17.zip` |
| Windows | ZIP | aarch64 | `https://tower-packages.s3.us-east-1.amazonaws.com/releases/tower-runner/latest/tower-runner-windows-aarch64.zip` | `https://tower-packages.s3.us-east-1.amazonaws.com/releases/tower-runner/0.8.17/tower-runner-windows-aarch64-0.8.17.zip` |
Note: You can verify downloads by appending `.sha256` to any file URL above to retrieve its SHA‑256 checksum.
## Requirements for running the Self-Hosted runner
- A Tower account and API key
- Outbound network access to `*.tower.dev` over TCP 443
- Platform and privileges:
- Linux: x86_64 or ARM64; root/sudo privileges for service install
- Windows: x64 or ARM64; Administrator privileges for MSI or service install
- macOS: x86_64 or ARM64; interactive shell usage
## Linux (Debian/Ubuntu) — .deb package (recommended)
1) Download and install from S3
```bash
# Latest (amd64)
curl -L -O https://tower-packages.s3.us-east-1.amazonaws.com/releases/tower-runner/latest/tower-runner_amd64.deb
sudo dpkg -i tower-runner_amd64.deb
# Latest (arm64)
curl -L -O https://tower-packages.s3.us-east-1.amazonaws.com/releases/tower-runner/latest/tower-runner_arm64.deb
sudo dpkg -i tower-runner_arm64.deb
# Versioned example (amd64)
curl -L -O https://tower-packages.s3.us-east-1.amazonaws.com/releases/tower-runner/0.8.17/tower-runner_0.8.17-1_amd64.deb
sudo dpkg -i tower-runner_0.8.17-1_amd64.deb
```
2) Configure API key
```bash
sudo $EDITOR /etc/tower-runner/tower-runner.env
# Set: TOWER_API_KEY=your-api-key-here
```
3) Start and verify
```bash
sudo systemctl enable --now tower-runner
sudo systemctl status tower-runner
journalctl -u tower-runner -f
```
The package installs a:
- Binary at `/usr/bin/tower-runner`
- Systemd unit `tower-runner.service`
- Config file at `/etc/tower-runner/tower-runner.env` (preserved across upgrades)
## Linux (other)
Download the tarball from S3
```bash
# Latest (x86_64)
curl -L https://tower-packages.s3.us-east-1.amazonaws.com/releases/tower-runner/latest/tower-runner-linux-x86_64.tar.gz | tar -xz
# Latest (arm64)
curl -L https://tower-packages.s3.us-east-1.amazonaws.com/releases/tower-runner/latest/tower-runner-linux-aarch64.tar.gz | tar -xz
# Specific version (x86_64)
export RUNNER_VERSION=0.8.17
curl -L "https://tower-packages.s3.us-east-1.amazonaws.com/releases/tower-runner/0.8.17/tower-runner-linux-x86_64-${RUNNER_VERSION}.tar.gz" | tar -xz
sudo mv tower-runner /usr/local/bin/
sudo chmod +x /usr/local/bin/tower-runner
```
## macOS — binary
```bash
# Latest (Apple Silicon / arm64)
curl -L https://tower-packages.s3.us-east-1.amazonaws.com/releases/tower-runner/latest/tower-runner-macos-aarch64.tar.gz | tar -xz
# Latest (Intel / x86_64)
curl -L https://tower-packages.s3.us-east-1.amazonaws.com/releases/tower-runner/latest/tower-runner-macos-x86_64.tar.gz | tar -xz
# Versioned example (Apple Silicon)
curl -L https://tower-packages.s3.us-east-1.amazonaws.com/releases/tower-runner/0.8.17/tower-runner-macos-aarch64-0.8.17.tar.gz | tar -xz
chmod +x tower-runner
sudo mv tower-runner /usr/local/bin/
# Authenticate (preferred: .env file in the working directory)
echo "TOWER_API_KEY=your-api-key-here" > .env
## Or for a one-off shell session:
export TOWER_API_KEY=your-api-key-here
# You can also: tower login (via CLI) to create a session
tower-runner start
```
## Windows — MSI installer (recommended)
```powershell
# Latest (x64)
Invoke-WebRequest -Uri "https://tower-packages.s3.us-east-1.amazonaws.com/releases/tower-runner/latest/tower-runner-x64.msi" -OutFile "tower-runner.msi"
# Latest (arm64)
Invoke-WebRequest -Uri "https://tower-packages.s3.us-east-1.amazonaws.com/releases/tower-runner/latest/tower-runner-aarch64.msi" -OutFile "tower-runner.msi"
# Versioned example (x64)
Invoke-WebRequest -Uri "https://tower-packages.s3.us-east-1.amazonaws.com/releases/tower-runner/0.8.17/tower-runner-x64-0.8.17.msi" -OutFile "tower-runner.msi"
msiexec /i tower-runner.msi /qb
notepad $env:ProgramData\tower-runner\tower-runner.env # Set TOWER_API_KEY
Start-Service -Name TowerRunner
Get-Service -Name TowerRunner
```
### Windows — ZIP + PowerShell scripts (alternative)
```powershell
# Latest (x86_64)
Invoke-WebRequest -Uri "https://tower-packages.s3.us-east-1.amazonaws.com/releases/tower-runner/latest/tower-runner-windows-x86_64.zip" -OutFile "tower-runner.zip"
# Latest (arm64)
Invoke-WebRequest -Uri "https://tower-packages.s3.us-east-1.amazonaws.com/releases/tower-runner/latest/tower-runner-windows-aarch64.zip" -OutFile "tower-runner.zip"
# Versioned example (x86_64)
Invoke-WebRequest -Uri "https://tower-packages.s3.us-east-1.amazonaws.com/releases/tower-runner/0.8.17/tower-runner-windows-x86_64-0.8.17.zip" -OutFile "tower-runner.zip"
Expand-Archive -Path "tower-runner.zip" -DestinationPath "C:\\Program Files\\tower-runner"
cd "C:\\Program Files\\tower-runner"
./install-service.ps1
notepad $env:ProgramData\tower-runner\tower-runner.env # Set TOWER_API_KEY
Start-Service -Name TowerRunner
Get-Service -Name TowerRunner
```
## Docker — containerized runner
```bash
# Latest tag
docker run -d --name tower-runner --restart unless-stopped \
-e TOWER_API_KEY="your-api-key-here" \
towerhq/tower-runner:latest
# Versioned example
docker run -d --name tower-runner-089 --restart unless-stopped \
-e TOWER_API_KEY="your-api-key-here" \
towerhq/tower-runner:0.8.17
# Logs
docker logs -f tower-runner
```
Notes:
- Image name: `towerhq/tower-runner`
- Tags: `latest` and semantic versions (e.g., `0.8.17`)
---
## Test apps
Once you have prepared a Towerfile and changed your app code to receive secrets and parameters, you are ready to test the app. We recommend starting with a python run, then a local Tower run, and then a run in the Tower cloud.
## Run your main script in python
Make sure your main script runs in python successfully.
```bash
python mainscript.py
```
## Run app locally
Tower offers a [local execution](https://docs.tower.dev/docs/concepts/apps#running-an-app-locally) mode. Use this mode to verify that your app is compatible with the Tower remote execution environment.
```bash
tower run --local
```
## Deploy the app to Tower
Now that you've tested the app locally, you can deploy the app to Tower and run it there. By default, `tower deploy` creates a new version of your app and pins it to the `default` environment only — other environments (like `production`) keep whatever version they were already running. That makes it safe to iterate without touching production.
```bash
tower deploy
```
## Run in a test Tower environment
If you have a separate testing environment that you use to test your apps before promoting them to production, you can set up Tower to mirror this process.
Using multiple environments in Tower means two things:
1. **Different secrets per environment** — so your app can connect to different databases, buckets, etc.
2. **Different versions per environment** — so you can let a new version "soak" in test before promoting it to production.
You can set different values for secrets that you want to differ from environment to environment.
```bash
tower secrets create --name=snowflake_url \
--value=https://abc123-prod.snowflake.com \
--environment=test
```
To deploy a new version of your code to a specific environment, pass `--environment` to `tower deploy`. This pins the new version to that environment only — other environments are not affected.
```bash
tower deploy --environment=test
```
Later, you can run an app in an environment that you specify on the command line. Tower will inject the correct value of the secret **and** run the version that's deployed to that environment, so you don't have to have special processing logic to handle different environments.
```bash
tower run --environment=test
```
### Promoting from test to production
Once a version has proven itself in your test environment, you can promote or deploy the same version to production. You can do this two ways:
- **From the Tower UI**: open the app's Changelog, find the version you want to promote, and click **Promote** → choose `production`. The exact version that was running in test gets deployed to production without rebuilding the package.
- **From the CLI**: run `tower deploy --environment=production` from the same source tree. This builds a fresh version and pins it to `production`. (The version number will differ from the one in `test`, but the code is the same if your source hasn't changed.)
If a problem turns up in production, you can roll back to any earlier version from the Changelog using **Rollback**. See [Versions, environments, and promotion](/docs/concepts/environments#versions-environments-and-promotion) for more.
However, if your app code does need to know which environment the app is running in — e.g. so that you can pick different database engines depending on the environment — you can do this via the [TOWER_ENVIRONMENT variable](/docs/using-tower/advanced#programmatically-determining-the-environment).
```
tower_env = os.getenv("TOWER_ENVIRONMENT")
```
## Get app status and logs from Tower
Once you initiate your first run in Tower, you can get the app status and run logs.
Execute “tower apps show” command to get a list of all app runs.
```
tower apps show
```
## Execute “tower apps logs” command to get logs of the specified run
```
tower apps logs #
```
---
## Webhooks
Webhooks are events from Tower that are sent via HTTP. They provide a way for
you to receive events from Tower, such as when a run starts or finishes, in
real time.
## Setting up a webhook
### Create a webhook endpoint on your end
First, create a publicly available endpoint that Tower can send webhooks to. This endpoint must meet the following criteria:
- **Must** be POST.
- **Must** accept JSON.
- **Must** accept the following headers: `X-Tower-Signature`, `X-Tower-Webhook-Timestamp`.
- **Must** return 200 status on success.
- **Should** verify the signature based on the timestamp and payload (details below).
- **Should** be HTTPS.
:::info
If you want to test in a local development environment before adding an
endpoint to your production environment, we recommend using a tool like [ngrok](https://ngrok.com)
that will create a tunnel between the public internet and
your local development environment.
:::
### Set up a webhook configuration in Tower
Next, create a webhook configuration that points to this publicly available
endpoint in Tower. You can do this from your Team Settings → Webhooks.
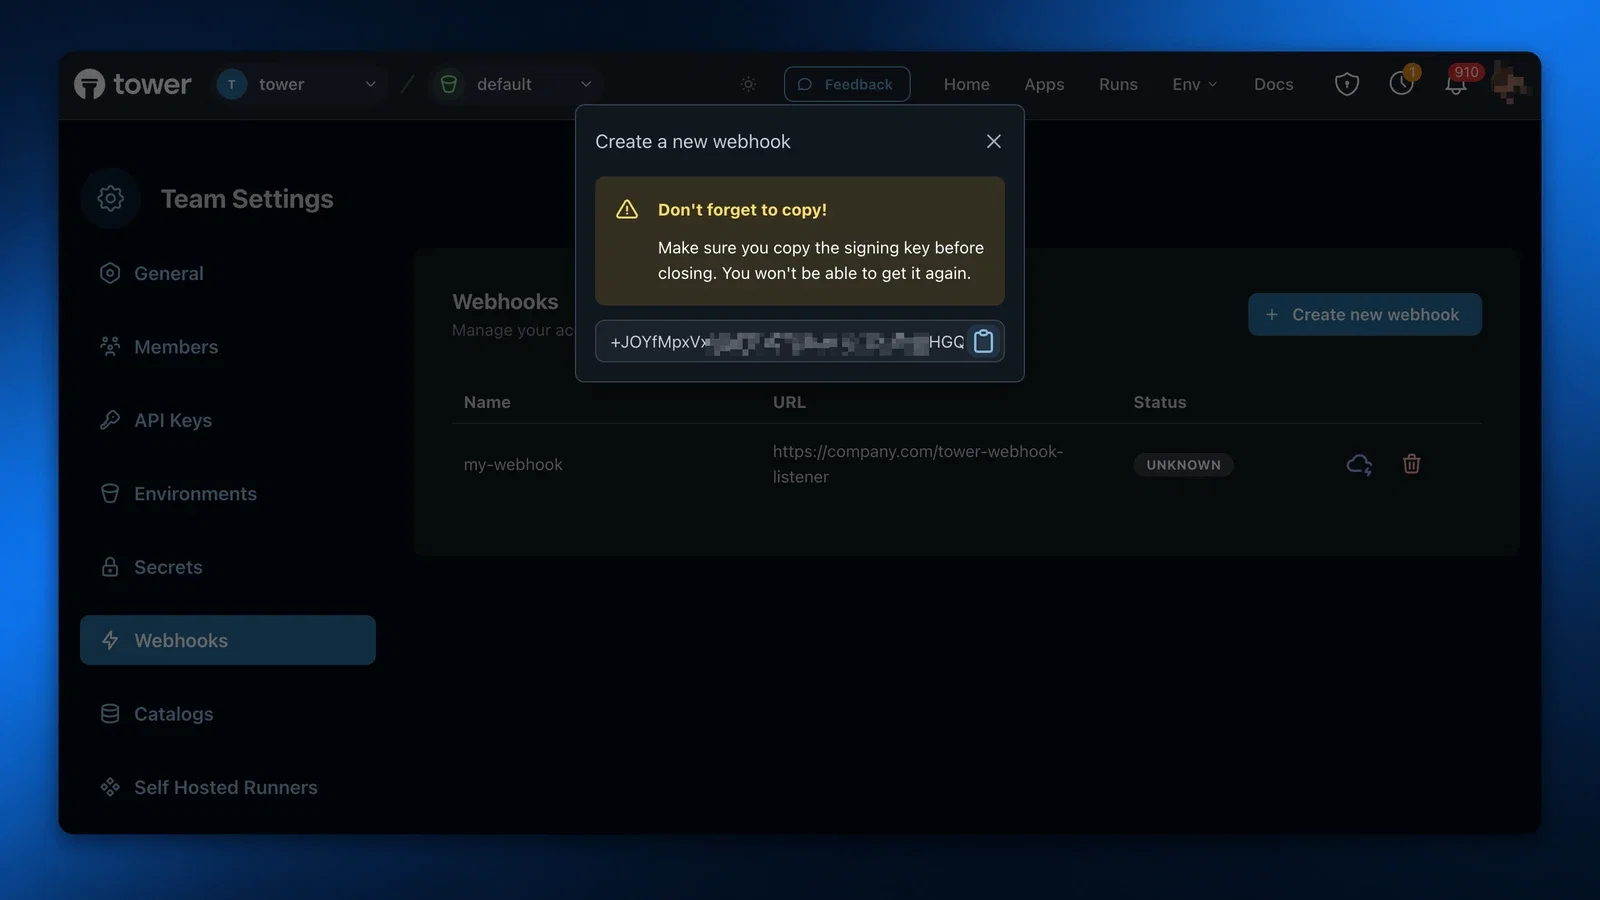
Note that you will get an encoded shared secret upon creation. Copy this
somewhere as you need it to do signature verification and you won’t be
able to see it again.
Once your webhook is created, you’ll see it on the table in the _Unknown_
state.

### Verify the request signature
We **highly recommend** that you write signature verification code as part of
your webhook request handler logic to ensure that the webhook is indeed coming
from Tower and to reject any webhooks that do not have a valid signature.
In each webhook request, in addition to the payload body, you will receive two important headers:
- `X-Tower-Signature`: padded base64 encoded HMAC SHA512 hash.
- `X-Tower-Webhook-Timestamp`: the timestamp, a Unix milliseconds resolution integer, when the webhook was sent from Tower.
To verify the signature, perform the following steps:
1. Check that the incoming timestamp is relatively close to the current time, to avoid replay attacks. Note that the incoming timestamp is in milliseconds, so ensure the way you generate the current time takes this into account.
2. Create a new SHA512 HMAC digest with the key as the decoded shared secret you received when creating the webhook.
3. Update the digest with the incoming timestamp, as bytes.
4. Update the digest with the incoming request body, as bytes. We recommend to get the request body directly as a buffer and using that, to ensure that no potential JSON decoding step makes subtle changes to the bytes used for the digest.
5. Generate a hash of the digest you’ve created.
6. Compare your hash with the hash from the `X-Tower-Signature` header. They should match exactly. Note that the header is padded (meaning, it will potentially have `=` appended to it), in case you are comparing the hashes as strings.
If the signatures do not match, we highly recommend you reject the request.
### Testing
Once the webhook is configured, you can test it by clicking the Test icon in the table.
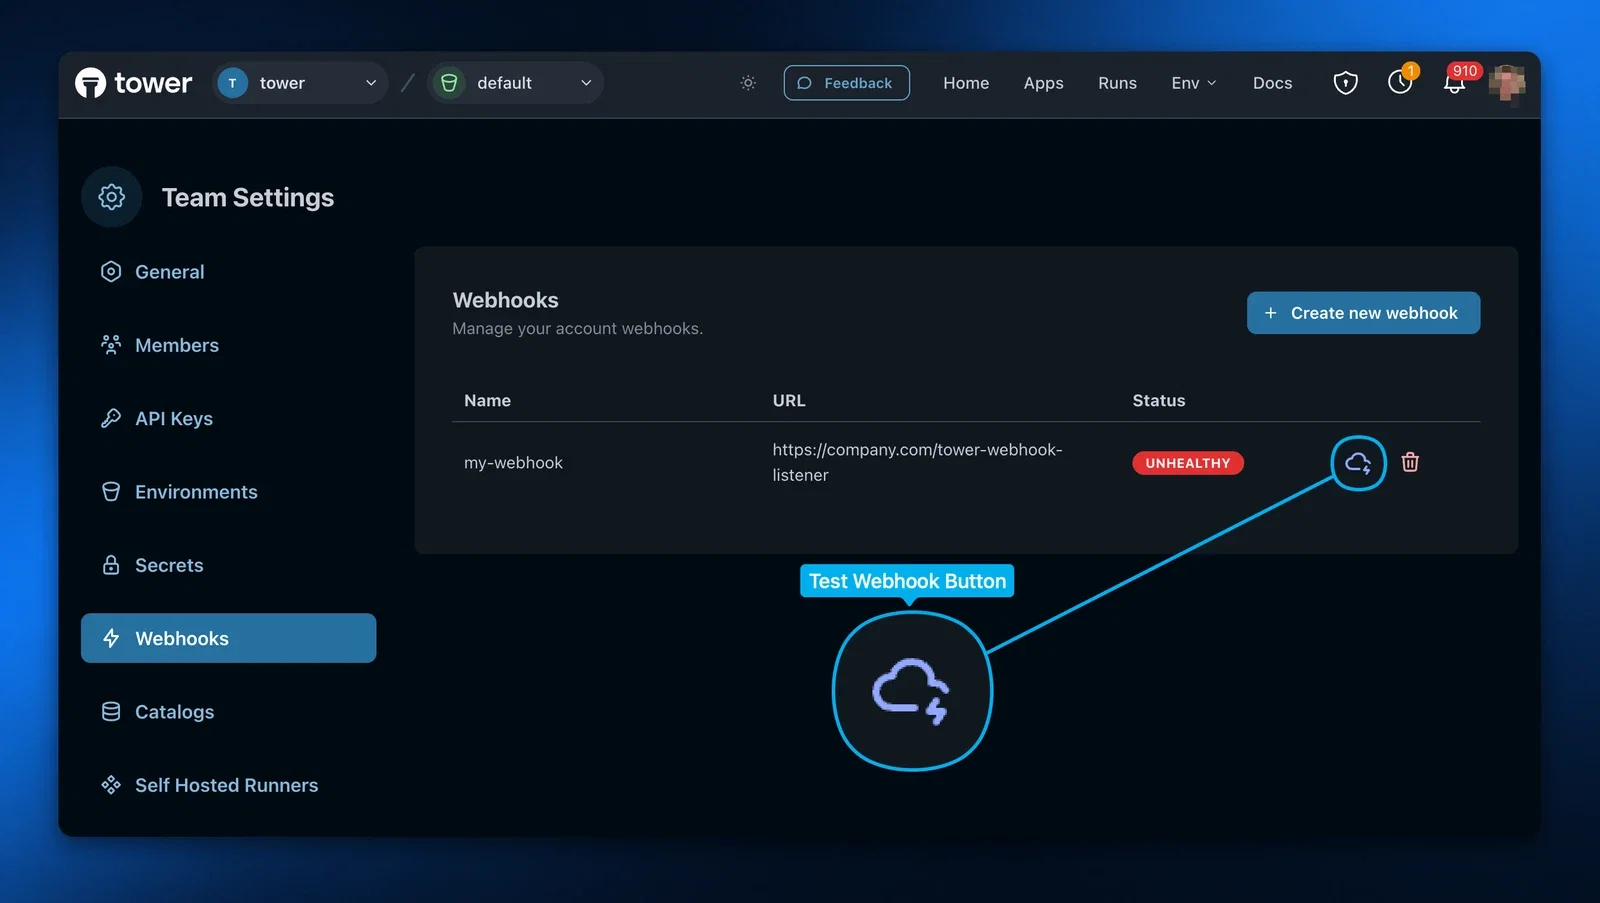
If everything is working, you should get a successful notification! Once the
webhook testing is successful and the webhook is healthy, it is ready to
receive events. Note that if the webhook is unhealthy, Tower will skip sending
events to that webhook.
If things aren’t working, double check the following:
- Your endpoint returned 200. Any non-200 status, even if it is in the 2XX range, will not be counted as successful.
- If you’re verifying the signature, double check the verification code is working correctly.
- Make sure you responded in time.
## Best practices
### Respond to a webhook as soon as possible
Tower waits up to 30 seconds for a response from your URL before considering
the request to have timed out and failed, which will cause it to retry later.
Make sure you respond to the webhook request as soon as possible with a 200
status code, and do any computationally expensive or slow processing
asynchronously.
### Always respond with a 200, even if something fails on your end
Tower considers that any non-200 response (including other 2XX status codes
such as 204) to be a delivery failure and will retry the event, at some later
point in time. To avoid getting repeat events due to this, always respond with
a 200 when receiving a webhook.
---
## Working in teams
Teams in Tower enable groups of users to collaboratively develop and run apps. By creating a team, you establish a shared workspace where multiple people can access the same Apps, Secrets, and resources.
When using Teams, responsibilities can be divided as follows:
- One person could be developing and deploying apps, with others just running them when needed, or
- Everyone on the team could be contributing to the creation and maintenance of apps.
Teams provide three key benefits:
- **Shared access** to apps and their configurations
- **Collaborative development** with multiple contributors
- **Centralized secrets management** for secure credential sharing
## Creating a team
To create a team in the Tower UI, go to Account Settings > Teams and click on "Create new team".
When creating a team, you'll need to provide:
- **Team name**: A descriptive name for your group
- **Team slug**: A unique identifier used in URLs for the team's apps (lowercase letters, numbers, and hyphens only)
## Inviting teammates
After creating a team, you can invite others (they can be non-users or existing Tower users) to join:
1. Select the Settings icon next to your team name
2. You'll be redirected to the Team Settings page
3. Navigate to the Members tab
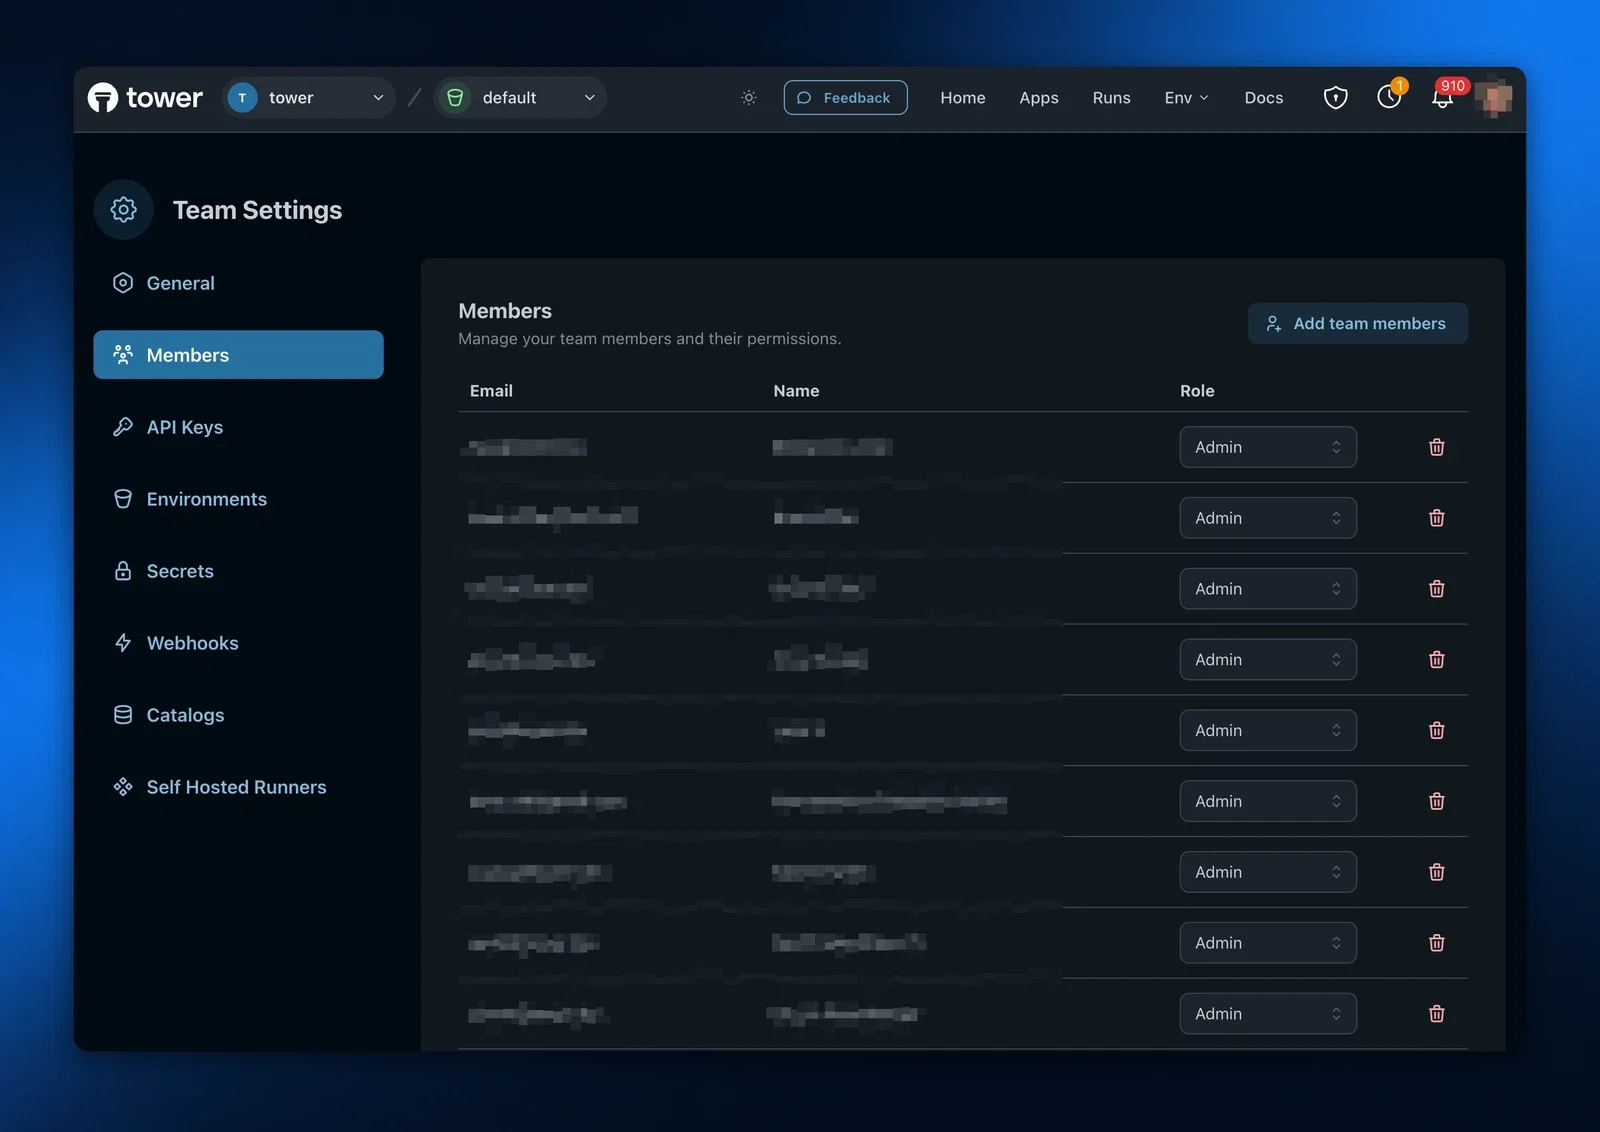
On the Members page, you can:
- Invite others by entering their email addresses
- Remove existing team members
- Resend invitations to pending members
- Revoke unaccepted invitations
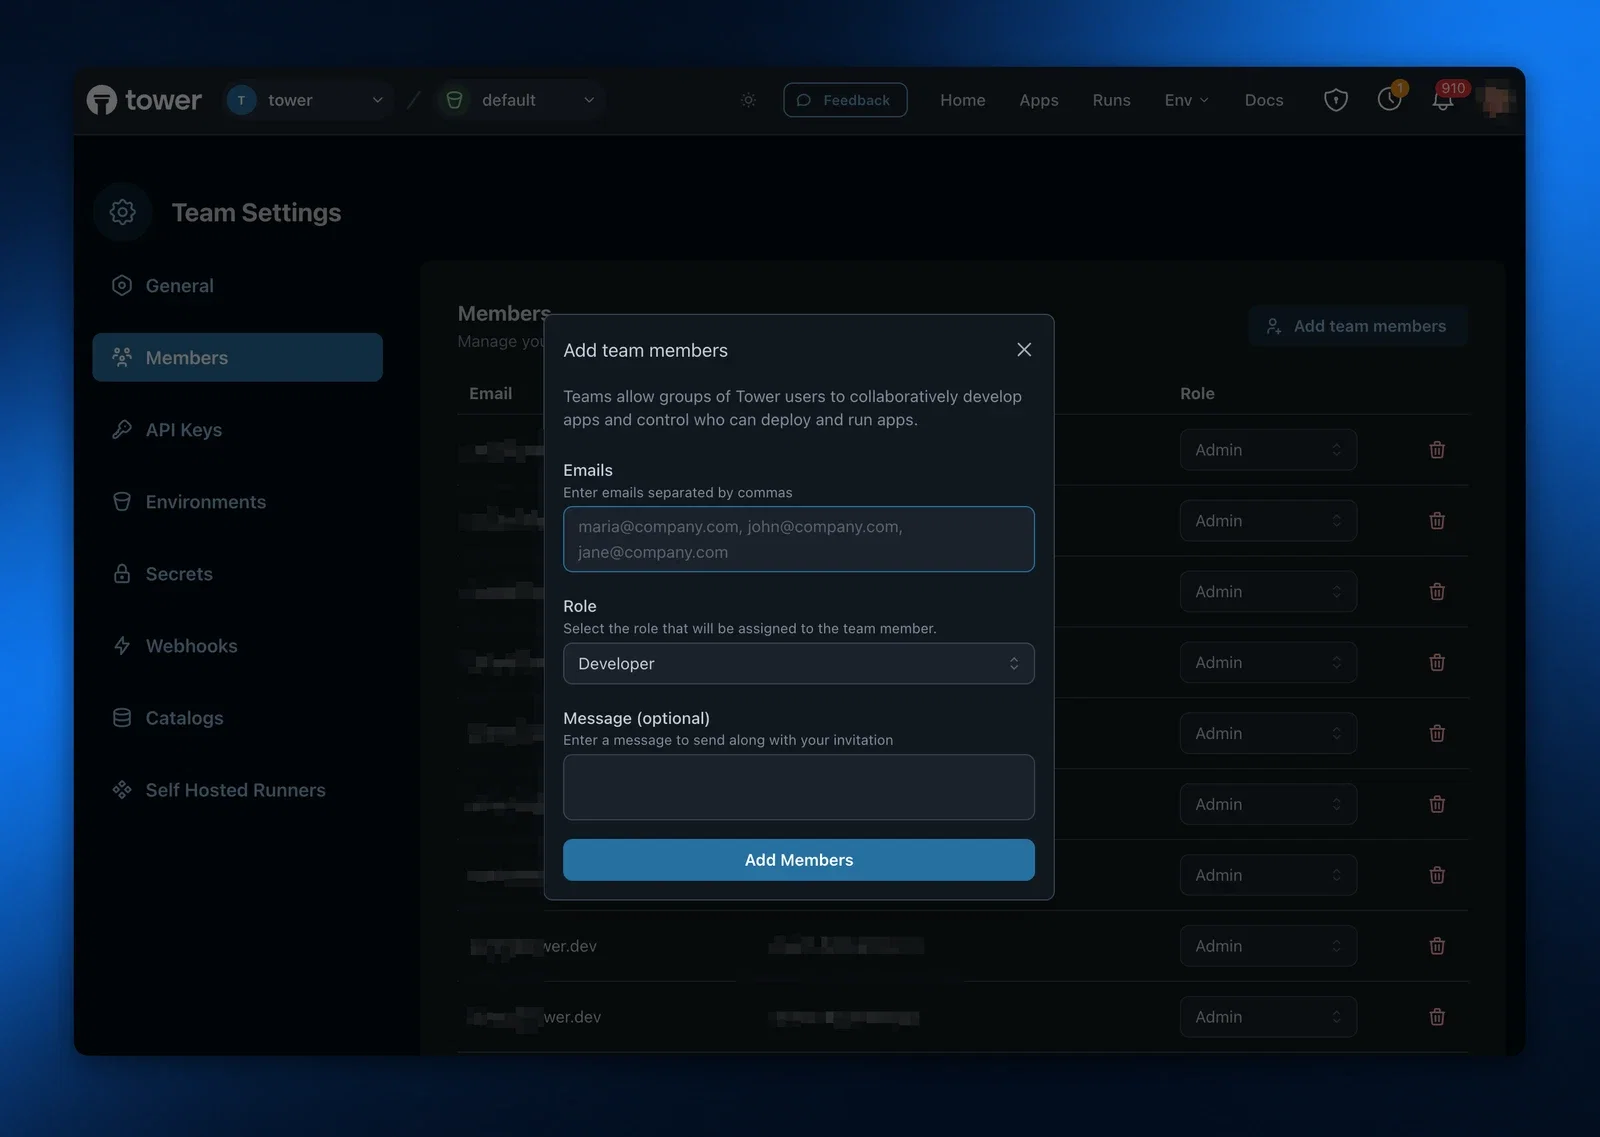
## Working with team context
In Tower, you always work in the context of either a team or your personal account. This context determines:
- Which apps you can access and deploy
- Which secrets are available to your apps
- Which resources you're using
> **Note**: In both the Tower CLI and UI, you'll always work in the context of **one** team or your personal account.
In the Tower CLI you can switch to the correct team context by using the [`tower teams switch`](/docs/reference/tower-cli#tower-teams-switch-team_name) command:
```bash
tower teams switch team-1
```
If you need to switch to your personal account, find its slug by using the [`tower teams list`](/docs/reference/tower-cli#tower-teams-list) command.
In the Tower UI, you can do the same by using the team selector near the Tower logo in the main navigation bar.
## Deploying apps
Use the Tower CLI to deploy apps to Tower. When working with teams, you deploy apps to the team's account rather than your personal account:
1. First, verify that the right team is active by using the [`tower teams list`](/docs/reference/tower-cli#tower-teams-list) command.
```bash
tower teams list
```
```bash
Slug Team Name
-----------------------------------------
* team-1 Team 1
team-2 Team 2
account-123 First Last
* indicates currently active team
```
2. Then, deploy your app using the standard [`tower deploy`](/docs/reference/tower-cli#tower-deploy) command:
```bash
tower deploy
```
```bash
App 'hello-world' does not exist. Would you like to create it? (y/N): y
Success! Created app 'hello-world'
✔ Building package... Done!
Deploying to Tower... [00:00:00] [████████████████████████████████████████] 6.50 KiB/6.50 KiB (0s)
Success! Version `v1` of your code has been deployed to Tower!
```
By default `tower deploy` pins the new version to the team's `default` environment only. When you're ready to roll a change out to `production` (or any other environment), pass `--environment` to target that one specifically, or `--all` to update every environment at once. See [Versions, environments, and promotion](/docs/concepts/environments#versions-environments-and-promotion) for the full promotion workflow.
## Managing team secrets
Just like with apps in your personal account, you will need to define [secrets](/docs/concepts/environments#secrets) for team apps:
```bash
tower secrets create --name=snowflake_url \
--value=https://abc123.snowflake.com
```
## Running apps
Team members can initiate ad-hoc or scheduled runs of apps in the team account using:
- The `tower run` command in the Tower CLI
- Schedules defined in an app's Towerfile
- The Run button in the Tower UI
Always ensure you're in the correct team context before running or deploying apps.
> **Note**: Runs of apps in team accounts will get the **secrets of the team**, not of the user who deployed it or ran it.
## Managing app code in repositories
When you work on personal apps, keeping your [app code](/docs/using-tower/develop#navigate-to-folder-with-source-code) in source control repos is optional but helpful. When you start developing apps collaboratively in a team setting, source control is highly recommended.
You should consider defining a repo or a folder in a repo as the container of your apps’ code.
---
## Working with Models(Using-tower)
## Using Models for Inference Tasks
The `Llm` class and the `llms()` helper function provide the programmatic interface for model inference in Tower. For an overview of these concepts, see the [Models](/docs/concepts/models) page. Underneath, the `Llm` class uses Inference Routers and Inference Providers to perform inference.
## Inference Routers and Inference Providers
Tower recognizes that users want to use different inference providers depending on offered model versions, inference performance, and cost. Tower also understands that users will sometimes want to do local inference when developing applications and switch to serverless, remote inference when deploying apps to production.
For this reason, Tower allows using popular inference providers such as Together.ai or Ollama, and sets up routing services that route inference calls to these providers.
### Local Inference (Ollama)
For local inference, we recommend Ollama. When using Ollama, it serves as both the router and the provider.
- Runs models locally on your machine
- Good for development and testing
- No API keys required
- Limited by local hardware capabilities
### Remote Inference (Hugging Face Hub)
For remote, serverless inference, we recommend Hugging Face Hub. When using Hugging Face Hub, it serves as a *router* of inference requests to various inference *providers* on that platform, including Together, SambaNova, and Hugging Face's own provider, HF-Inference.
- Runs models on remote servers
- Requires API keys for authentication
- Better throughput for production workloads
- Access to a wide variety of models
### Setting Up Ollama for Local Inference
We recommend using [Ollama](https://ollama.com/) to serve as a local inference server during development.
```bash
pip install ollama
```
You will also need to download models that you want to use for inference. To download and run a local LLM, for example, DeepSeek R1, use:
```bash
ollama pull deepseek-r1:14b
ollama run deepseek-r1:14b
```
### Signing Up for Hugging Face for Remote Inference
In production, many users will want to use Hugging Face Hub to route inference calls to commercial inference providers.
You don't have to use the Hub and you can call inference providers directly, but using the Hub is free and adds flexibility to switch providers that offer better value, such as lower latency, higher request rates, lower costs, or better availability.
You should [sign up for Hugging Face](https://huggingface.co/join) and get the Hugging Face [access token](https://huggingface.co/docs/hub/en/security-tokens). Note this token as you will need it later.
### (Optional) Signing Up for Third-Party Inference Providers
Third-party inference providers like Together.ai can help you get started with remote inference while you decide on your long-term inference provider.
Together.ai is a popular serverless inference provider that offers many OSS models like DeepSeek R1 for inference. Sign up for [Together.ai](https://www.together.ai/) and note its [access key](https://docs.together.ai/reference/authentication-1).
Follow this [quickstart](https://docs.together.ai/docs/quickstart-using-hugging-face-inference) to enable Together.ai in the Hugging Face Hub. You will enter your Together.ai access token in the Hugging Face Hub settings. Once you do that, you can use your Hugging Face access token to make inference calls from your Tower app.
### Choosing Inference Routers and Providers at Run-time
The choice of Inference Routers and Providers for a particular app run is controlled by specific `secrets` defined in the environment where the Tower app is running.
- `TOWER_INFERENCE_ROUTER` - Can be set to "ollama" or "hugging_face_hub" when running the app in local mode. Must be set to "hugging_face_hub" when doing serverless inference
- `TOWER_INFERENCE_ROUTER_API_KEY` - When using Ollama inference router, the API key can be left unset. When using the "hugging_face_hub" inference router, should be set to the Hugging Face token
- `TOWER_INFERENCE_PROVIDER` - Should be set to a Hugging Face Hub Inference provider like "together" or others
To create one of these secrets, use the Tower CLI or the Web UI:
To define the inference secrets for local execution in an environment called "dev-local":
```bash
tower secrets create --environment="dev-local" \
--name=TOWER_INFERENCE_ROUTER --value="ollama"
```
To define the inference secrets for remote execution in an environment called "prod":
```bash
tower secrets create --environment="prod" \
--name=TOWER_INFERENCE_ROUTER --value="hugging_face_hub"
tower secrets create --environment="prod" \
--name=TOWER_INFERENCE_ROUTER_API_KEY --value="hf_1234567"
tower secrets create --environment="prod" \
--name=TOWER_INFERENCE_PROVIDER --value="together"
```
## Combining Local and Remote Inference
Tower's inference capabilities were designed to give you choices. You can use the same inference router and provider in both development and production. Alternatively, you could use local inference during development and remote, serverless inference in testing and production.
- Use Tower's `--local` mode to run the app on your dev machine during development
- Use Ollama to host a local inference server that the Tower app will use in local mode
- Ollama will use local GPUs (e.g., Apple Silicon) to save on inference costs during development and avoid inference rate throttling
Run in one terminal:
```bash
ollama run deepseek-r1:14b
```
Run in another terminal:
```bash
tower run --local --environment="dev-local" \
--parameter=xyz='123' \
--parameter=model_to_use='deepseek-r1:14b'
```
- Once you are done developing your app, you can deploy the app to the Tower cloud
- To maintain flexibility with inference providers, use Hugging Face Hub as the router of inference calls
- Use Together.AI as the serverless inference provider
Run in terminal:
```bash
tower run --environment="prod" \
--parameter=xyz='123' \
--parameter=model_to_use='deepseek-ai/DeepSeek-R1'
```
Tower example [DeepSeek-Summarize-Github](https://github.com/tower/tower-examples/tree/main/07-deepseek-summarize-github) demonstrates how this can be done.
## Specifying Model Names
Inference providers can have different names for the same model. Usually, model vendors release a family of model versions that vary in the number of parameters (via a process called distillation) and the quantization levels. For example, the 3 billion parameter, Instruct-fine-tuned model of the Llama 3.2 family is known as "llama3.2:3b" in Ollama and as "meta-llama/Llama-3.2-3B-Instruct" in Hugging Face Hub.
Tower's LLM inference was designed to allow developers to use LLMs across their development and production environments by specifying a short model family name without having lots of conditional statements to handle differences in environments. For example, specifying `llms("llama3.2")` should resolve to either "llama3.2:3b" or "meta-llama/Llama-3.2-3B-Instruct" depending on the chosen inference provider.
### Specifying Model Families
Users can specify a model family, e.g., `llms("deepseek-r1")`, in both local and Tower cloud environments, and Tower will resolve the model family to a particular model that is available for inference:
- In local environment, Tower will find the model that is installed and, if there are multiple installed, pick the one with the largest number of parameters
- In Tower cloud environments, Tower will take the first model returned by Hugging Face search, making sure that this model is servable by the Inference Provider
Tower currently recognizes [~170 names of model families](https://github.com/tower/tower-cli/blob/main/src/tower/_llms.py).
### Specifying Particular Models
In addition to using model family names, users can also specify a particular model in both local and Tower cloud environments:
- Locally: `llms("deepseek-r1:14b")` or `llms("llama3.2:latest")`
- Remotely: `llms("deepseek-ai/DeepSeek-R1-0528")` or `llms("meta-llama/Llama-3.2-3B-Instruct")`
### Name Flexibility in Development, Precise Naming in Production
One recommended pattern is to specify a model family name in development and use a precise model name in production.
The code that supports this pattern is the same; you just pass the model name as a parameter of the app or as an environment secret:
```python
model_name = os.getenv("MODEL_NAME")
llm = llms(model_name)
```
In the development environment, you would then set:
```
MODEL_NAME = "llama3.2"
# (any model of this family installed locally will do)
```
In the "prod" environment, you would set:
```
MODEL_NAME = "meta-llama/Llama-3.2-3B-Instruct"
# (use a particular model)
```
## Learn More
For detailed information about the `llms()` function and `Llm` class methods, see the [Tower SDK Reference](/docs/reference/tower-sdk#large-language-models).
---
## Working with Tables(Using-tower)
This guide demonstrates Tower's table capabilities using two example apps:
1. [Writing Ticker Data to Iceberg](https://github.com/tower/tower-examples/tree/main/05-write-ticker-data-to-iceberg) - Shows how to create and write to tables
2. [Trimming Ticker Table](https://github.com/tower/tower-examples/tree/main/11-trim-ticker-table) - Shows how to read and delete data from tables
## Creating and Writing to Tables
The first example app uses Yahoo Finance's public API and the [yfinance](https://github.com/ranaroussi/yfinance) library to:
- Download major indicators for stock tickers (e.g., 'AAPL')
- Track Open, Close, and Volume data
- Save the data in an Iceberg table named "daily_ticker_data"
### Creating Tables
To create a table, follow these steps:
1. Define the schema in [Arrow Schema](https://arrow.apache.org/docs/python/generated/pyarrow.Schema.html#pyarrow.Schema) format
2. Call the [`create_if_not_exists()`](/docs/reference/tower-sdk#tablereferencecreate_if_not_exists) method
```python
SCHEMA = pa.schema([
("ticker", pa.string()),
("date", pa.string()),
("open", pa.float64()),
("close", pa.float64()),
("volume", pa.int64()),
])
table = tower
.tables("daily_ticker_data")
.create_if_not_exists(SCHEMA)
```
#### Using Different Catalogs and Namespaces
To create a table in a specific catalog and namespace:
```python
mytable = tower
.tables('mytable', catalog='mycatalog', namespace='mynamespace')
.create_if_not_exists(SCHEMA)
```
If you're certain the table doesn't exist, use the [`create()`](/docs/reference/tower-sdk#tablereferencecreate) method:
```python
mytable = tower
.tables('mytable', catalog='mycatalog', namespace='mynamespace')
.create(SCHEMA)
```
### Writing to Tables
To write data to a table:
1. Get a reference to the table using [`load()`](/docs/reference/tower-sdk#tablereferenceload)
2. Use either [`upsert()`](/docs/reference/tower-sdk#tableupsert) or [`insert()`](/docs/reference/tower-sdk#tableinsert)
3. Provide data as an [Arrow Table](https://arrow.apache.org/docs/python/generated/pyarrow.Table.html)
```python
# Get table reference
table = tower.tables("daily_ticker_data").load()
```
#### Upserting Data
Use [`upsert()`](/docs/reference/tower-sdk#tableupsert) to:
- Update existing rows that match join columns
- Insert new rows that don't have matches
```python
table = table.upsert(data, join_cols=['ticker','date'])
```
#### Inserting Data
Use [`insert()`](/docs/reference/tower-sdk#tableinsert) to simply add new rows:
```python
table = table.insert(data)
```
## Reading and Deleting Data
The second example app demonstrates how to:
- Inspect an Iceberg table
- Remove records older than a specified time window
### Reading Data
#### Lazy Reading (Recommended)
For best performance and memory efficiency:
1. Create a [Polars LazyFrame](https://docs.pola.rs/api/python/stable/reference/lazyframe/index.html) using [`to_polars()`](/docs/reference/tower-sdk#tableto_polars)
2. Build your query plan
3. Execute with `collect()` when needed
```python
# Create LazyFrame
df = table.to_polars()
# Build and execute query
ticker_stats = df.group_by("ticker").agg([
pl.count().alias("row_count"),
pl.col("date").str.to_date().max().alias("latest_date")
]).collect()
```
#### Eager Reading
For smaller tables or when you need all data in memory:
```python
# Read entire table into memory
df = table.read()
```
### Deleting Data
Use the [`delete()`](/docs/reference/tower-sdk#tabledelete) method with a predicate:
```python
cutoff_date_str = calculate_cutoff_date(df, time_window_days)
table.delete(f"date < '{cutoff_date_str}'")
```
You can provide predicates as:
- String expressions
- Lists of Arrow Expressions